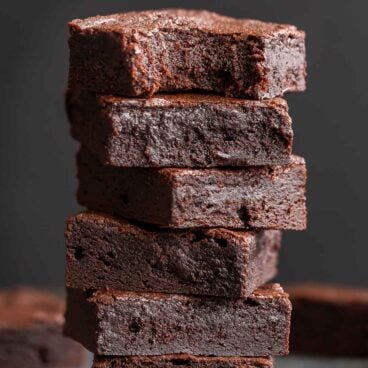
This recipe makes rich, dense, fudgy Homemade Brownies with crisp, crackly tops—every time! Plus, they’re super easy and come together with just a bowl and a whisk.

Table of Contents
The Best Fudgy Brownies from Scratch
I first started making these brownies back in my university days, when I found all my recipes on Allrecipes.com and had no knowledge of food blogging. On a whim, I decided to try this particular recipe. I mean, how else do you possibly choose a brownie recipe from the 371 options on one website alone?
Best decision ever.
Anyway. This is THE brownie recipe you need.
Unless you like cakey, fluffy, crumbly brownies. These are definitely not those.
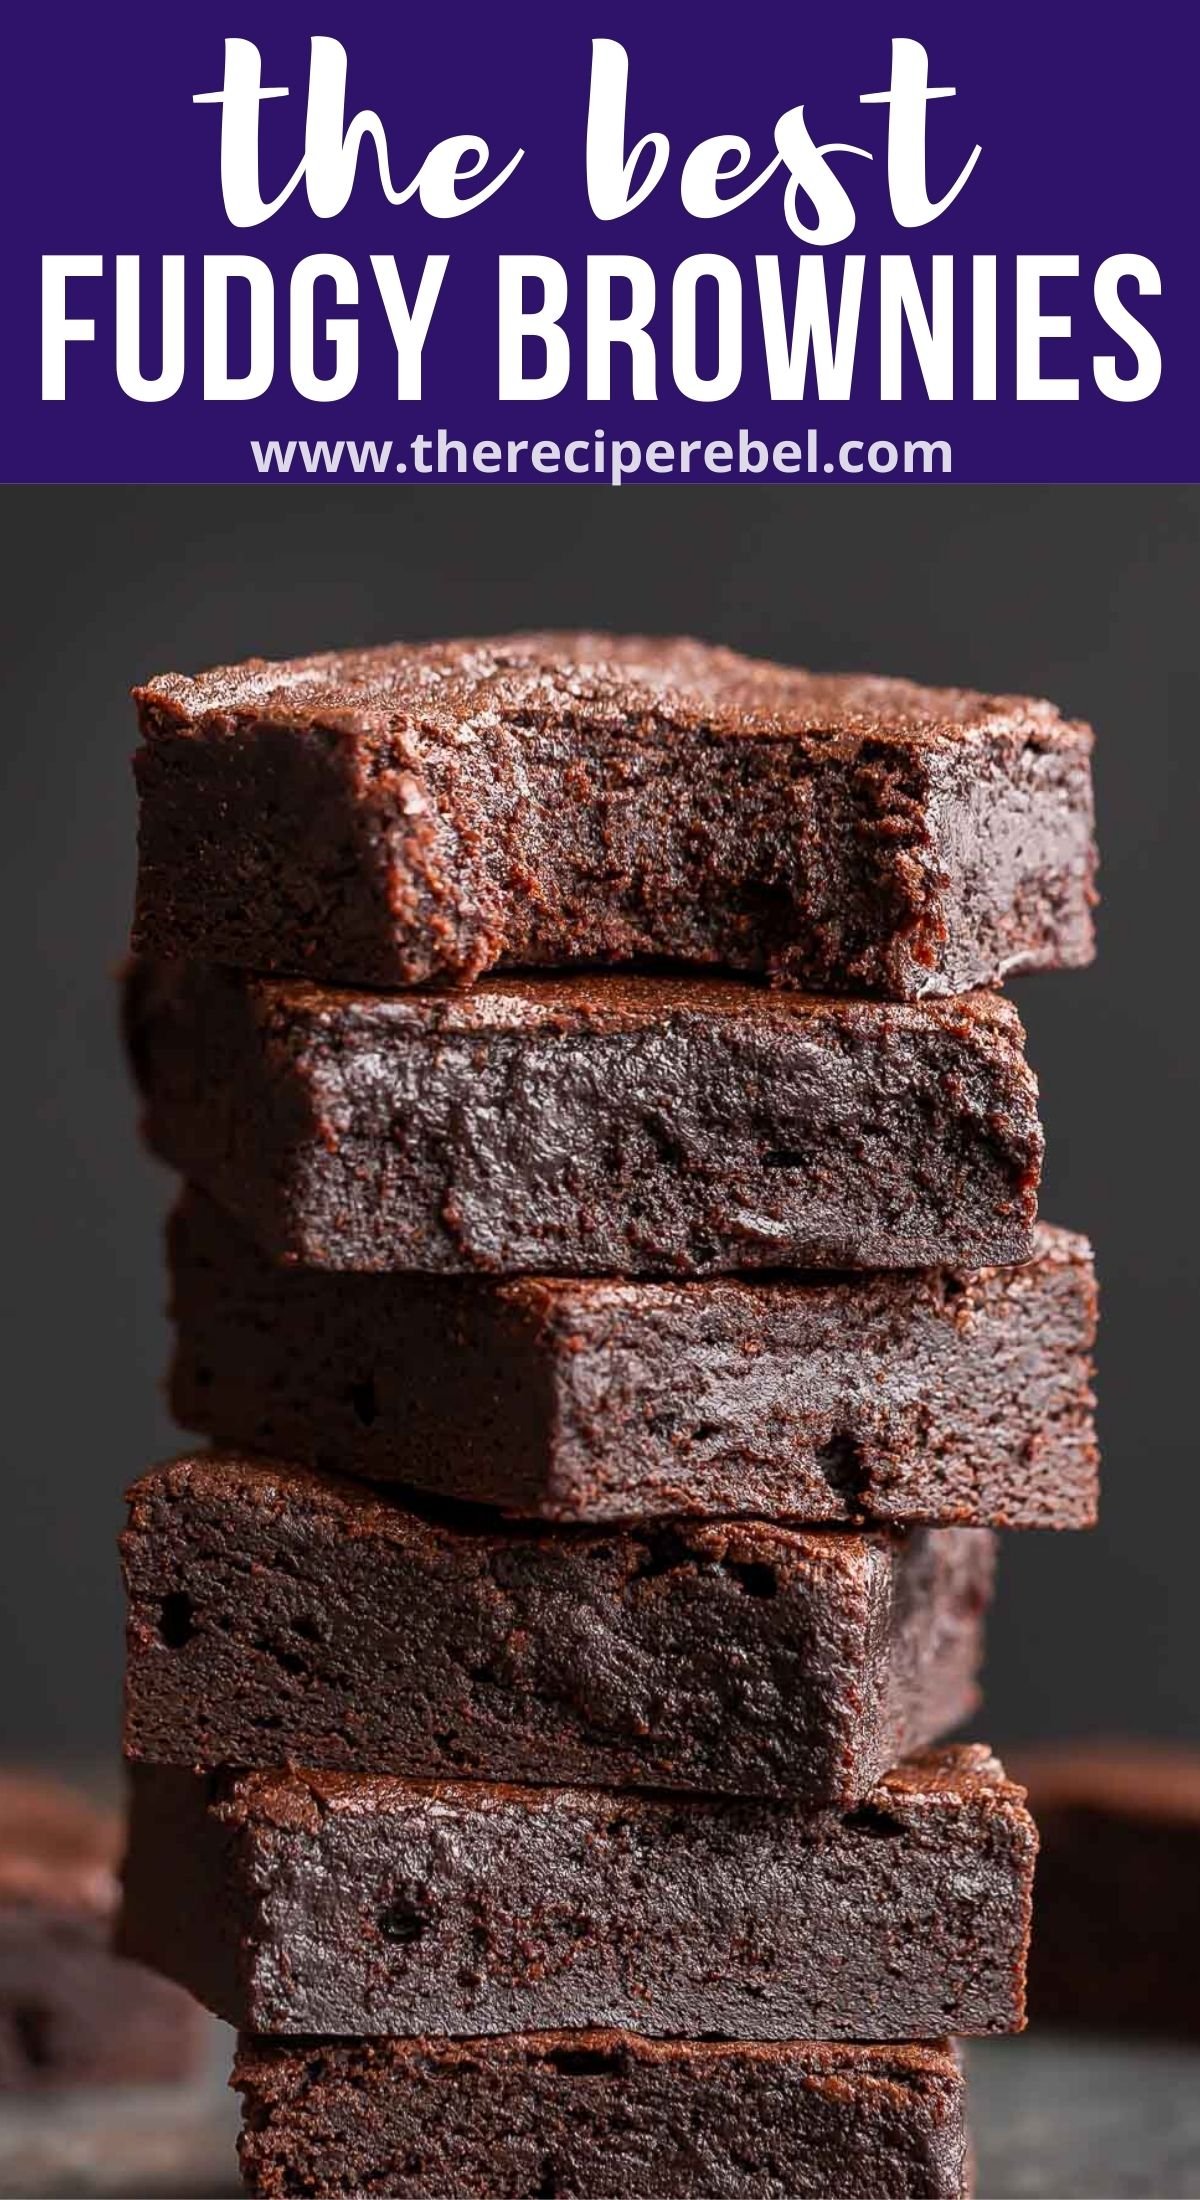
These brownies are dense, fudgy, and rich. They are slightly chewy at the edges, crisp and crackly on top, and incredibly moist and fudgy underneath. How many times can I use ‘fudgy’ in a brownie description without it becoming redundant?

They are perfect on their own or as a base for this Brownie Sundae! You can also jazz them up with Easy Homemade Ice Cream, Whipped Cream and Strawberry Sauce.
What Makes These Brownies So Good?
One reason that these brownies are special is that they aren’t overly sweet. I use a whole cup of cocoa and only 2 ½ cups of sugar, which allows the rich chocolatey flavor from the cocoa powder to really shine. The original recipe called for 3 cups of sugar, which is a lot for one 9×13 pan, in my opinion. (If you like things extra sweet, feel free to add it back in, or you can reduce further to 2 cups).
I also often swap whole wheat flour for all-purpose flour, which is a healthy trade that also gives a deeper, fuller flavor—and in a brownie like this, I honestly don’t think you can tell any difference in the texture!
But again, if you don’t have any whole wheat flour (or just don’t want to use it), feel free to use all-purpose.
Finally, while a lot of great brownie recipes call for vegetable oil, this one uses melted butter! So indulgent!
Recipe Ingredients
Another great thing about these brownies is that the list of ingredients is very short. That cuts down on the measuring and prep time. If you make these often enough, you may end up memorizing this easy recipe! (For the full recipe card with amounts and nutrition facts, scroll down to the bottom of this post.)

- Butter: I use melted butter instead of oil, for extra richness.
- Sugar: You can use plain granulated sugar, or swap out raw sugar if you prefer.
- Vanilla: Pure vanilla extract gives the best flavor.
- Eggs: You’ll need four whole, large eggs.
- Flour: Use whole wheat flour or all-purpose, it’s up to you!
- Cocoa: Using cocoa powder gives these brownies an extra-deep chocolate flavor, compared to brownies made with melted chocolate.
- Salt: a bit of salt balances out the sweetness and adds incredible flavor
- Chocolate Chips: These are optional! Sprinkle them on top, mix them into the batter, or leave them out.
How to Make Homemade Brownies from Scratch
The method for making these brownies couldn’t be simpler. All you need is a bowl and a whisk.
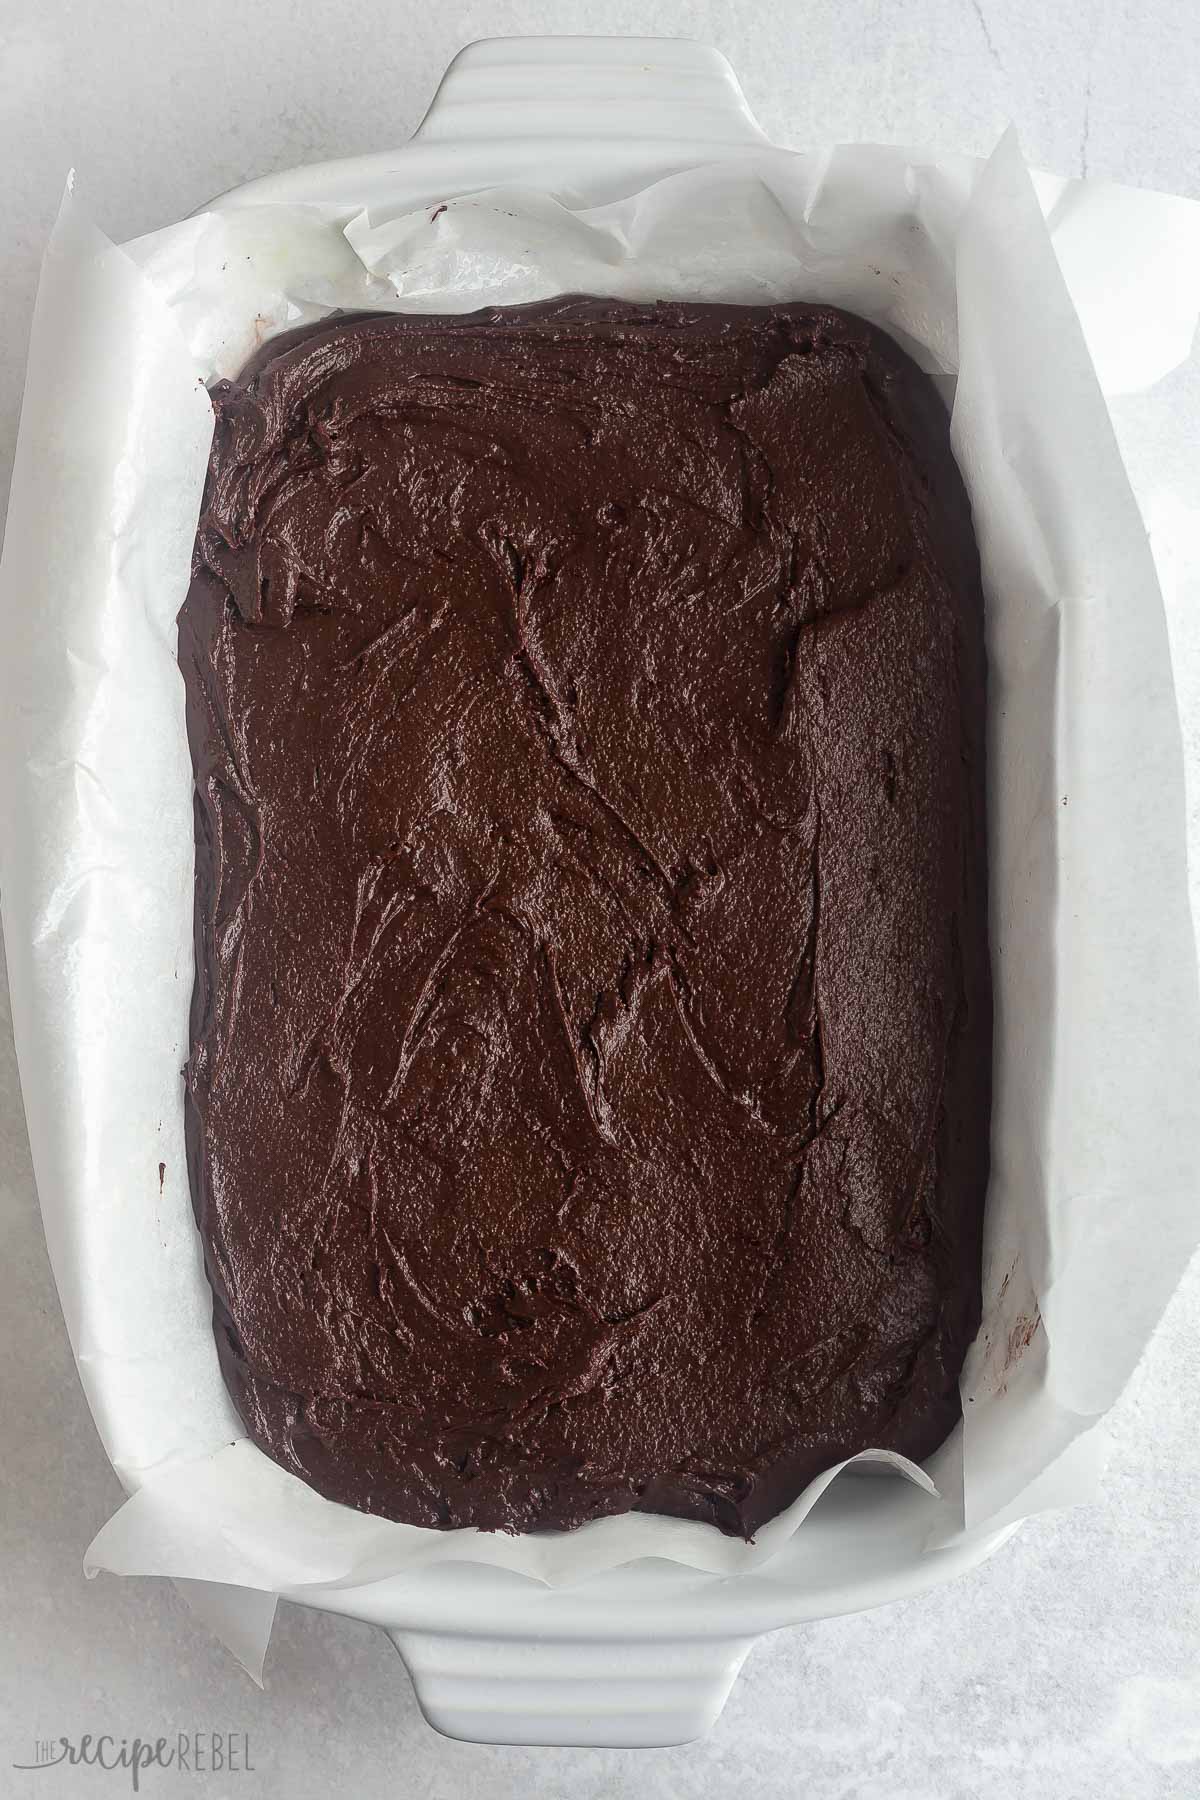
- Get Ready to Bake. First things first! Preheat your oven to 350°F and line a 9×13 pan with foil or parchmet. Spray the lined pan with non-stick spray.
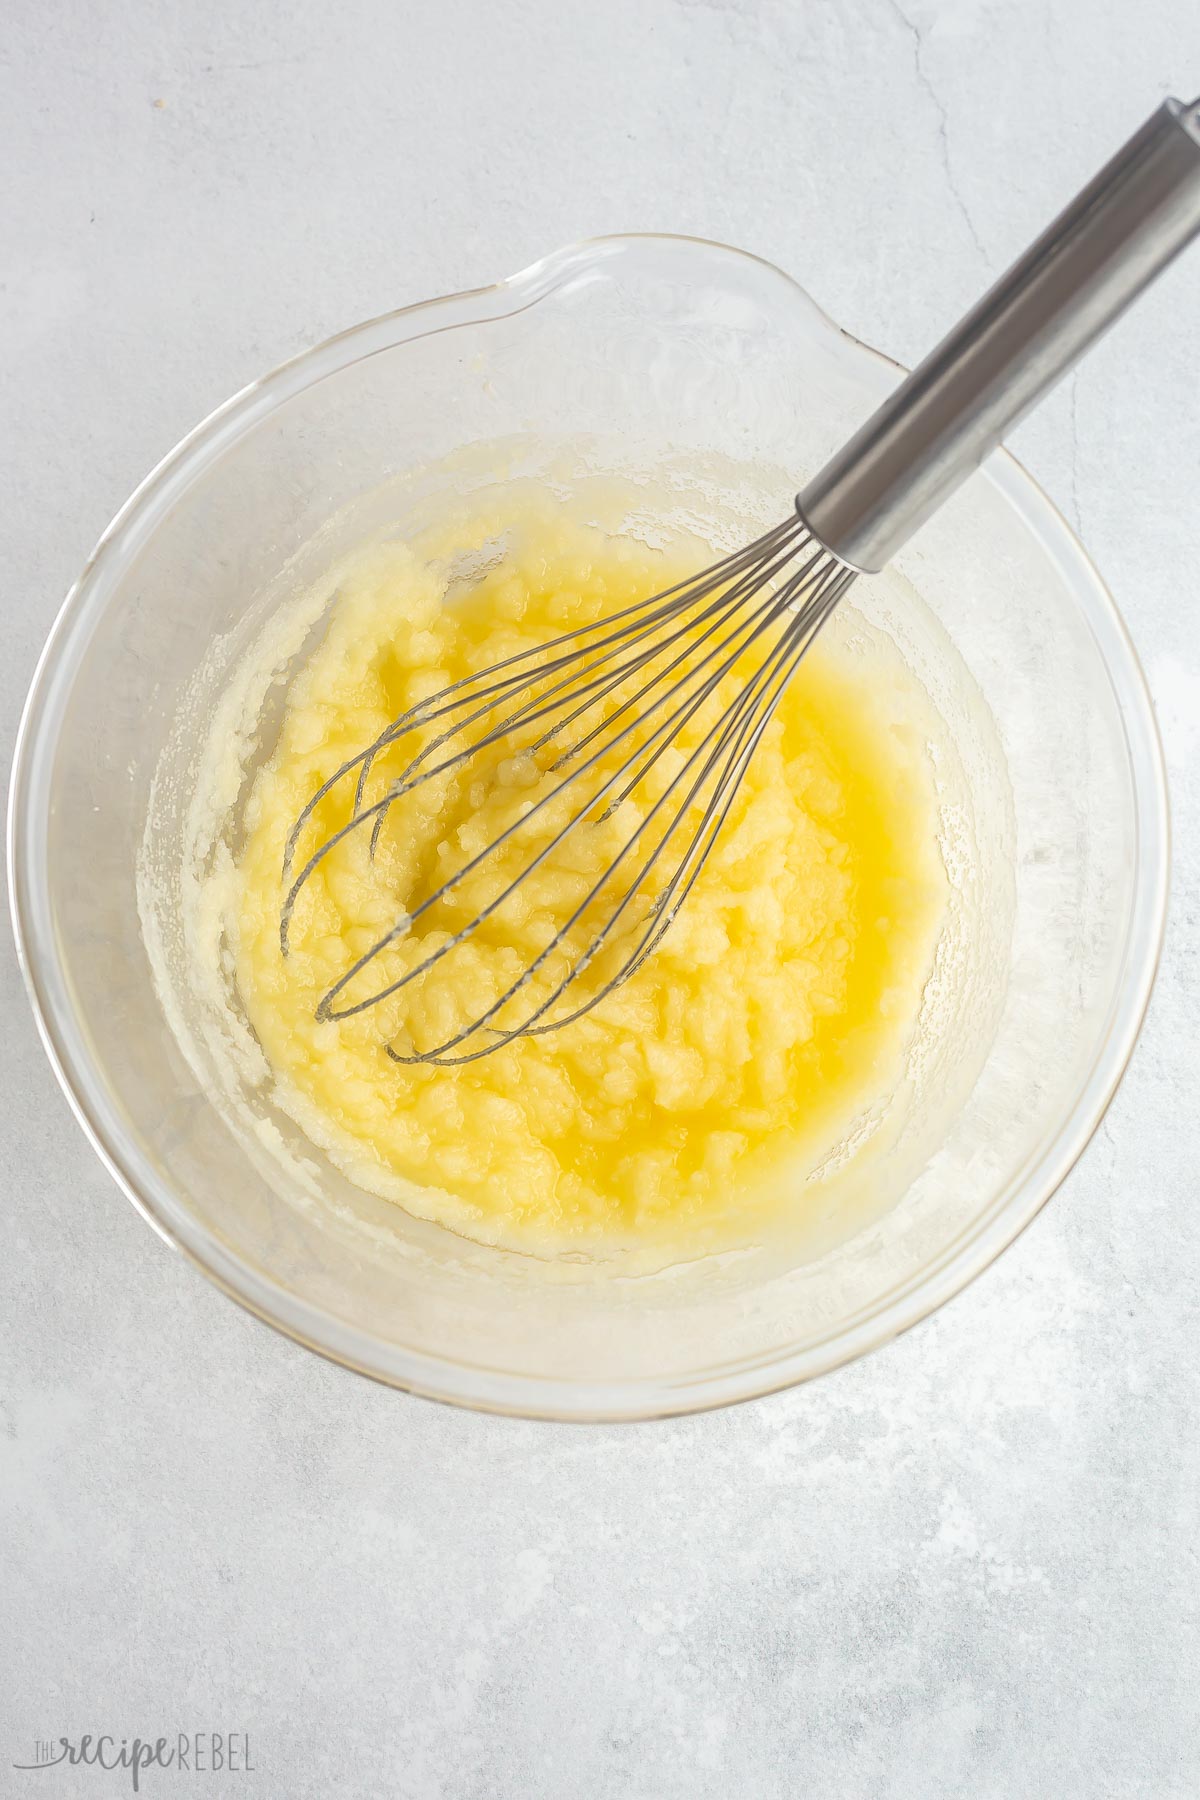
- Combine the Liquid Ingredients. In a large bowl, combine the melted butter, the sugar, and the vanilla; whisk until smooth. Then whisk in the eggs, one at a time, beating well after each addition.
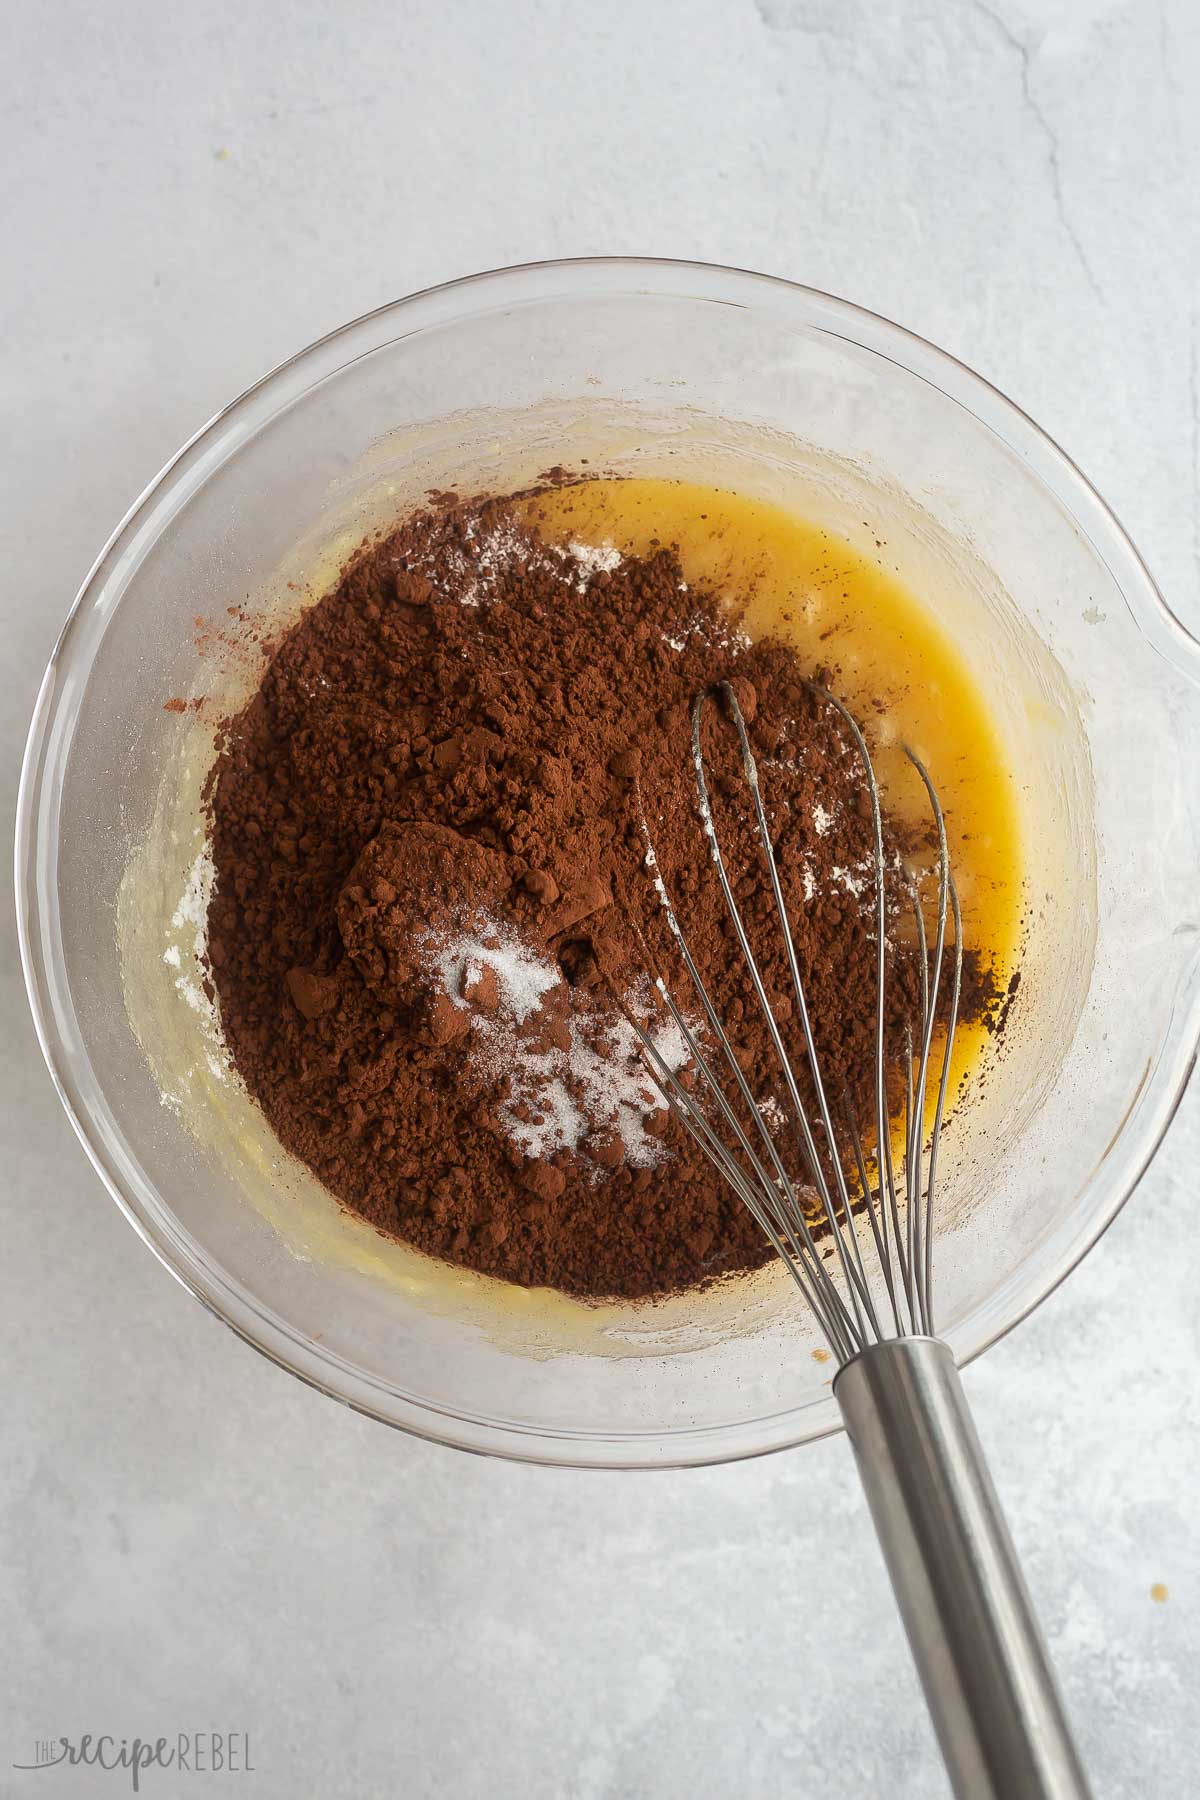
- Add the Dry Ingredients. Stir the flour, cocoa and salt into the wet ingredients, just until combined.
- Bake! Spread the batter evenly into the prepared pan, and bake. You’ll know they’re done when a toothpick inserted into the baked brownies comes out with just a few moist crumbs. The great thing about brownies is that you can cook them more or less according to your tastes. Keep in mind that the brownies will continue to set after baking.

Tips and Variations
As with most of my recipes, this one is flexible and can easily be tailored to your needs. Here are a few easy ways to do just that.
- Butter Swap: Feel free to use vegetable oil, coconut oil, ghee, or applesauce instead of the butter. Each one will add its own unique flavor and nutrition profile to the recipe.
- Tweak the Bake Time: The brownies do not need to be totally set when you pull them out of the oven, as they will continue to cook in the pan—and if you like them gooey-er, you can just take them out on the earlier side. If you want them fully baked, wait until a toothpick comes out clean.
- Add Your Favorite Mix Ins: You can mix all kinds of goodies into this basic recipe! Here are a few great ideas to get you started:
- Chopped nuts
- Mini marshmallows
- Chocolate candies
- Toffee bits
- Chopped or quartered cherries
- Dried fruit
- A swirl of chocolate ganache
- White chocolate chips
- Try these Cosmic Brownies from my friend Karli!

Serving Suggestions
Aside from serving the brownies on their own (perfect snack!), you can also serve them as part of a larger dessert, like this:
- Brownies A La Mode: Top a warm brownie with a scoop of your favorite ice cream—No Churn Turtle Ice Cream, perhaps?
- Caramel Nut Bars: A platter of homemade brownies alternating with these Caramel Nut Bars makes a festive and perfectly-paired dessert.
- Strawberry Topping: Homemade Strawberry Sauce makes a luscious topping for these amazing brownies.
How to Store Brownies
You can store brownies at room temperature, in the fridge, or in the freezer! Here’s how:
- Counter: Place brownies in an airtight container and store on the counter for up to 3 days.
- Fridge: Also store them in an airtight container, but place it in the fridge. The brownies will keep for up to a week this way!
- Freezer: Slice the brownies and wrap each brownie individually in plastic wrap. Store multiple brownies in zip-top bags. They will keep for up to 3 months. Thaw the brownies before serving.
- To heat them up: Pop them in the microwave for a few seconds at a time until warm. Watch out for hot and/or cold spots!
The Best Homemade Brownies
written by Ashley Fehr
Ingredients
- 2½ cups granulated sugar, (500g)
- 1 cup unsalted butter, melted
- 1 tablespoon vanilla extract
- 4 large eggs,, room temperature
- 1½ cups all-purpose flour, (about 195g)
- 1 cup unsweetened cocoa powder, (90g)
- ½ teaspoon salt
- Chocolate chips to mix in or to sprinkle on top, optional
Instructions
- Preheat the oven to 350°F. Line a 9×13″ baking dish with foil or parchment (this is optional but ensures easy removal) and spray with nonstick spray.
- In a large bowl, whisk together the sugar, butter, and vanilla, until smooth. Whisk in the eggs, one at a time, stirring well after each addition. Stir in the flour, cocoa powder, and salt, until combined. Stir in chocolate chips if using.
- Spread the batter into the prepared baking dish.
- Bake for 25 to 35 minutes, or until mostly set. (The brownies do not need to be totally set because they will continue to cook in the hot pan. If you like them more gooey, take them out on the earlier side. If you like them less gooey, wait until a toothpick comes out with moist crumbs.)
- For clean slices, allow the brownies to cool completely and use a plastic knife to cut them.
Video
Nutrition
Nutrition information is automatically calculated, so should only be used as an approximation.
Want to save this recipe?
Create an account easily save your favorite content, so you never forget a recipe again.
Tried this recipe?
Tag @thereciperebel or hashtag #thereciperebel — I love to see what you’re making!
Tag @thereciperebel
Clarissa says
Came out even better than I was hoping
The Recipe Rebel says
Hi Clarissa! So glad you enjoyed it! Thank you for your review!
Heddy says
I make these brownies all the time. I think I have the recipe memorized now! I like them best the next day as-is or with vanilla ice cream.
Thank you for sharing this recipe!
Michele says
Ashley? You know that I make a lot of your recipes without any problems but this one? I was tough to stir. Is it missing a liquid like water or milk? I actually put on a disposable glove to mix it by hand, I had no more strength to mix with a spatula. Whew! It tastes good, just a difficult recipe to mix.
Tracy says
Did you melt the butter? I just made, followed the recipe to a T and it mixed quite easily. I would say like a typical brownie batter—thick and gooey!
Laurie says
That’s why I used an electric hand mixer (beaters). I’m not going to give myself a shoulder cramp.
Diane says
I only wanted to make 9×9 pan size so I halved the recipe and it turned out fine, baked just under 25 mins. The author isn’t lying about them not being too sweet, they are definitely more chocolate than sugary. There’s also not a lot of liquid here so it’s almost a sticky batter putting it in the pan instead of a runny batter which only matters if you are looking for a nice flat surface after baking. This is a good recipe if you want to make shaped brownies (eg heart or football shapes) bc they will cut well and not crumble.
The Recipe Rebel says
Hi Diane! So glad you enjoyed the recipe! Thank you for this kind review.
Tamaira says
These are fantastic! I didn’t have whole wheat flour so used 1 cup of all purpose with 1/2 cup of rye flour. Best batch of brownies I have made and easiest as well 👍🏻
Diane says
So no one had issues with them not setting up? I baked them 10 min over the time recommended. They are still way too wet.
The Recipe Rebel says
Hi Diane! These may be fudgy, but they will not be raw or too wet. If they are raw, then there may be other problems like inaccurate oven temperature or a slightly smaller pan which would lead to slightly thicker brownies.
Audra says
I had to bake mine twice what the recipe required – 50-53 minutes total. I am happy to say, they did finally set up nicely, and the edges didn’t get over-crispy, which I was watching for due to the prolonged cooking time. The only change I made to the recipe was using half avocado oil instead of butter, and I was a little short on cocoa (but made it up with flour).
Ashley Fehr says
50 minutes is quite a long time for brownies. Is it possible your pan was smaller than 9×13″ or that your oven temperature is off?
Lori says
Made the first batch without extras. Fudgy and wonderful. The house smelled divine! Second batch used mini chocolate chips and micro mini marshmallows with walnuts like a rocky road ice cream. Marshmallows were too tiny they melted in so mini marshmallows next time. Big hit at the picnic!
The Recipe Rebel says
Hi Lori! So glad you enjoyed it! Thank you for this review!
Diane says
Came out great! Topped with a half cup of sunflower seeds.
The Recipe Rebel says
Hi Diane! So glad you enjoyed the recipe! Thank you for this kind review!
Amy says
I have a 13 by 11 pan, will this recipe work?
Ashley Fehr says
It will work but they will be quite thin
Ariel Richardson says
I only have a 9in cake pan. Would I still use same heat and time to bake?
Ashley Fehr says
Unfortunately you cannot bake these in a 9 inch pan. They would be too thick and not bake properly. You can bake the recipe in two 9 inch square or round pans, or halve the recipe, or bake half of the batter and then repeat.
Ann says
Made the recipe as posted, easy and delicious. Added roasted walnuts and leftover Halloween mini candy(cupped peanut butter cups, Kit Kats, Snickers, malt balls) for a surprise in every bite.
Ashley Fehr says
That’s a great idea!
Michele says
Ann? How did you get the walnuts and candy mixed in? I had a hard time just getting the dry ingredients mixed in, and had to leave the chocolate chips out. I put them on top, and I hope that works.
Melissa says
Literally the best. I’ll never make another recipe again. I used the 2.5 c of sugar and it does not need more than that. I made the recipe as-is and didn’t add chocolate chips, which I honestly think would have made them too sweet. They’re PERFECT. Fudgy with a crusty top, and even better than the ones I used to think were my favorites from a bakery. I also love that they’re made in a 9X13 pan instead of a square one (because more brownies, right?). You can’t go wrong with these!
Ashley Fehr says
Thanks Melissa! I’m glad you liked them!
Jamie says
These were absolutely delicious and will be the only recipe I use going forward. I had to cook them a bit longer but my oven is quirky and I included a pretzel crust on the bottom.
Ashley Fehr says
Thanks Jamie! I’m glad you liked them!
Leora Celeste says
This is hands down the best brownie recipe I’ve ever used! I did reduce the sugar a bit because we prefer it that way, but they came out perfect! Thank you!
Ashley Fehr says
Thanks Leora! I’m so glad!
Krisgren says
This is my go to brownie recipe, I have never had them fail. They are so chewy and chocolatey, this is what a brownie should be. My kids thank you lol
Ashley Fehr says
Thanks! It’s our favorite too!
Morgan C says
Do you use unsalted or salted butter?
Ashley Fehr says
I use unsalted but you could use salted butter and omit the salt
Jacqueline says
These were delicious. Thanks for the recipe. I only had a half a cup of cocoa powder to us and they still came out tasty. Next time I will make sure to have enough!
Ashley Fehr says
I’m so glad!
Annalie Slabbert says
Can i use oil instead of butter
Ashley Fehr says
I don’t recommend it, no
Pauline says
Yum! Exactly the brownie texture I was looking for! Fudgy, but not gooey. I followed the recipe as written (using all purpose flour), and baked them for 25 mins. Nice that it makes a 9×13 pan. More is more! This recipe is a keeper!
Ashley Fehr says
Thanks Pauline!
Lisa says
Best brownies ever! Made these for my Husband’s Birthday yesterday and they were Amazing! I’ll never make box brownies again. I used 1/2 cup melted butter instead of oil and just a tad less salt so I used 1/2 teaspoon fine sea salt. Took them out of the oven at 40 minutes and they were perfection. Thank you so much!
Ashley Fehr says
Thanks Lisa!
Maria Zammit says
Thanks for the lovely recipe. First proper brownie attempt and successful.
I would like to clarify whether toothpick needs to come clean as if I had to follow such an instruction, brownies would take forever in the oven and would then end up dry. Thanks for your help.
Ashley Fehr says
Thanks for the tip Maria! I have added more tips in the recipe card 🙂
Iryna Leskiv says
They were super easy to make but my only complain is that they turned out a little more spongy than I though
Ashley Fehr says
If you want fudgier brownies, the trick is not to bake them too long 🙂
Dave A says
Thank you, I had great results! I made a few changes based on what I had on hand: for sugar, I used 1 cup white, 1 cup packed brown; used salted butter & omitted extra salt; used almond extract instead of vanilla; added chopped walnuts and some dark chocolate chips to the batter. I baked it an extra 8 minutes or so to get the toothpick to come out clean.
Ashley Fehr says
I’m glad you liked them!