
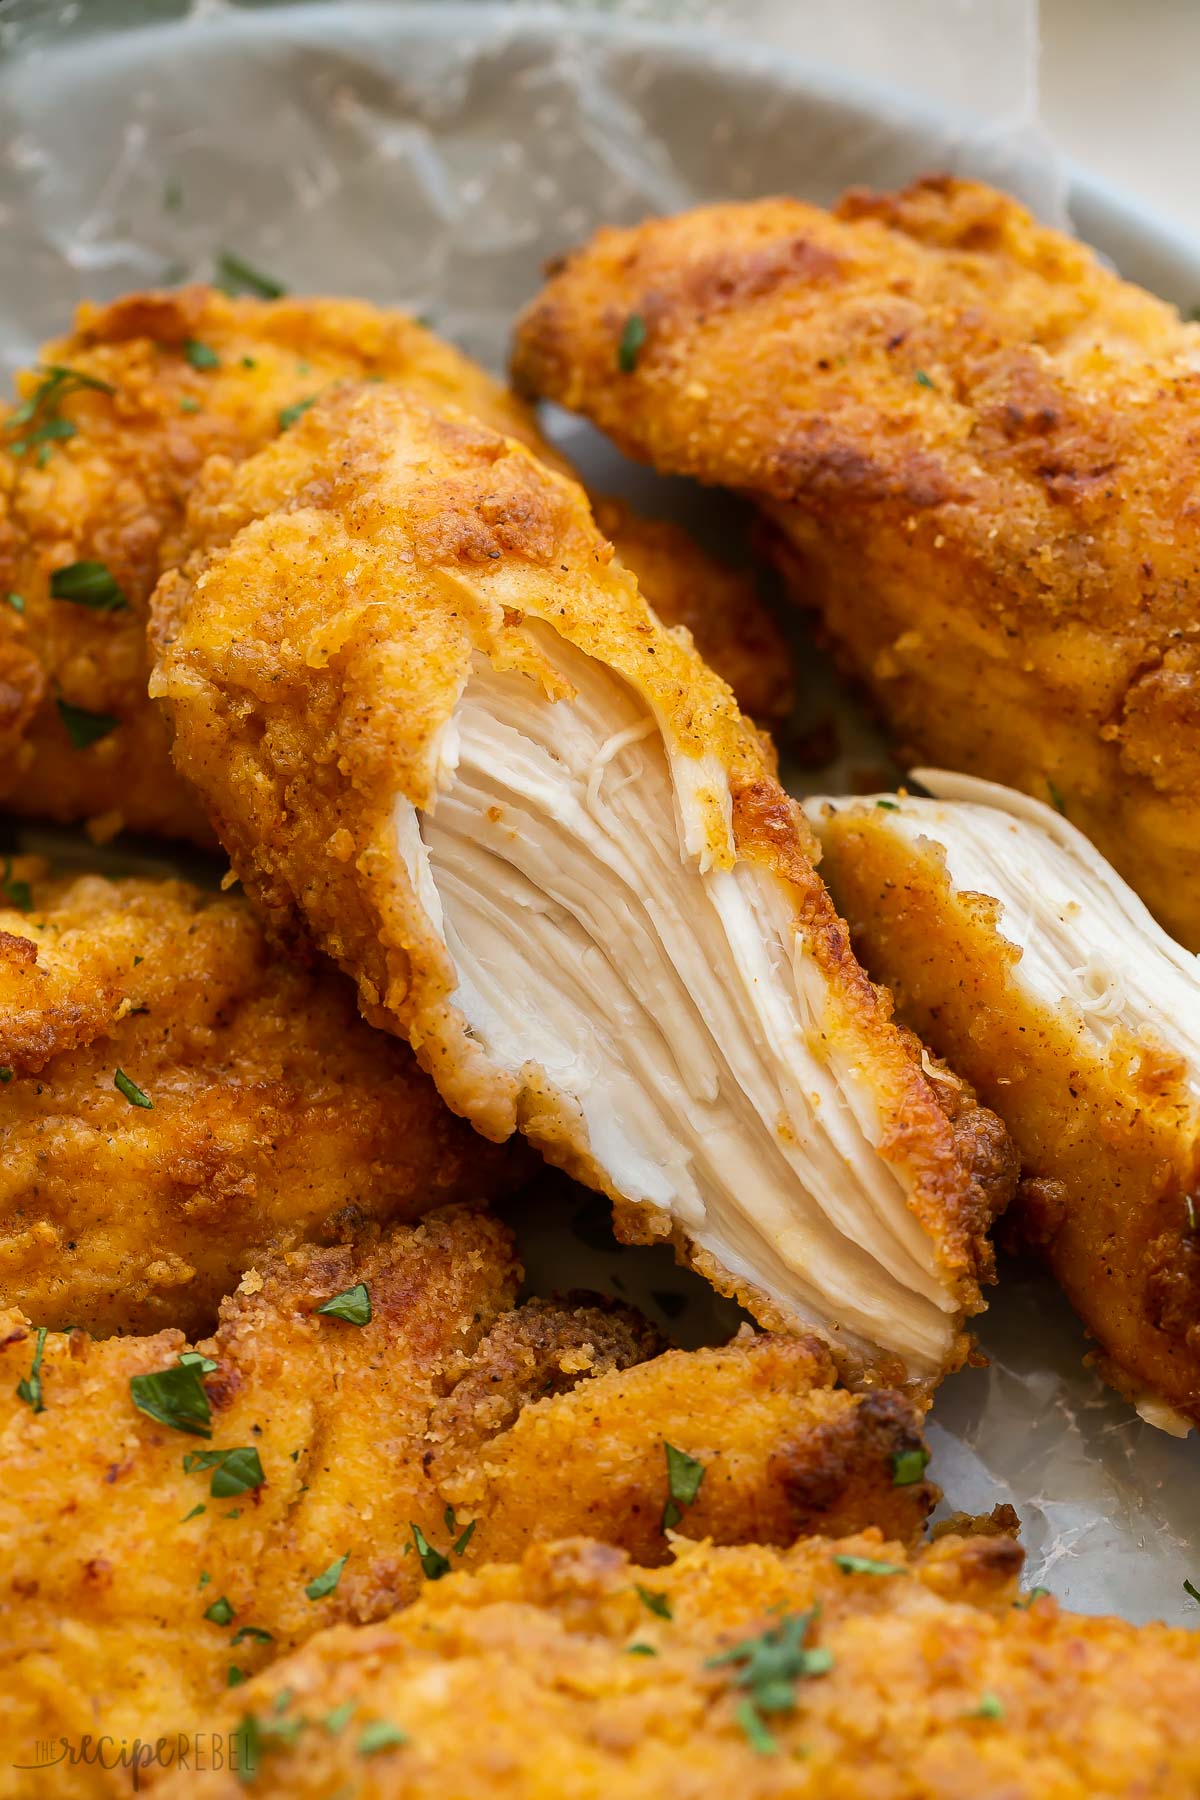
This easy Oven-Fried Chicken turns out perfectly crispy and juicy every time! The special seasoning blend tastes just like KFC, but it’s made with wholesome ingredients in your own kitchen. No deep fryer needed!

Can’t get enough crispy chicken recipes? Try this Crispy Chicken with Basil Cream Sauce, Parmesan Crusted Chicken, or Air Fryer Fried Chicken!
Table of Contents
- Why you’ll love this crispy Oven-Fried Chicken:
- What people are saying:
- Oven-Fried Chicken ingredients:
- How to make fried chicken in the oven:
- Quick things to remember:
- How to store leftover chicken:
- Why is my baked fried chicken not crispy?
- Make-ahead option:
- Serving Suggestions:
- More baked chicken recipes:
- The Best Oven-Fried Chicken Recipe
If you’re craving traditional fried chicken but don’t feel like going out, this Oven-Fried Chicken will hit the spot!
Instead of deep frying, this recipe coats chicken strips in eggs and a panko bread crumb mixture for a crispy coating. They’re baked on a sheet pan with butter to get that signature crunch.
It has all that big flavor of KFC fried chicken, but with less fat.
This is a dinner recipe that our whole family loves, especially the kids! Serve it up with Spicy Mayo, Sweet and Sour Sauce, or Homemade BBQ Sauce and watch it disappear fast.
Why you’ll love this crispy Oven-Fried Chicken:
- Better than takeout: because we’re making it at home, we know what’s going into it.
- Wonderfully crispy: You get all the crunch of fried chicken but baked in the oven! No deep frying required.
- Quick and easy: All you need are a handful of simple ingredients and basic prep, and it’s ready in no time for an easy weeknight dinner.
What people are saying:
![]()
“WoW – Absoltely FanTAStic!!! A random search on Google led me to your site and after seeing the huge numbers of high ratings, decided to give it a shot. SO GLAD I did – crispy yet juicy and spot on flavor. With a real feel of -22 in ND, this was Exactly what I needed. Highlight of my weekend 😁” Gabriella
Oven-Fried Chicken ingredients:

- Chicken breast: One batch of this recipe makes about 3-4 chicken breasts, or around one and a half pounds, cut into strips. One chicken breast equals about three strips, the way I cut them. You could also use tenders, thighs, or legs!
- Eggs: Coat your chicken with beaten eggs to help the coating stick more.
- Butter: Salted or unsalted butter is fine.
- Flour: All-purpose flour helps coat the chicken to produce a crispy exterior! You can swap with gluten-free flour if needed.
- Panko: Panko breadcrumbs give the chicken a crunchy, crispy coating. For a gluten-free option, you can use pork rind panko!
- Seasoned salt: This versatile seasoning goes with everything! I use Lawry’s brand, but feel free to use your favorite brand.
- Paprika: It isn’t spicy, but it adds depth of flavor, a slight sweetness, and lots of color. You could add a dash of cayenne pepper to make it spicier if you like!
How to make fried chicken in the oven:
This recipe is the best way to enjoy fried chicken at home! For the full list of recipe instructions, scroll down to the recipe card below.
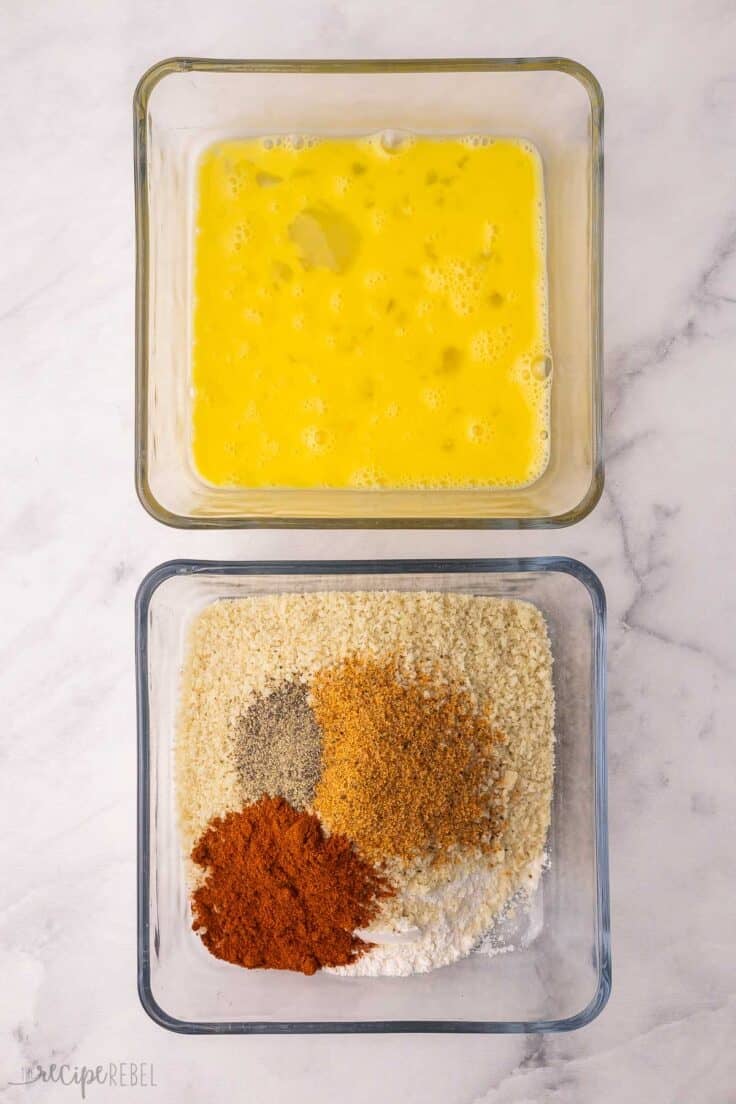
- Whisk the eggs in a shallow dish. Mix the coating by combining bread crumbs, flour, and seasonings in another shallow dish.
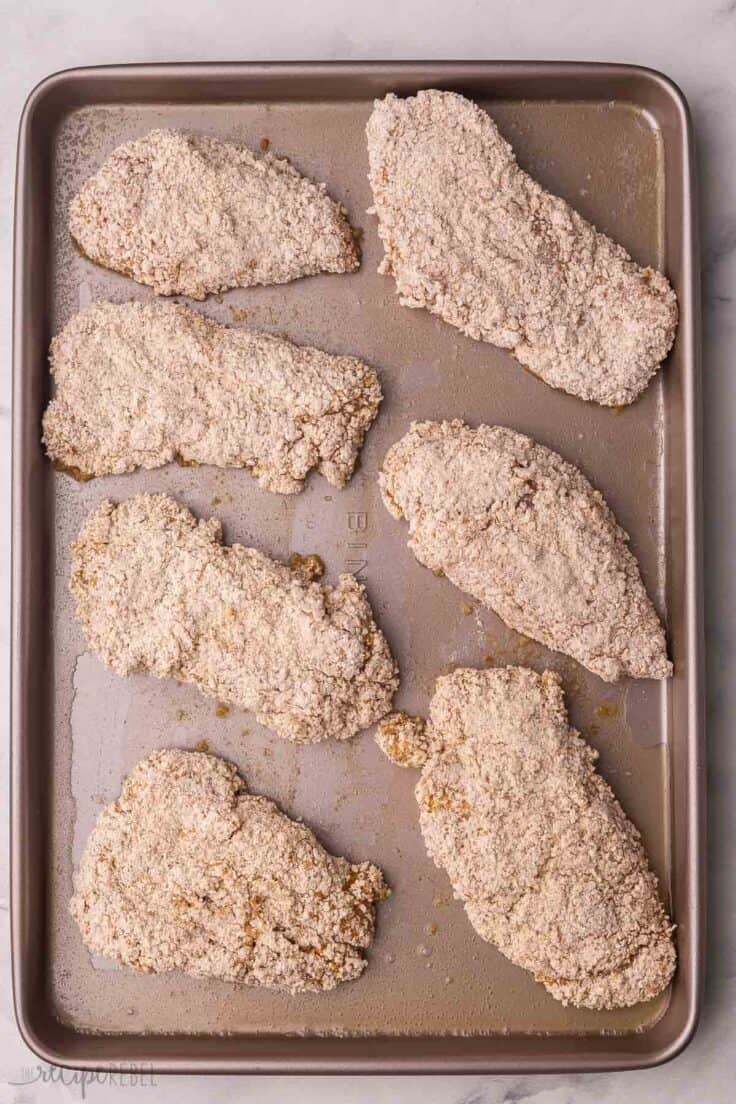
- Coat the chicken by dipping each piece in the egg, then pressing it into the breadcrumb mixture. Bake the chicken until it’s golden brown and crispy.
Quick things to remember:
- Cooking time: Depending on the size and thickness of your chicken pieces, you may need to adjust the cooking time, so always check your chicken for doneness before diving in.
- Add oil: If the pan is dry when you flip the chicken, add a drizzle of oil, to the to ensure the bottom pieces of chicken get crispy.
How to store leftover chicken:
To refrigerate leftover chicken, allow it to cool on a wire rack or paper-towel-lined plate. Then transfer the cooled pieces into shallow, airtight containers. Store in the fridge for 3 to 4 days.
To freeze, place the chicken in a single layer on a tray in the freezer until frozen solid. Then, transfer the frozen pieces to freezer bags and store them in the freezer for up to 3 months.
To reheat Oven-Fried chicken, place chicken pieces on a wire rack on a baking sheet and place in the oven at 250 degrees just until heated through.

Why is my baked fried chicken not crispy?
While baking chicken isn’t always known for crispy results, this recipe really does deliver a crispy “fried” main course right out of the oven! Still, I wanted to add some tips that might help if you find that your chicken is not as crispy as you’d like.
- Use Dark, Non-Stick Pans. Dark pans heat to a higher temperature than light-colored pans, which will help with getting a crispy coating. Make sure the pan and butter are hot when you add the chicken.
- Use Butter, Not Cooking Spray. I know you might be tempted to bake the chicken with cooking spray instead of butter, but unfortunately, this just doesn’t work as well. The fat in real butter makes a lot of difference in crisping up the chicken! If you want, you can spray the other side of the chicken when you flip for extra insurance.
- Check when you flip: When you flip the chicken, you may find that the pan is a little dry. You can add more butter or oil to the pan to help crisp up the bottom of the chicken as it cooks.
- Serve with Care: As the chicken sits on a plate, the underside may get a little soggy from condensation. Therefore, I recommend serving immediately. If you’re not serving right away, place the chicken on a rack or a plate lined with a paper towel, or just keep it warm in a 225°F oven.
Make-ahead option:
You can make the breading mixture and bread the chicken pieces, and then “flash freeze” them on a tray in the freezer until frozen solid.
From there, transfer the breaded frozen chicken to freezer bags, and keep for up to 3 months frozen. There’s no need to thaw them before baking, but you will need to add more cooking time (around 2 to 5 additional minutes per side, depending on the thickness of the chicken).
Serving Suggestions:
When it comes to serving Oven-Fried Chicken, I like to go with classic, comforting sides, like baked beans and slow cooker mashed potatoes! If you want to add some veggies, you can’t go wrong with some glazed carrots.
Every once in a while, I like to go for something more indulgent and make my cream cheese mashed potatoes!
More baked chicken recipes:
- Baked Chicken Wings — perfect for a party!
- Baked Chicken Breast — SO juicy.
- Baked Chicken Thighs — perfectly crisp skin.
- Baked Chicken Drumsticks — the kids love these!
The Best Oven-Fried Chicken
written by Ashley Fehr

Ingredients
- 2 eggs
- 1 cup panko bread crumbs
- ¾ cup all-purpose flour
- 1 tablespoon seasoning salt
- 2 teaspoons paprika
- ½ teaspoon pepper
- 2 pounds boneless skinless chicken breasts, , cut into strips (about 3 or 4 breasts)
- ¼ cup unsalted butter, plus more if needed
Instructions
- Preheat the oven to 425°F.
- In a shallow dish, whisk the eggs.
- In a second shallow dish, combine the bread crumbs, flour, seasoning salt, paprika, and pepper.
- Coat each piece of chicken in the egg, then in the bread crumb mixture, pressing on firmly to adhere. Place the chicken on a plate and repeat until all the chicken is coated.
- To a rimmed baking sheet, add the butter and put the pan in the oven to melt the butter. (You want the pan to get hot, but be careful not to burn the butter.)
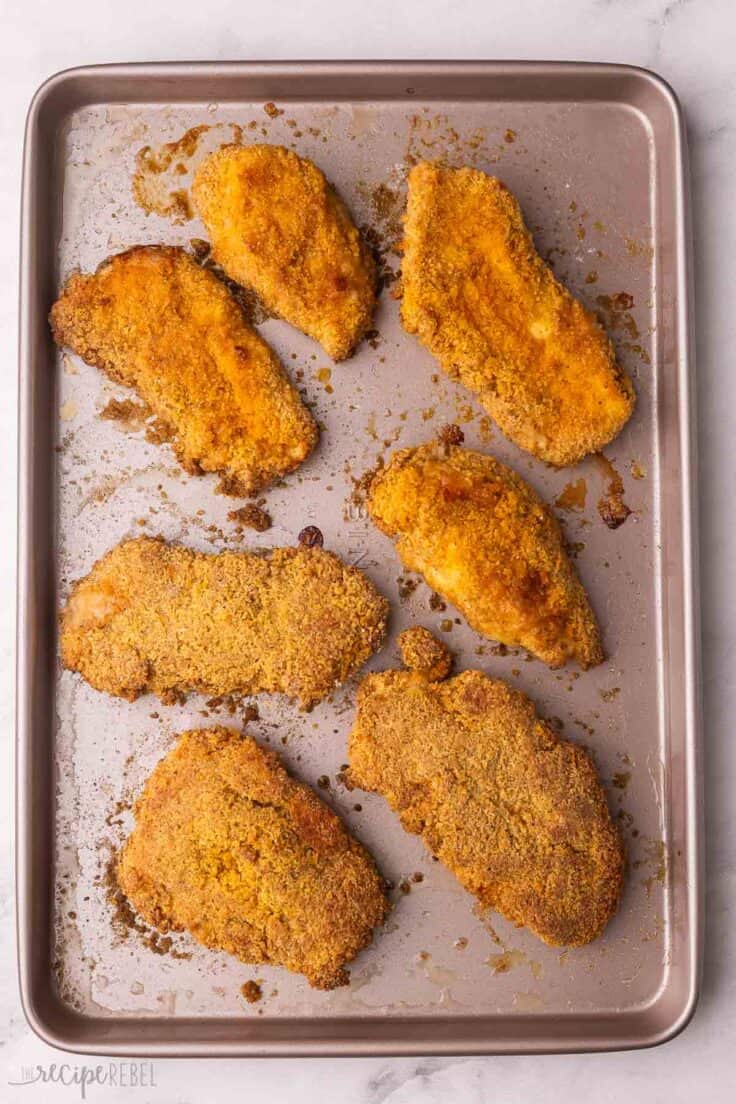
- Place each piece of chicken on the hot pan, leaving a good amount of space in between. Bake for 20 minutes, flipping gently halfway through, or until cooked through and a meat thermometer inserted into the chicken reaches at least 165°F and the coating is browned. If necessary, add another dab of butter when flipping.
- Remove from pan and serve immediately.
Video
Notes
Nutrition
Nutrition information is automatically calculated, so should only be used as an approximation.
Want to save this recipe?
Create an account easily save your favorite content, so you never forget a recipe again.
Tried this recipe?
Tag @thereciperebel or hashtag #thereciperebel — I love to see what you’re making!
Tag @thereciperebel
Dianne D. says
I made this oven fried chicken tonight and my family loved it. The chicken was tender and moist on the inside and crunchy on the outside. Delicious!!
Ashley Fehr says
Thanks Dianne!
Loren says
I used a cast iron pan and it worked great.
Ashley Fehr says
Thanks for sharing Loren!
Carrie Lou Kirasic says
It’s just myself and Mr. Fred-an elderly gentleman I care for. Found this recipe and wanted to try. I had a rather large breast so I sliced it lengthwise. I personally have a problem with “moist juicy chicken” I literally want it so dry I need water nearby so I don’t choke when swallowing it. Lol. So I cooked it an extra 5 minutes on each side. Delicious. Thank you for an enjoyable meal
Ashley Fehr says
Haha, thanks for sharing!
Pamela Olson says
Holy crap. I have NEVER made a decent or edible fried chicken EVER. This recipe is now life changing. Thank you so so so much. It was above delicious. Im so happy. Thank you
Ashley Fehr says
I’m so glad you liked it!
Colleen McKenzie says
Baked 20 mins per instruction
And flipped for another 16 minutes…turned out too dry! Disappointed
Ashley Fehr says
Hi Colleen! The recipe calls for a 20 minute bake time total, which could be why it was dry.
Katherine says
Would it be ok to use a stainless steel baking sheet? We don’t use nonstick pans! I wonder if it would stick to the stainless steel baking sheet.
Or I could use a silicone cover on the stainless steel baking sheet…I wonder which option is best?
Ashley Fehr says
It shouldn’t stick no, I wouldn’t recommend silicone as it won’t brown
Trish L says
Excellent. I often make food for my older family members who are super picky. Putting the butter in the rimmed baking sheet and popping it into the oven to get hot while I breaded was key. Crisped up so well. Delicious
Ashley Fehr says
Thanks Trish!
Luke says
Unfortunately did not crisp up well for me. Result definitely isn’t as nice as shallow frying, also seemed a bit too floury
Barb says
How long would you bake if using bone in thighs?
Ashley Fehr says
Probably 30-40 minutes total
Robert says
How is this healthier than fried chicken in a pan?
Ashley Fehr says
It’s not swimming in oil?
P says
This was so great. Juicy and full of flavor! Will be in my regular rotation!!!! Thank you!!
Ashley Fehr says
Thanks!
Kelly says
I didn’t think it tasted like KFC but it was very flavorful, very juicy, very easy. Every single person that tried it was raving (and I am a very good cook on my own). I made it a couple nights ago & it’s already being requested again. Def going into rotation- and it’s easy enough to do on a weeknight!
Ashley Fehr says
Thanks for sharing Kelly!
Kelly says
No, thank you for sharing!! It’s def become a regular in our house & no guilt from frying! When I do other chicken dishes (like our version of Marry Me Chicken), this incorporates perfectly & because it’s so juicy- it only makes it better! Can’t thank you enough
Kelley Chambers says
I can’t find the amounts for the ingredients
Ashley Fehr says
In the pink recipe card