
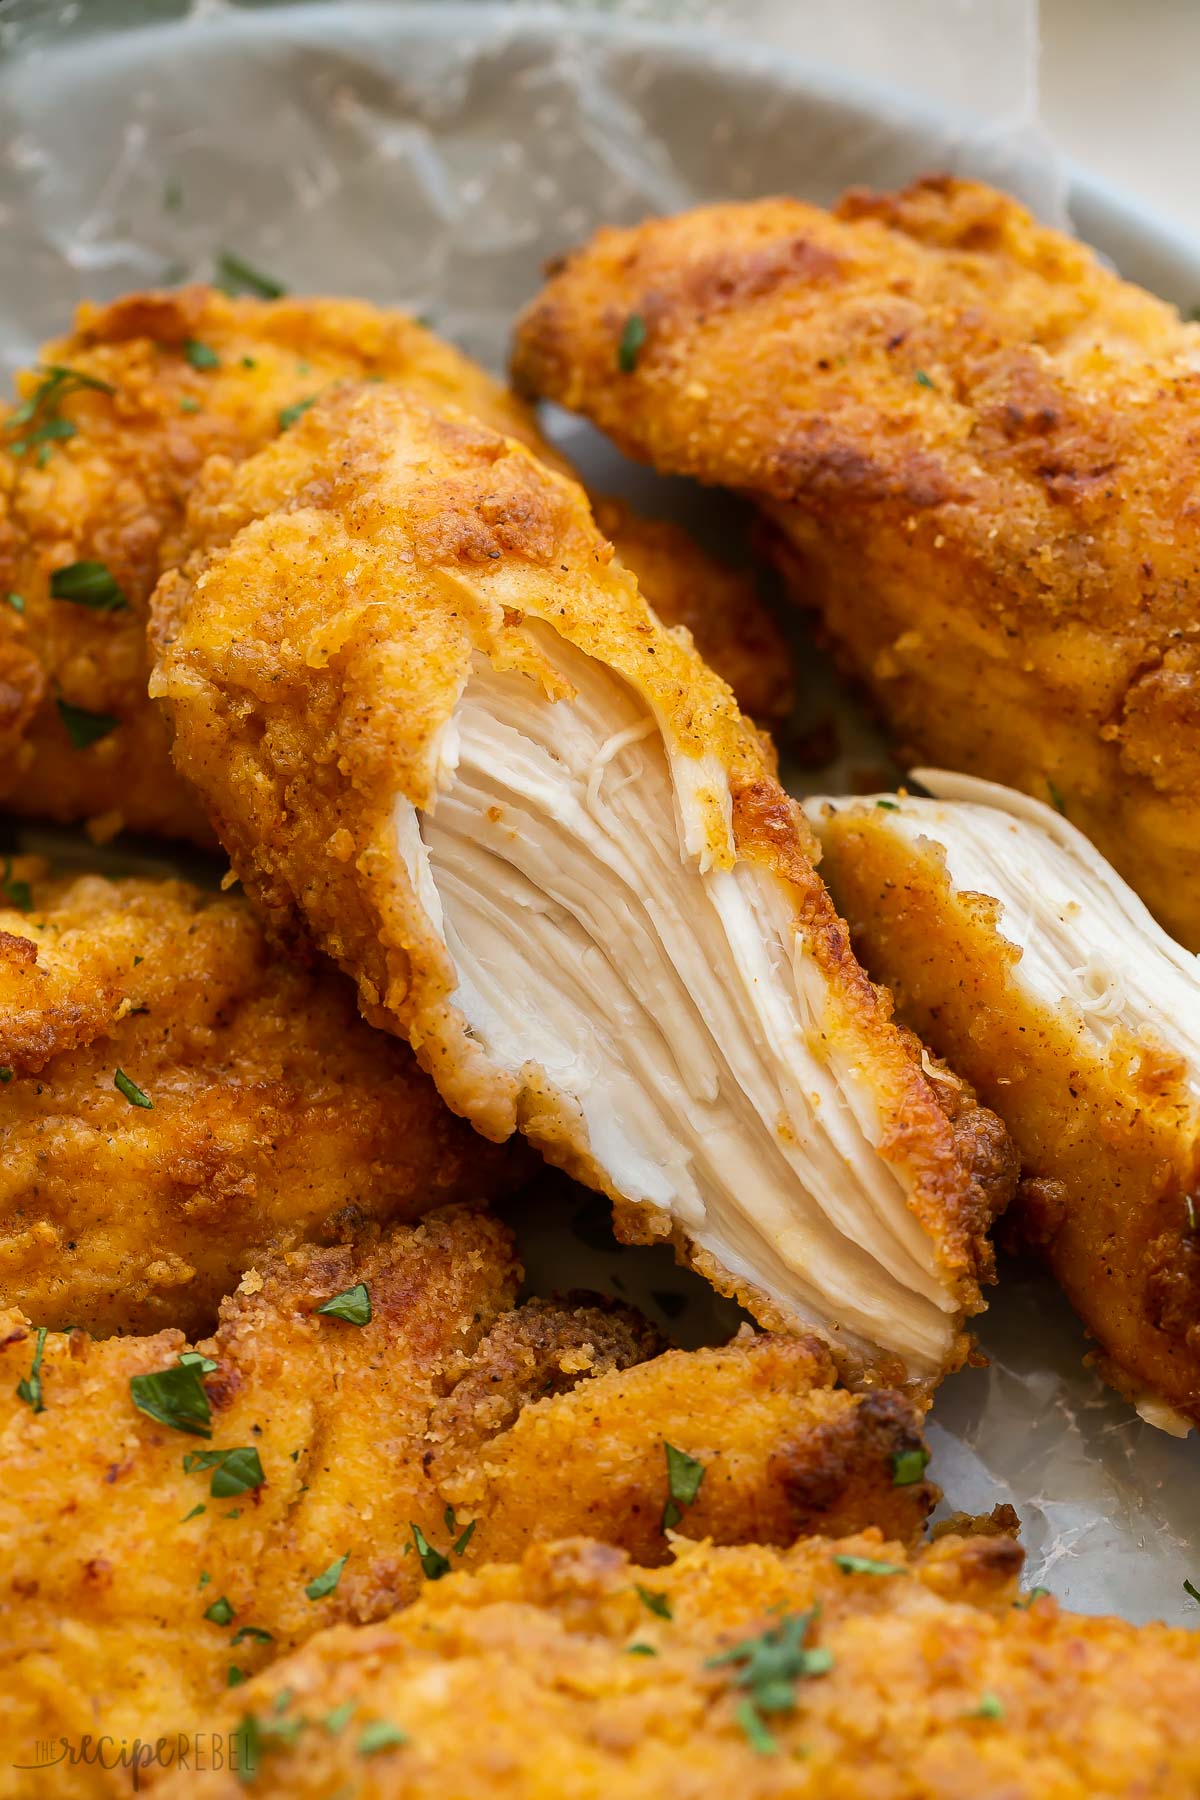
This easy Oven-Fried Chicken turns out perfectly crispy and juicy every time! The special seasoning blend tastes just like KFC, but it’s made with wholesome ingredients in your own kitchen. No deep fryer needed!

Can’t get enough crispy chicken recipes? Try this Crispy Chicken with Basil Cream Sauce, Parmesan Crusted Chicken, or Air Fryer Fried Chicken!
Table of Contents
- Why you’ll love this crispy Oven-Fried Chicken:
- What people are saying:
- Oven-Fried Chicken ingredients:
- How to make fried chicken in the oven:
- Quick things to remember:
- How to store leftover chicken:
- Why is my baked fried chicken not crispy?
- Make-ahead option:
- Serving Suggestions:
- More baked chicken recipes:
- The Best Oven-Fried Chicken Recipe
If you’re craving traditional fried chicken but don’t feel like going out, this Oven-Fried Chicken will hit the spot!
Instead of deep frying, this recipe coats chicken strips in eggs and a panko bread crumb mixture for a crispy coating. They’re baked on a sheet pan with butter to get that signature crunch.
It has all that big flavor of KFC fried chicken, but with less fat.
This is a dinner recipe that our whole family loves, especially the kids! Serve it up with Spicy Mayo, Sweet and Sour Sauce, or Homemade BBQ Sauce and watch it disappear fast.
Why you’ll love this crispy Oven-Fried Chicken:
- Better than takeout: because we’re making it at home, we know what’s going into it.
- Wonderfully crispy: You get all the crunch of fried chicken but baked in the oven! No deep frying required.
- Quick and easy: All you need are a handful of simple ingredients and basic prep, and it’s ready in no time for an easy weeknight dinner.
What people are saying:
![]()
“WoW – Absoltely FanTAStic!!! A random search on Google led me to your site and after seeing the huge numbers of high ratings, decided to give it a shot. SO GLAD I did – crispy yet juicy and spot on flavor. With a real feel of -22 in ND, this was Exactly what I needed. Highlight of my weekend 😁” Gabriella
Oven-Fried Chicken ingredients:

- Chicken breast: One batch of this recipe makes about 3-4 chicken breasts, or around one and a half pounds, cut into strips. One chicken breast equals about three strips, the way I cut them. You could also use tenders, thighs, or legs!
- Eggs: Coat your chicken with beaten eggs to help the coating stick more.
- Butter: Salted or unsalted butter is fine.
- Flour: All-purpose flour helps coat the chicken to produce a crispy exterior! You can swap with gluten-free flour if needed.
- Panko: Panko breadcrumbs give the chicken a crunchy, crispy coating. For a gluten-free option, you can use pork rind panko!
- Seasoned salt: This versatile seasoning goes with everything! I use Lawry’s brand, but feel free to use your favorite brand.
- Paprika: It isn’t spicy, but it adds depth of flavor, a slight sweetness, and lots of color. You could add a dash of cayenne pepper to make it spicier if you like!
How to make fried chicken in the oven:
This recipe is the best way to enjoy fried chicken at home! For the full list of recipe instructions, scroll down to the recipe card below.
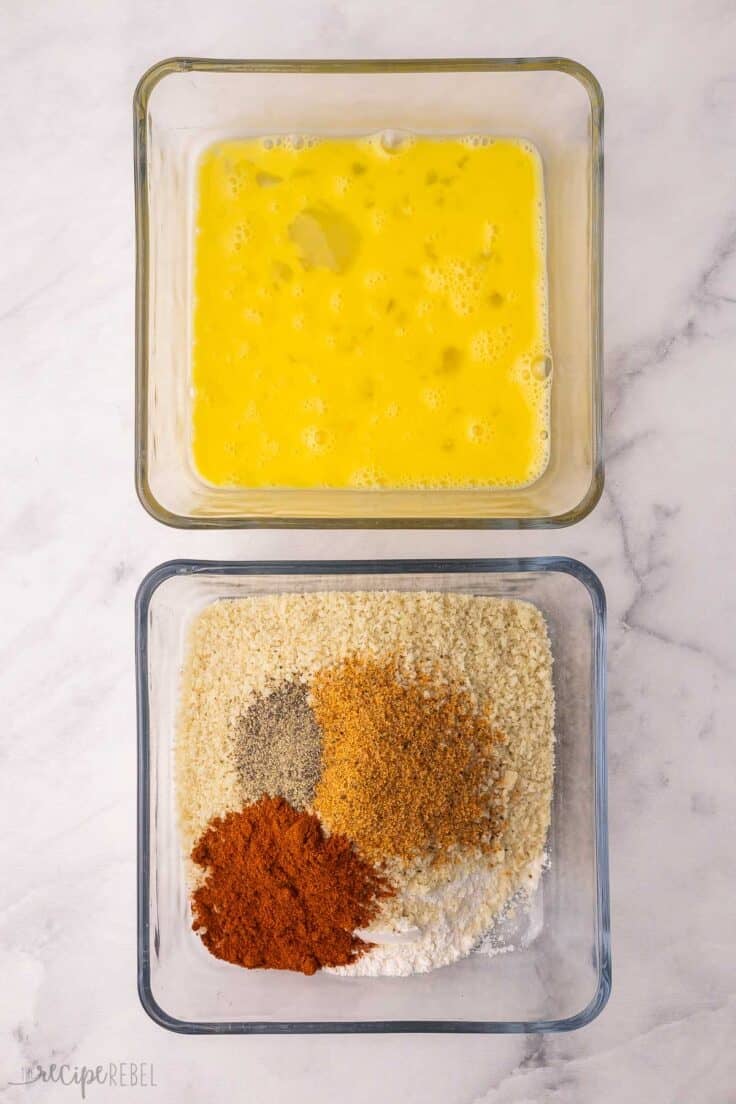
- Whisk the eggs in a shallow dish. Mix the coating by combining bread crumbs, flour, and seasonings in another shallow dish.
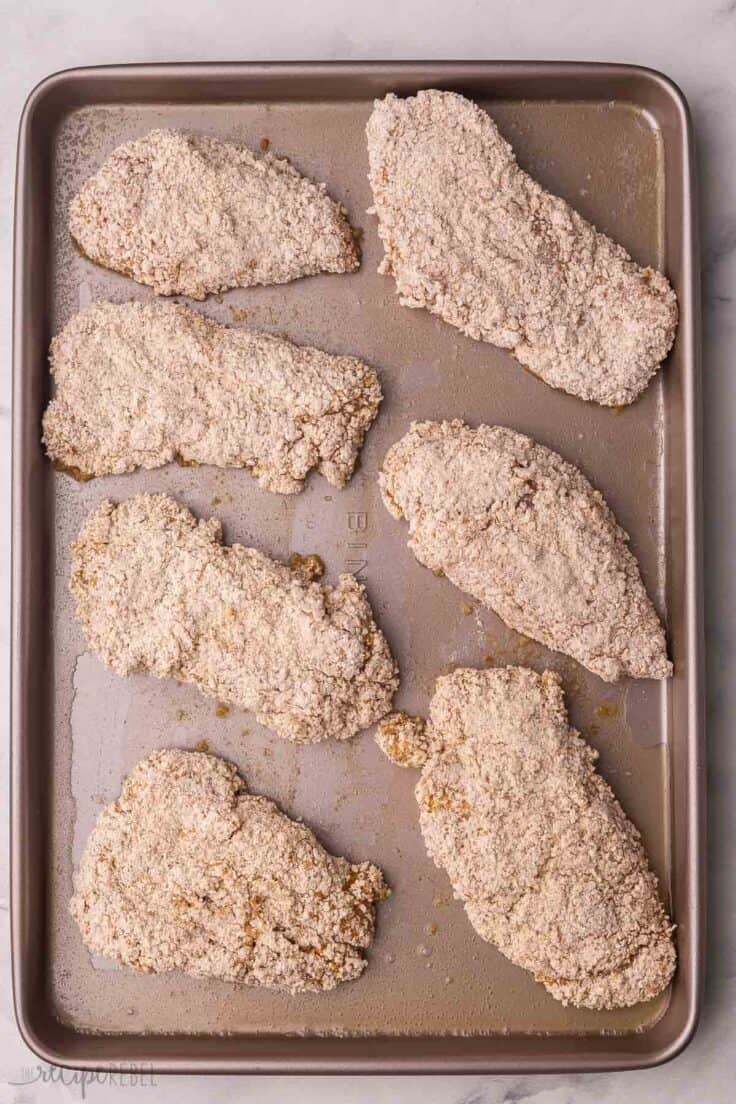
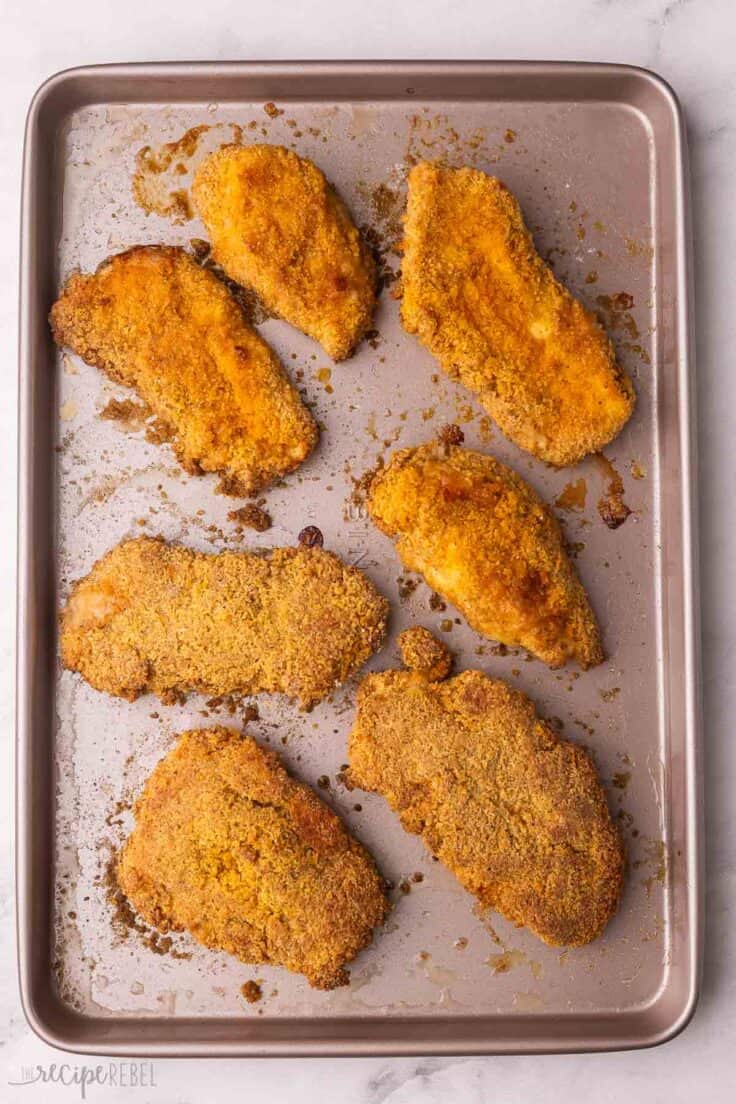
- Coat the chicken by dipping each piece in the egg, then pressing it into the breadcrumb mixture. Bake the chicken until it’s golden brown and crispy.
Quick things to remember:
- Cooking time: Depending on the size and thickness of your chicken pieces, you may need to adjust the cooking time, so always check your chicken for doneness before diving in.
- Add oil: If the pan is dry when you flip the chicken, add a drizzle of oil, to the to ensure the bottom pieces of chicken get crispy.
How to store leftover chicken:
To refrigerate leftover chicken, allow it to cool on a wire rack or paper-towel-lined plate. Then transfer the cooled pieces into shallow, airtight containers. Store in the fridge for 3 to 4 days.
To freeze, place the chicken in a single layer on a tray in the freezer until frozen solid. Then, transfer the frozen pieces to freezer bags and store them in the freezer for up to 3 months.
To reheat Oven-Fried chicken, place chicken pieces on a wire rack on a baking sheet and place in the oven at 250 degrees just until heated through.

Why is my baked fried chicken not crispy?
While baking chicken isn’t always known for crispy results, this recipe really does deliver a crispy “fried” main course right out of the oven! Still, I wanted to add some tips that might help if you find that your chicken is not as crispy as you’d like.
- Use Dark, Non-Stick Pans. Dark pans heat to a higher temperature than light-colored pans, which will help with getting a crispy coating. Make sure the pan and butter are hot when you add the chicken.
- Use Butter, Not Cooking Spray. I know you might be tempted to bake the chicken with cooking spray instead of butter, but unfortunately, this just doesn’t work as well. The fat in real butter makes a lot of difference in crisping up the chicken! If you want, you can spray the other side of the chicken when you flip for extra insurance.
- Check when you flip: When you flip the chicken, you may find that the pan is a little dry. You can add more butter or oil to the pan to help crisp up the bottom of the chicken as it cooks.
- Serve with Care: As the chicken sits on a plate, the underside may get a little soggy from condensation. Therefore, I recommend serving immediately. If you’re not serving right away, place the chicken on a rack or a plate lined with a paper towel, or just keep it warm in a 225°F oven.
Make-ahead option:
You can make the breading mixture and bread the chicken pieces, and then “flash freeze” them on a tray in the freezer until frozen solid.
From there, transfer the breaded frozen chicken to freezer bags, and keep for up to 3 months frozen. There’s no need to thaw them before baking, but you will need to add more cooking time (around 2 to 5 additional minutes per side, depending on the thickness of the chicken).
Serving Suggestions:
When it comes to serving Oven-Fried Chicken, I like to go with classic, comforting sides, like baked beans and slow cooker mashed potatoes! If you want to add some veggies, you can’t go wrong with some glazed carrots.
Every once in a while, I like to go for something more indulgent and make my cream cheese mashed potatoes!
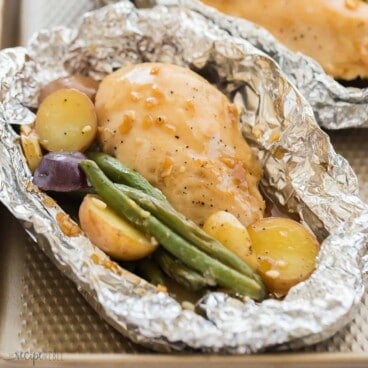
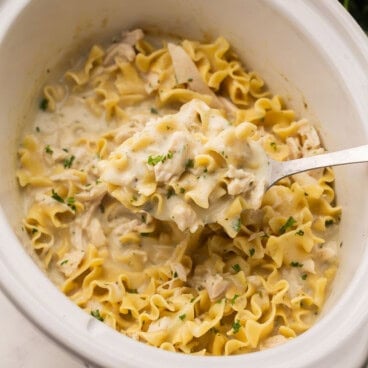
More baked chicken recipes:
- Baked Chicken Wings — perfect for a party!
- Baked Chicken Breast — SO juicy.
- Baked Chicken Thighs — perfectly crisp skin.
- Baked Chicken Drumsticks — the kids love these!
The Best Oven-Fried Chicken
written by Ashley Fehr

Ingredients
- 2 eggs
- 1 cup panko bread crumbs
- ¾ cup all-purpose flour
- 1 tablespoon seasoning salt
- 2 teaspoons paprika
- ½ teaspoon pepper
- 2 pounds boneless skinless chicken breasts, , cut into strips (about 3 or 4 breasts)
- ¼ cup unsalted butter, plus more if needed
Instructions
- Preheat the oven to 425°F.
- In a shallow dish, whisk the eggs.
- In a second shallow dish, combine the bread crumbs, flour, seasoning salt, paprika, and pepper.
- Coat each piece of chicken in the egg, then in the bread crumb mixture, pressing on firmly to adhere. Place the chicken on a plate and repeat until all the chicken is coated.
- To a rimmed baking sheet, add the butter and put the pan in the oven to melt the butter. (You want the pan to get hot, but be careful not to burn the butter.)
- Place each piece of chicken on the hot pan, leaving a good amount of space in between. Bake for 20 minutes, flipping gently halfway through, or until cooked through and a meat thermometer inserted into the chicken reaches at least 165°F and the coating is browned. If necessary, add another dab of butter when flipping.
- Remove from pan and serve immediately.
Video
Notes
Nutrition
Nutrition information is automatically calculated, so should only be used as an approximation.
Want to save this recipe?
Create an account easily save your favorite content, so you never forget a recipe again.
Tried this recipe?
Tag @thereciperebel or hashtag #thereciperebel — I love to see what you’re making!
Tag @thereciperebel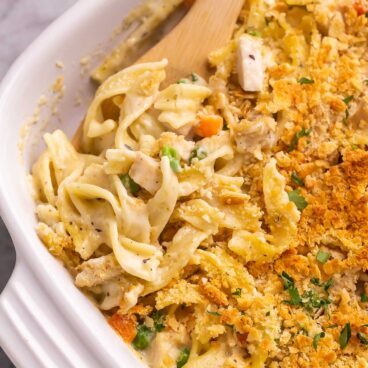
Ladonna says
Thanks for the marvelous posting! I seriously enjoyed reading it, you may be a great author.I will
remember to bookmark your blog and will eventually come
back later in life. I want to encourage you to definitely continue your great writing,
have a nice day!
Barbara says
I pinned this recipe a while ago and tried it for the first time last night. It was delicious. I used fresh chicken tenders, so I soaked them in buttermilk as suggested. I baked them at 425 for 12 minutes a side, since I was concerned about using parchment paper at 450. Otherwise, I followed the recipe as written. Best baked “fried” chicken I have made. (and I’ve made a lot) Thanks!
Ashley Fehr says
Thanks Barbara! I’m glad to hear that!
Pam Reis says
Wow! My husband and daughter are the pickiest eaters ever! I didn’t make enough although I made one more than normal! Love, love this recipe! Thank you!
Ashley Fehr says
Thanks Pam!
Kofi Yankey says
Hi Ashley,
I used the recipe to make chicken thighs for the first time tonight, cooking it longer remembering that “bone-in” chicken takes longer. The thighs did come out crispy; one thing I did differently was that when I flipped them over, I brushed some of the leftover butter on top of them. Nice and crispy! Next time, I’ll try the recipe using chicken breast!😎
Thank you!🤓
Ashley Fehr says
Thanks Kofi!
Domesticdoll says
My family loves this recipe but I have made a small change. I use chicken thighs and brown them in a cast iron skillet, still in butter then bake them. They come out crispy and amazing! Thank you.
Ashley Fehr says
Thanks for sharing!
Natalie says
The video says 450 but written instructions say 425…
Ashley Fehr says
There won’t be much of a difference between the two, maybe a couple of minutes of cook time. The oven temperature in the video is an error, but even so, it won’t change the recipe.
Loiza says
Can legs be used?
Ashley Fehr says
They can, but bone in chicken usually takes longer to cook so you will have to factor that in
CASSY says
This is one of my family’s favorites!! Recipe is easy to follow. I usually double the dry ingredients while I’m making it but put it in another ziplock to use for the next week, or whenever I want since the dry ingredients will stay good. My husband loves chicken thighs and it works great with this recipe. Keeper and highly recommended 👌
Ashley Fehr says
Thanks Cassy! I am so glad you all enjoy it!
Shannon G. says
So tasty! Husband was a big fan also! I just didn’t pay attention that the batter was enough for 3 pounds of chicken, and I only had 1 (7 strips), so I wasted a lot of batter, but that was on me not reading 🙃
Ashley Fehr says
Thanks Shannon! I’m so happy you enjoyed it!
Kacie D says
This recipe was amazing! It is my go to now. I didn’t have any panko breadcrumbs so I made it with some Italian breadcrumbs that I had and it by far exceeded my expectations! Thank you!
Ashley Fehr says
Thanks Kacie! I’m so glad!
wilhelmina says
This chicken turned out perfectly! So crisp an juicy, my family loved it. Great recipe!
Ashley Fehr says
I’m so happy to hear that!
Natasha says
The end result was awesome! It’s crispy outside, moist and tasty inside. My kids loved it so much.
Ashley Fehr says
thanks Natasha!
Isabelle says
Who would have thought homemade chicken could taste SO good?! Yum!
Ashley Fehr says
thanks Isabelle!
Lisalia says
This was absolutely the BEST oven fried chicken. So moist and the perfect crunchy exterior. Thanks for such a wonderful recipe!
Ashley Fehr says
I’m so glad you liked it!
Stephanie says
This was amazing! The chicken was super crispy and moist…loved it!!
Leo H says
We made this tonight and it was wonderful. I’ve tried several oven fried chicken recipes and this was the best -BY FAR! Total time from start to eating was 40 min. We will definitely be making this again.
Ashley Fehr says
thanks Leo! I’m so happy to hear that!
Will says
So so good!
Am using chicken thighs which are super juicy and possibly the extra fat helps crisp up the coating 🙂
Don’t have the seasoning salt here so am using paprika, cayenne, onion powder, garlic powder, salt, turmeric.
Found it important to make a lot of the coating powder and not put too much chicken in the bag otherwise it turns into a soggy mess. Can individually coat of course using a bowl for the coating which yields perfect results.
Enjoy!
Ashley Fehr says
Thanks for the tips Will! Chicken thighs would be great in this!
Angie says
This recipe was a huge disappointment. I followed it to the letter, but the coating was soggy and stuck to our teeth. It became dark on the bottom but still wouldn’t crisp up. And if I wasn’t super careful, the coating would slide right off the chicken. 0/4 of my family liked it. I will NOT be making it again, and I wouldn’t recommend it to anyone else.
Ashley Fehr says
I’m sorry to hear that Angie! The coating will become soggy with sitting, but should be crispy and golden out of the oven. There are 516 reviews on this recipe and most have enjoyed it1 I’m sorry you didn’t feel the same.
W. Maynard Pittendreigh says
When do you add the remaining butter for crisping?
Ashley Fehr says
You put it all on the pan. You will have a little extra butter on the pan or parchment, but it is necessary for making crispy chicken.
Kelly says
My family loves these! They call them the “fancy tenders” and cannot get enough! I usually make a double batch so we can eat them the next day too. I highly recommend this recipe!
Ashley Fehr says
Thank you so much Kelly!