This Homemade Dinner Rolls recipe is easy and makes the most delicious, soft, and fluffy dinner rolls you’ve ever tasted! They’re perfect for Sunday dinner or special occasions, but they’re easy enough that you can enjoy them during the week, too.

Table of Contents
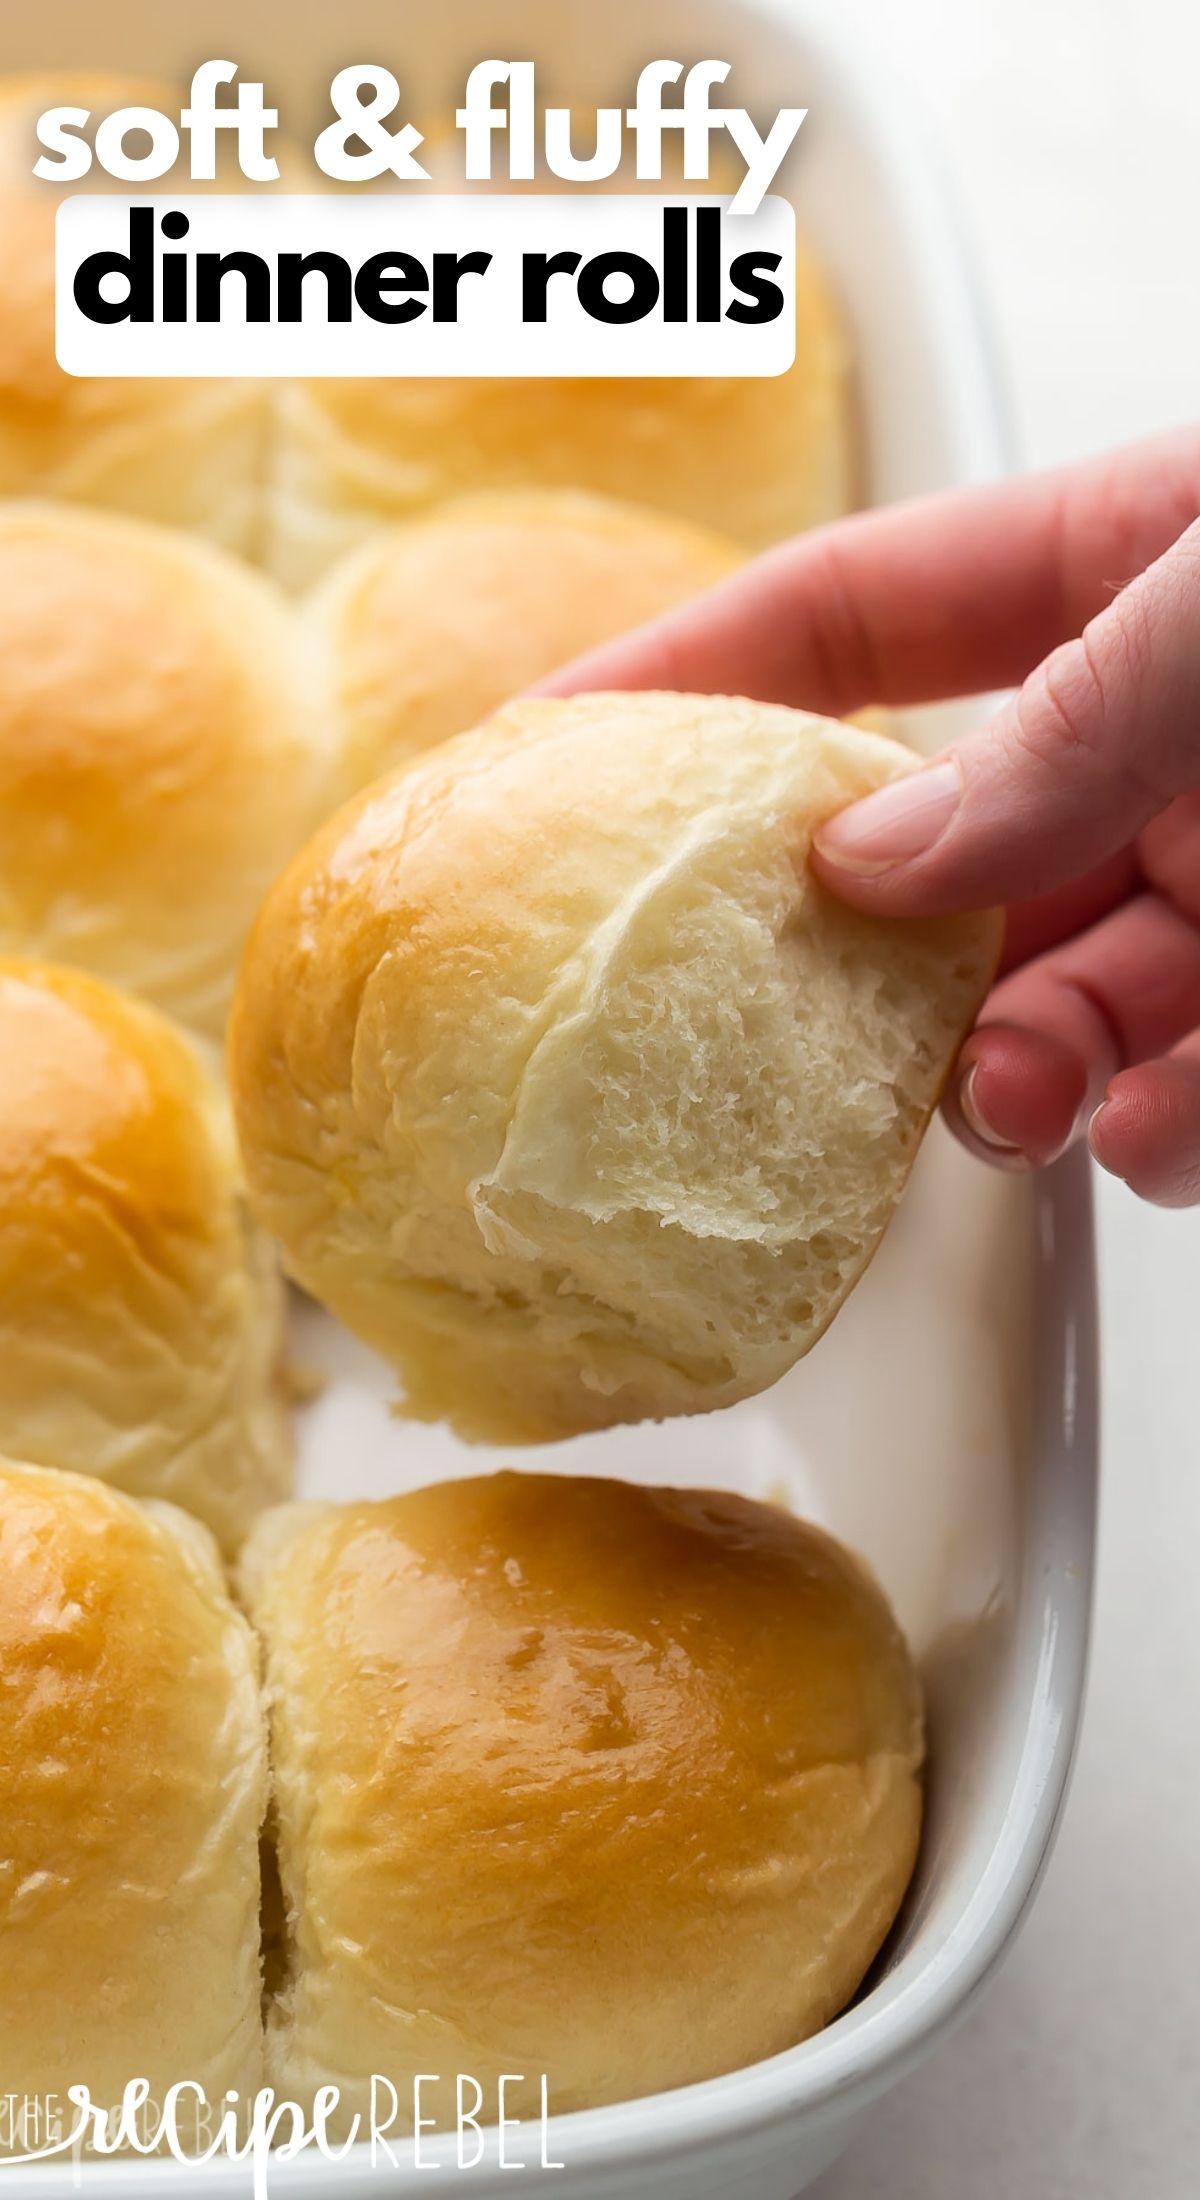
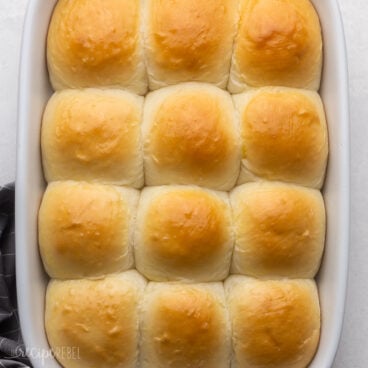
There’s nothing better than fluffy, homemade dinner rolls fresh out of the oven!
This easy Dinner Rolls recipe is based on my Mom’s Homemade Buns, but I’ve added some milk and an egg to give these rolls a richer flavor.
They are less rich than my Brioche Bun recipe, but the delicious hint of sweetness here is perfect for your Thanksgiving meal!
We’ll be letting the dough rise twice for these rolls, which helps them achieve that super light and fluffy texture.
This also means there’s a bit of hands-off time when you can be prepping the other parts of your meal.
The great thing about these dinner rolls is that they’re perfect for any occasion, from your Thanksgiving dinner or holiday meal to a weeknight dinner!
For more delicious bread roll recipes that are perfect for dinnertime, try my Homemade Crescent Rolls, Buttery (Whole Wheat) Bread Machine Rolls, and my Homemade Garlic Herb Dinner Rolls!
Ingredients Needed:

- Milk: we’ll use warm, whole milk to proof the yeast for the best flavor.
- Yeast: use instant or active dry yeast for this recipe.
- Sugar: use white granulated sugar to activate the yeast and also make the dough soft with a hint of sweetness.
- Water: you can use water or milk here to make the dough. Either works great! Milk will have a slightly richer flavor.
- Butter: use salted butter for the best flavor.
- Egg: to bind the ingredients, add richness and help the rolls rise.
- Salt: to enhance the flavor of the bread.
- Flour: all-purpose flour works well here, but you can substitute in some whole-wheat flour if you like for added fibre.
How to Make Homemade Dinner Rolls
This recipe is easy to make, and you can check out my recipe video to see exactly how I do it! Full instructions are also included in the recipe card below.
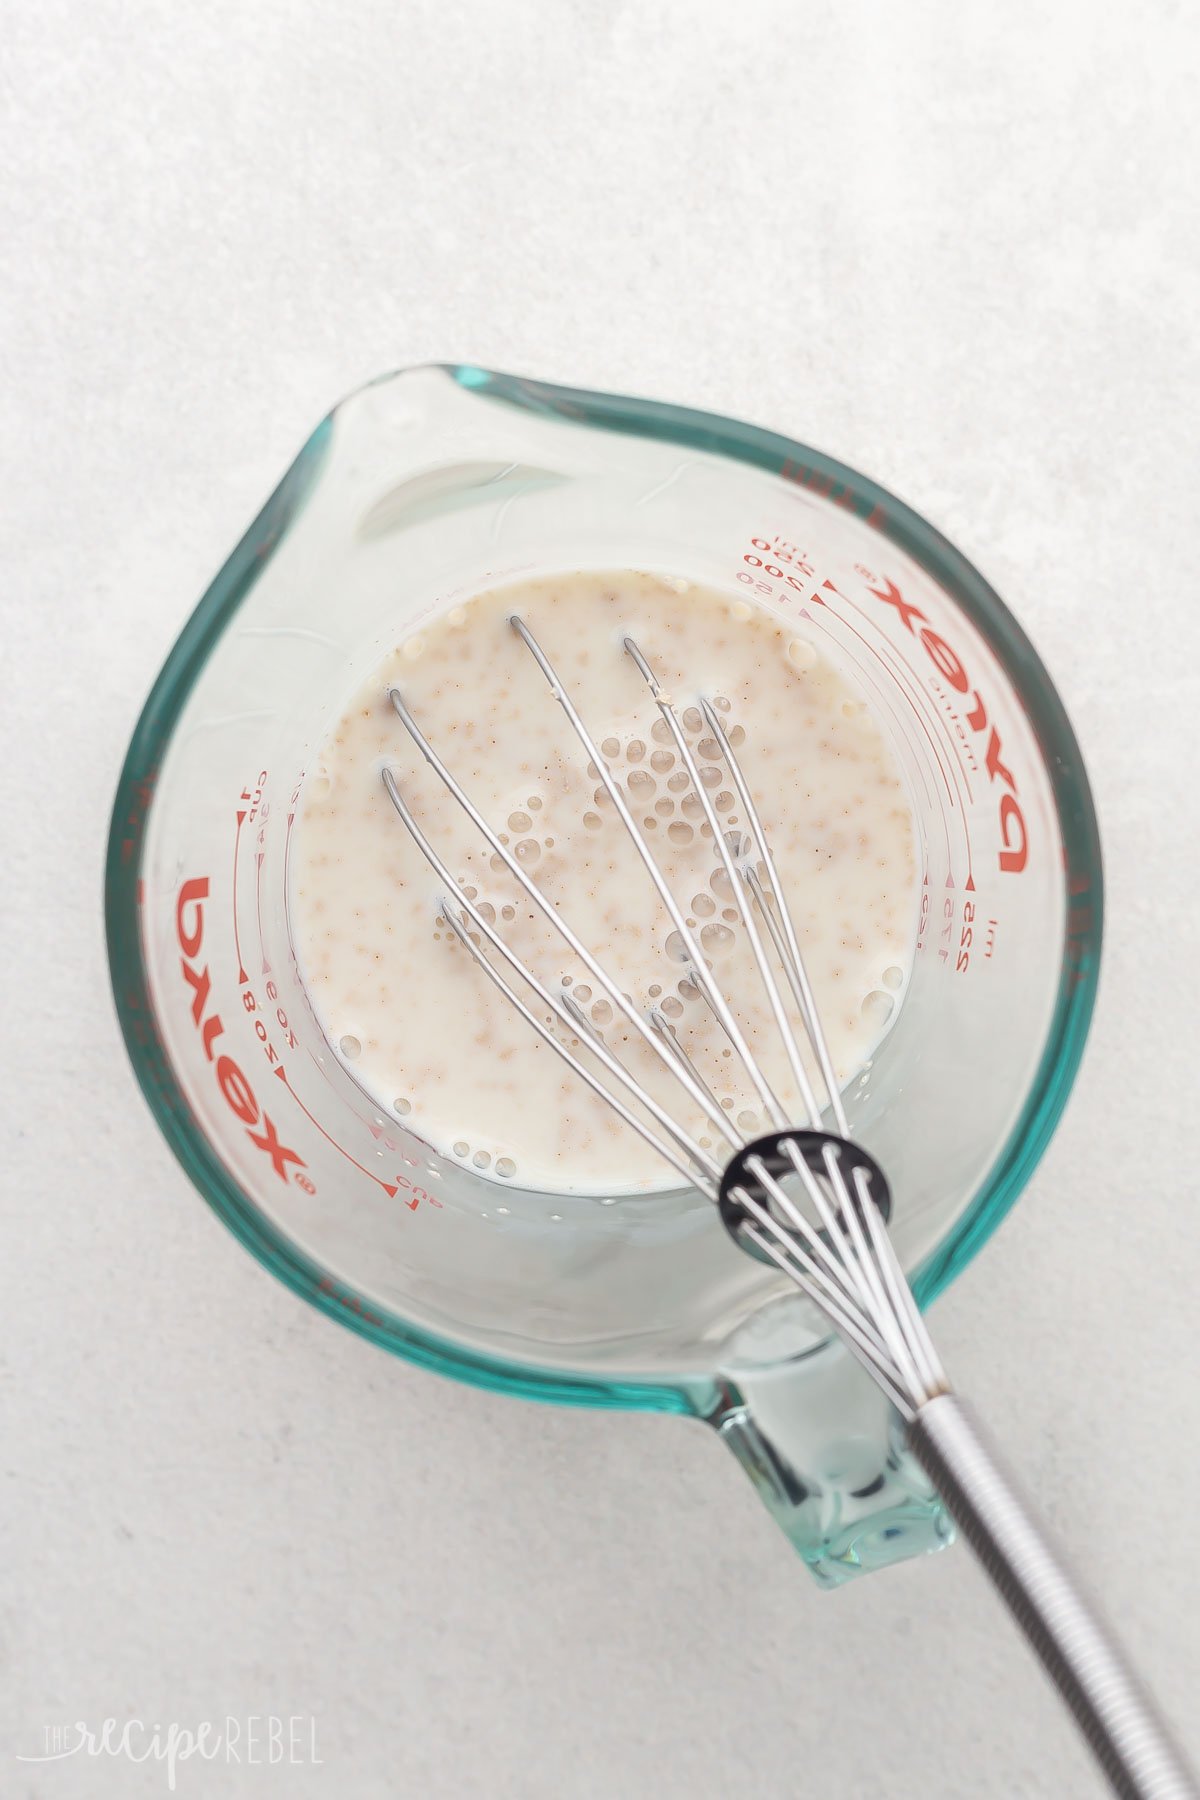
- Proof yeast: Whisk together the warm milk, yeast, and sugar.
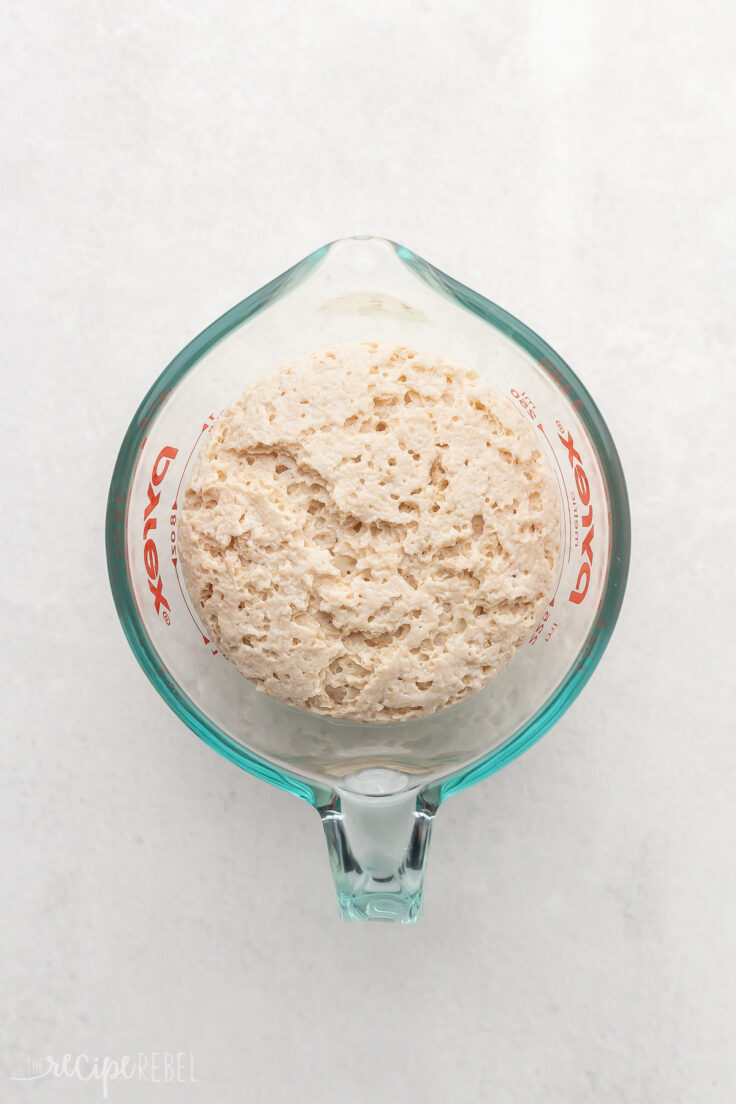
- Set yeast mixture aside: Let the mixture sit for 10 minutes or until bubbly—this is how you know your yeast is working.
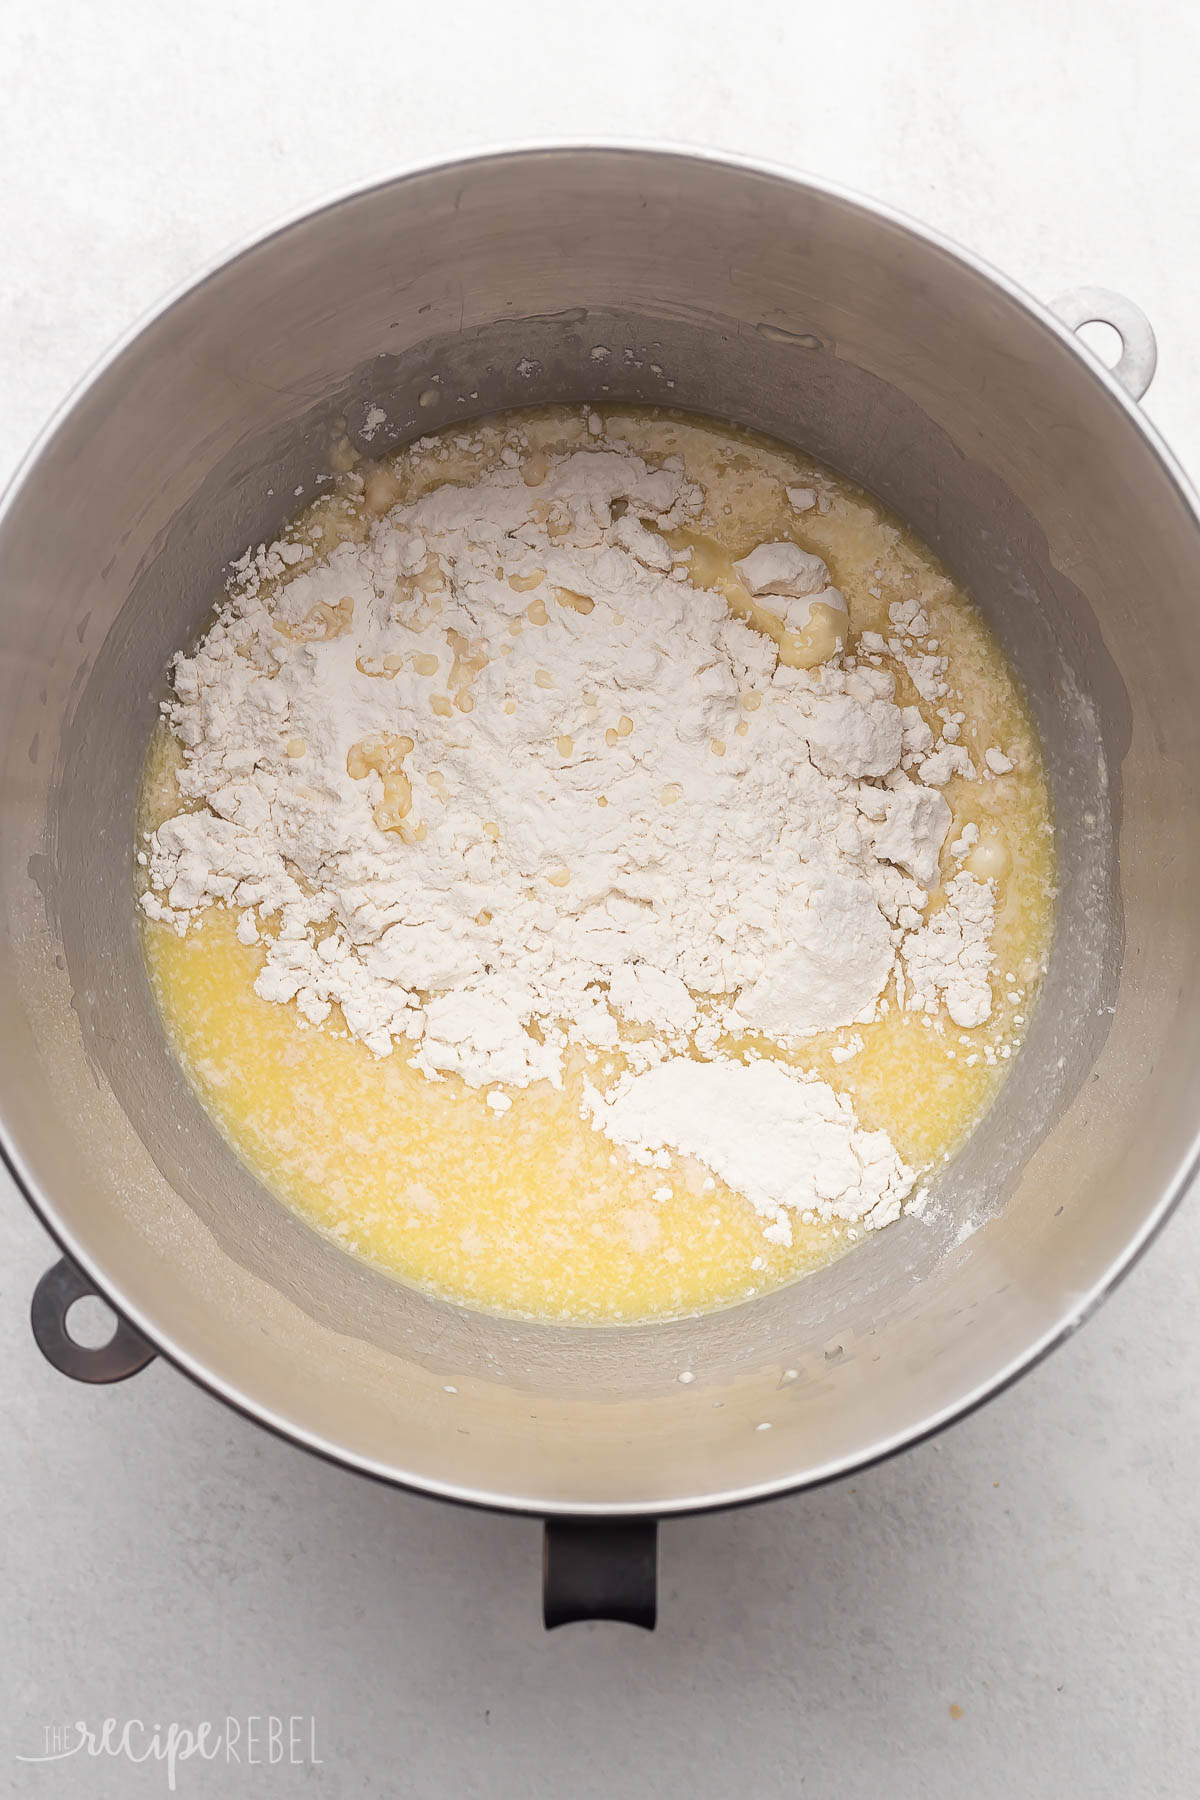
- Mix ingredients: In a large bowl, whisk together the warm water, butter, ⅓ cup sugar, egg, and salt. Then, add the yeast mixture and stir to combine.
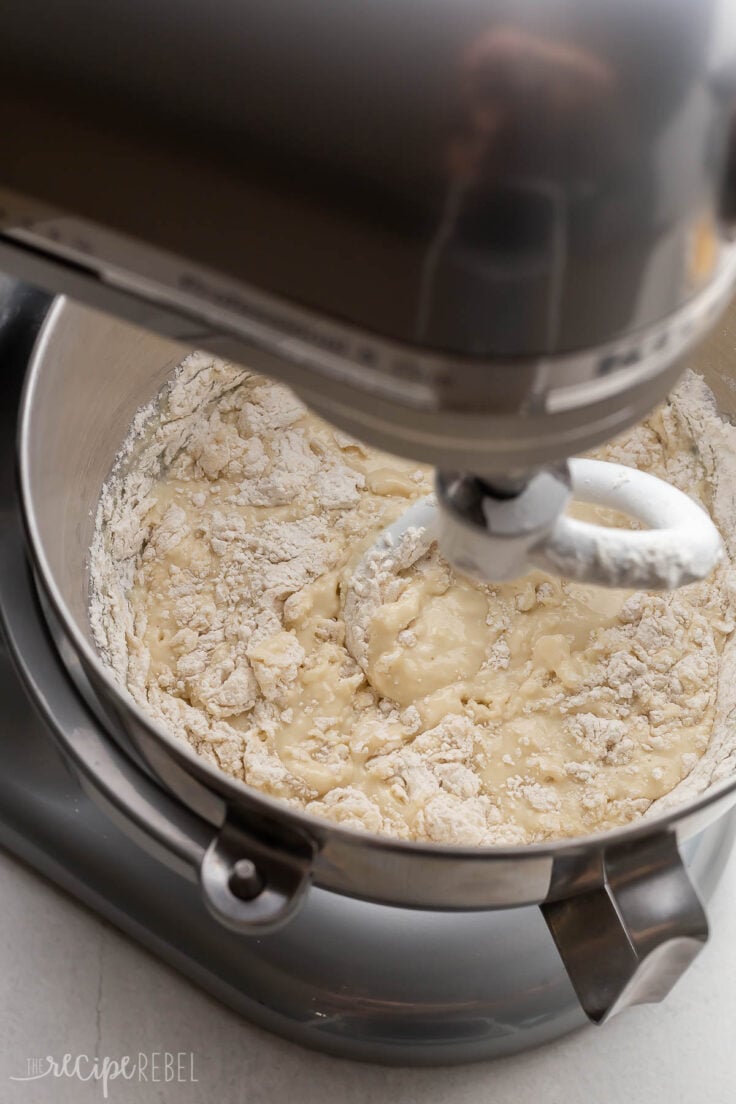
- Add flour: Add the flour, one cup at a time, and mix until nearly combined before adding more.

- Make dough smooth: Make sure your dough is soft and never stiff. Add flour gradually so it does not become tough.
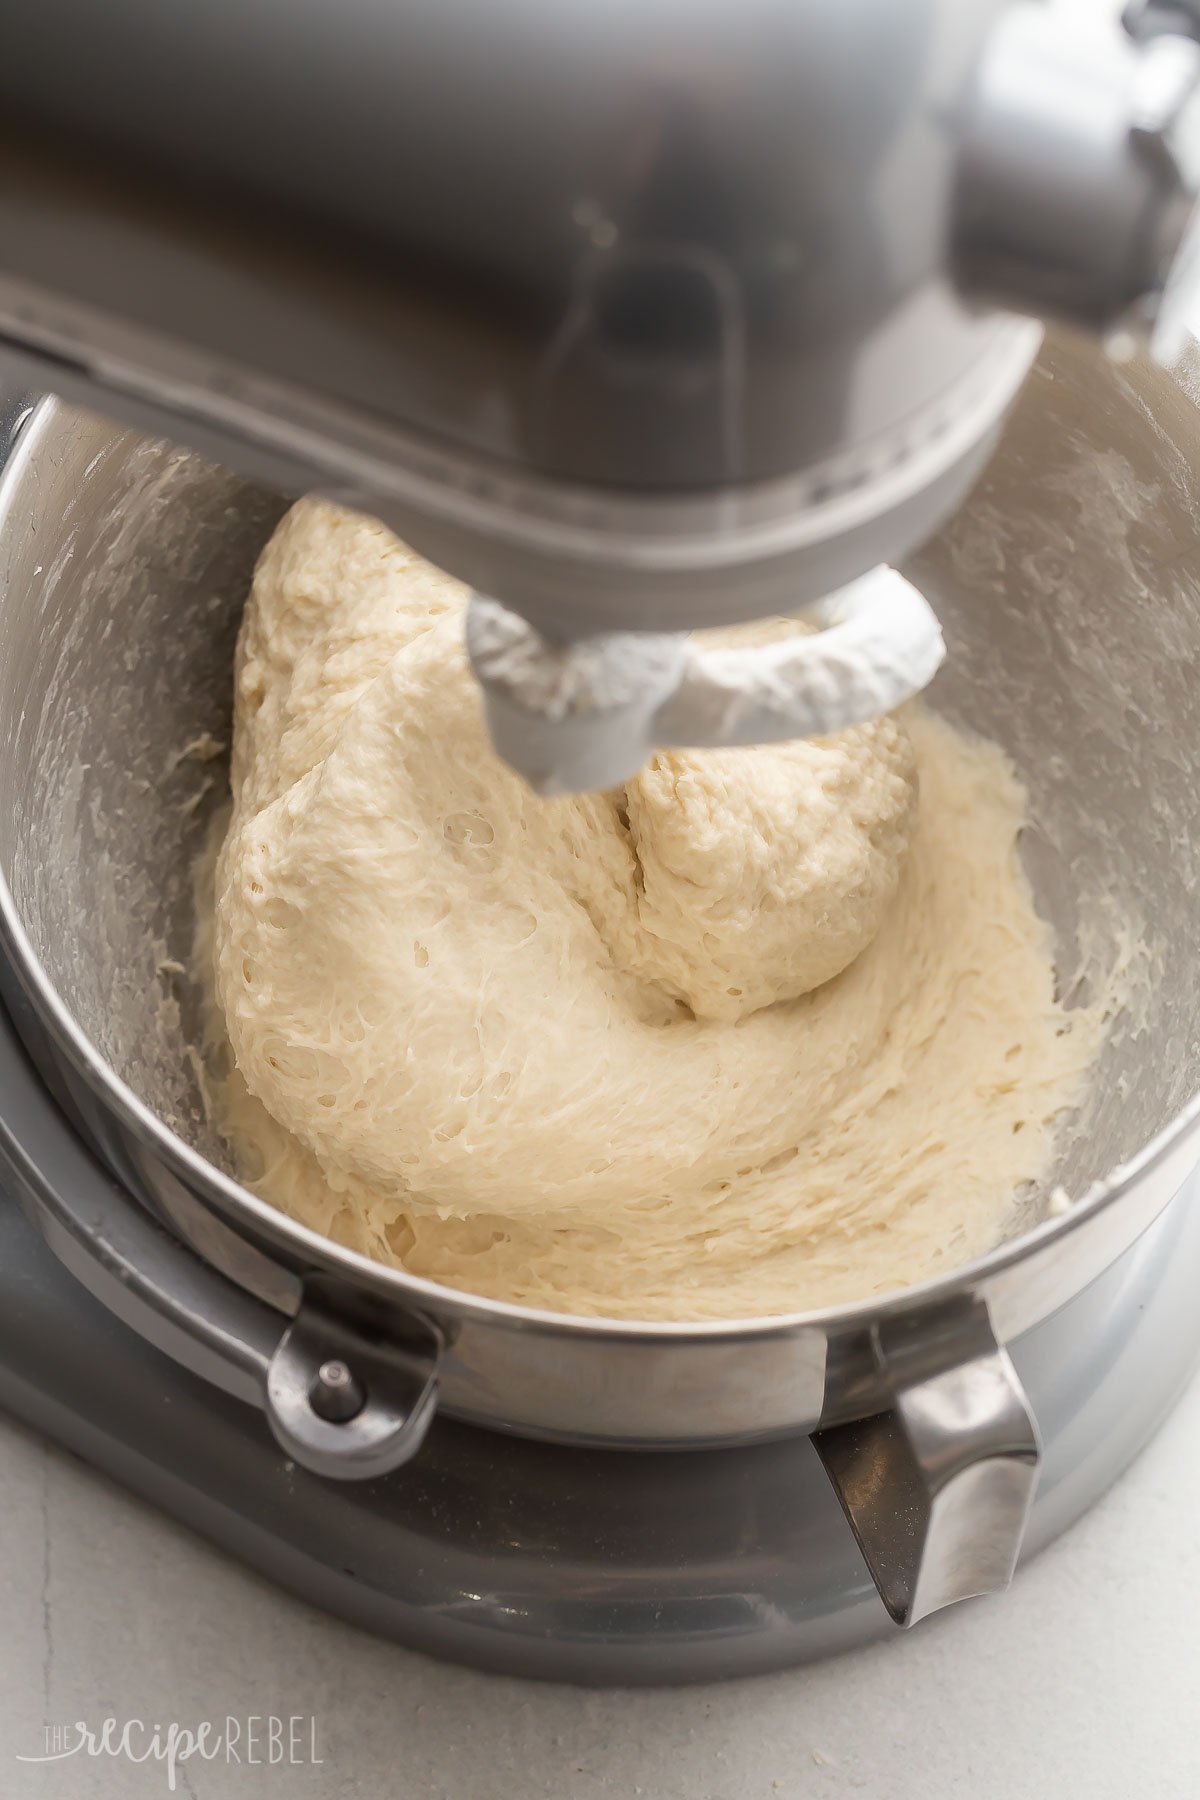
- Make dough ball: The dough should come together in a smooth, soft ball that does not stick to the sides of the stand mixer. It will be tacky but not overly sticky.
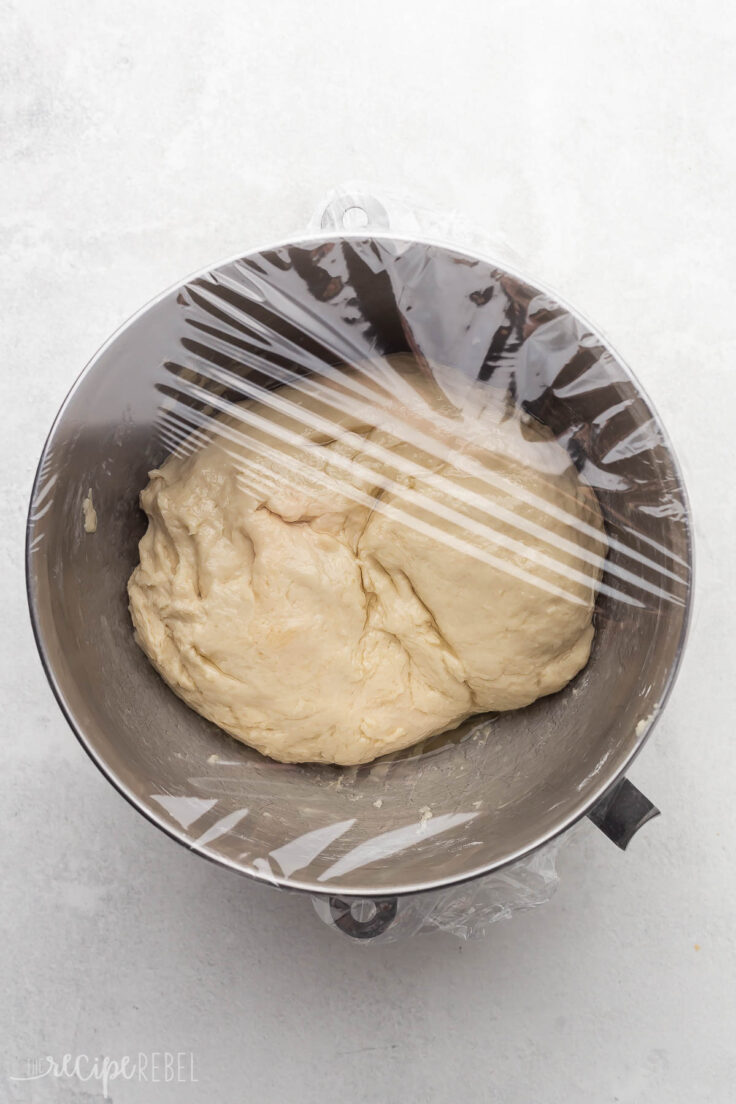
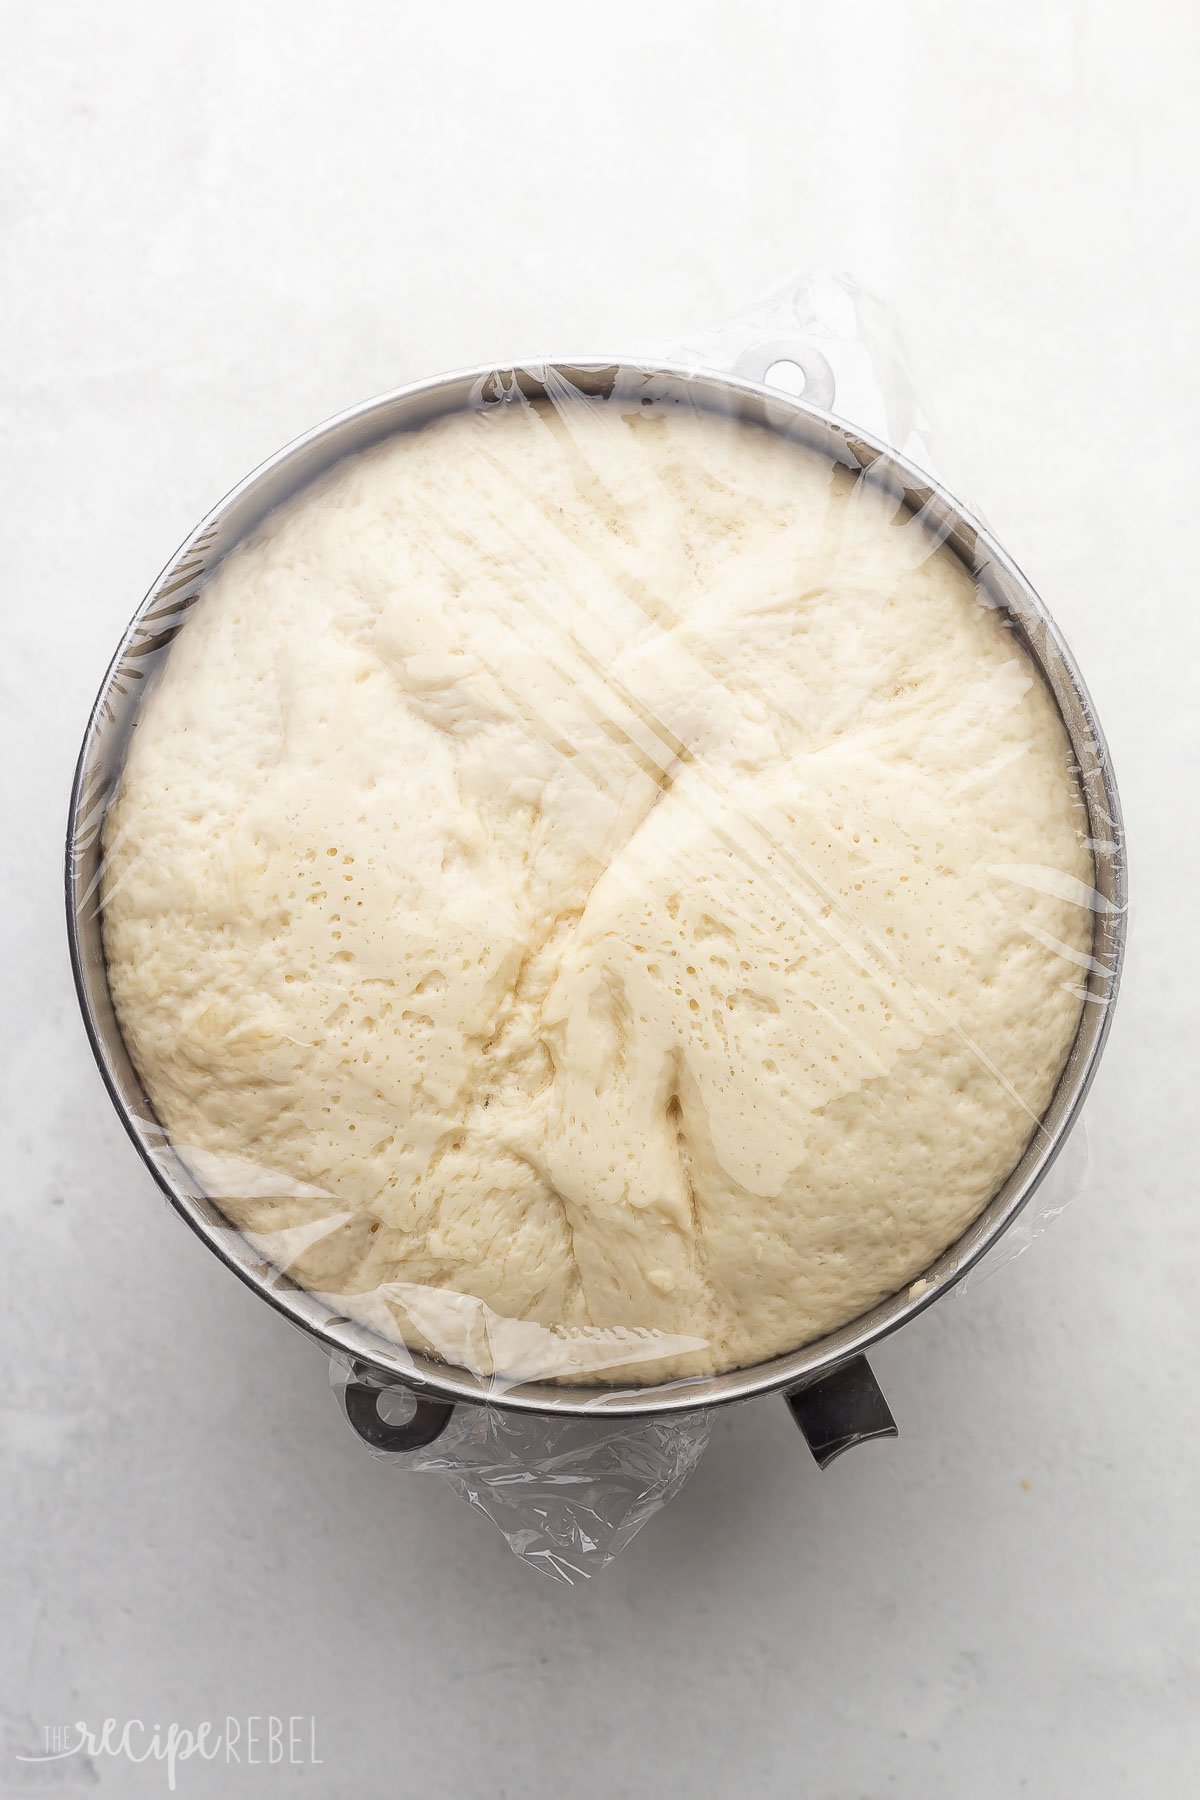
- Cover dough ball: Place the dough in a large, lightly greased bowl and cover with plastic wrap or a clean kitchen towel.
- Let dough rise: Set the bowl in a warm spot and let it rise until doubled.
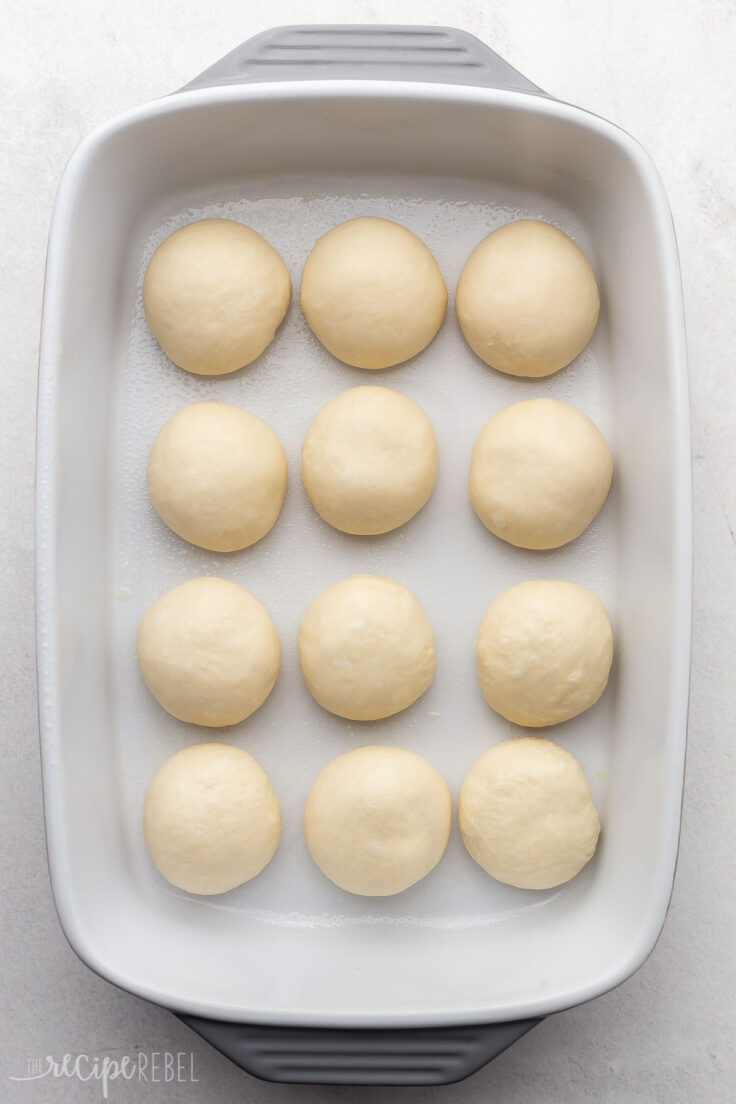
- Punch dough: Uncover the dough, punch it down, and roll out 20-24 rounds. Place them in two greased baking dishes.
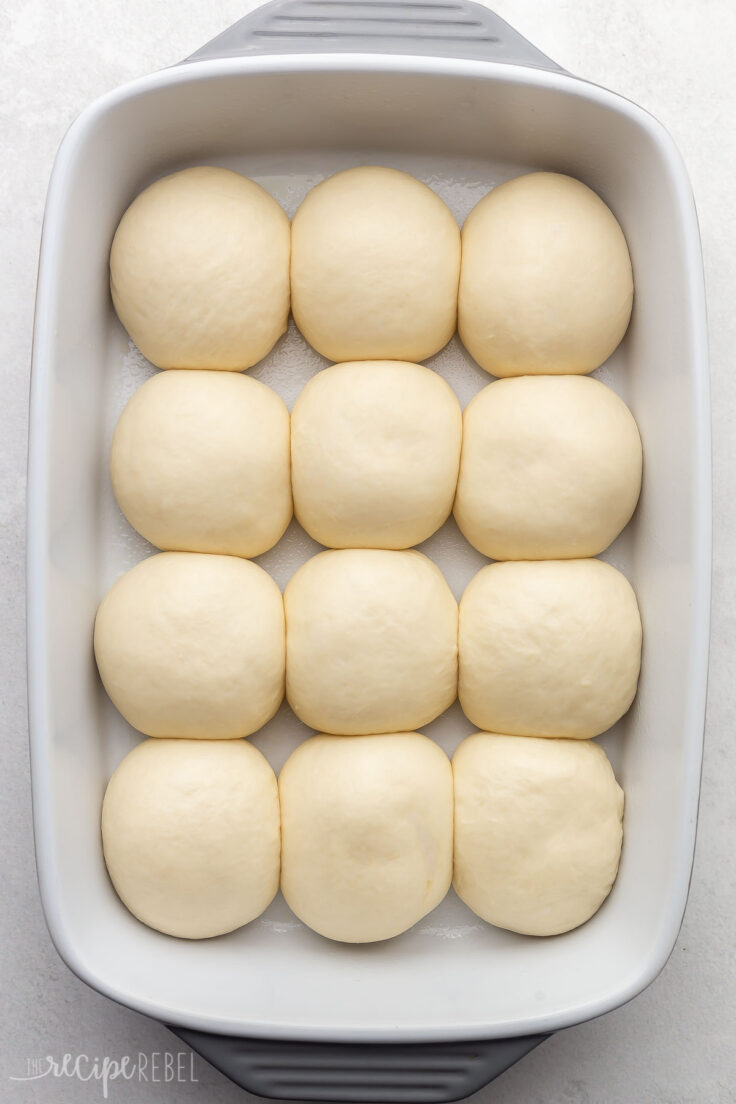
- Let them rise: Let the rolls rise again, covered with plastic wrap or a light towel that won’t stick, in a warm spot until doubled.
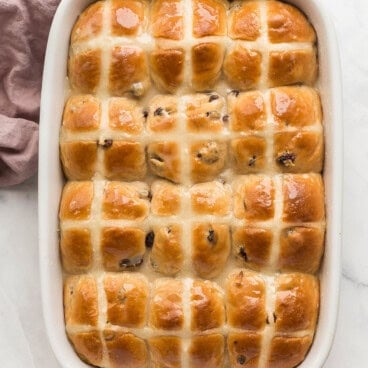
- Bake: Bake until light golden brown, brush with melted butter while warm, if desired, and serve.

Dinner Rolls FAQs
Yes! Make the dough balls in the baking dish, but cover them with plastic wrap before allowing them to rise, and refrigerate them for up to 16 hours. Leave them at room temperature for 1-2 hours before baking them.
Homemade rolls do not have the same preservatives as store-bought bread, so they should not be stored on the counter for more than a day, or you will find they are tough and not fluffy. I recommend freezing them once they are cooled if you do not plan on eating them within 24 hours.
The best way to store these homemade dinner rolls after they have cooled is to freeze them. Allow the rolls to cool completely, then place them in an airtight container or bag, and freeze them for up to 3 months. Thaw in the microwave on a piece of paper towel for 30-60 seconds before serving.

Tips and Notes
- Scrape down the bowl: Scrape the sides of the bowl as you add and mix ingredients to ensure you’re using everything in the bowl.
- Silicone mats: If you have silicone mats, you can line the baking sheets with them instead, but I prefer using greased baking sheets as it helps them to brown nicely.
- Baking pan: Ideally, bake these rolls in a deep baking dish or pan. We want the buns to touch as they rise and bake to get nice, tall rolls with soft sides and perfectly golden tops!
- Floured surface: Using a lightly floured surface to make your rolls will keep the dough from sticking to the worktop.
Dinner Roll Variations
- Change the shape. You can shape the bread dough into any kind of roll you’d like. Use this recipe for hot dog buns, garlic knots, twists, or any other shape you like. The yield of rolls will differ depending on the shape and size of the rolls you make.
- Add some cheese. Add 1 cup of cheddar cheese, Mexican cheese mix, or mozzarella cheese to the dough to make these rolls cheesy, or sprinkle some cheese on top a few minutes before the end of the baking time.
- Make them herby. Mix 1 teaspoon of garlic powder and 2 teaspoons of dried herbs like basil, parsley, or rosemary to make garlic and herb rolls.

Serving Suggestions
Serve warm dinner rolls with any main dish and other side dishes to make a completely delicious meal the whole family will love.
Try them with my Baked Tuscan Chicken Breasts, this Perfect Instant Pot Roast Beef Recipe, or my Crockpot Turkey Breast for a yummy feast!
Serve some other delicious sides with them, like Cheesy Baked Asparagus, Roasted Carrots, Cheesy Broccoli Casserole, or my Garlic Parmesan Scalloped Potatoes and Carrots Recipe.
More Homemade Bread Recipes You’ll Love


Homemade Dinner Rolls Recipe
written by Ashley Fehr
Ingredients
To proof the yeast
- ½ cup warm whole milk, (105-110 degrees F — warm but not hot)
- 1 tablespoon instant or active dry yeast, (either works in this recipe)
- 1 teaspoon granulated sugar
To make the dough
- 2 cups warm water, (or milk)
- ½ cup melted salted butter
- ⅓ cup granulated sugar
- 1 egg
- 1 tablespoon salt
- 6-7 cups all purpose flour
Instructions
Proof the yeast
- In a small bowl or liquid measuring cup, whisk together the warm milk, yeast and sugar.
- Let sit for 10 minutes or until bubbly — this is how you know your yeast is working. This step is actually not required when using instant yeast, but I do it anyways, so that I know my buns will be nice and fluffy.
Prepare the dough
- In the bowl of a stand mixer (or a very large bowl if you are kneading by hand), whisk together the 2 cups warm water, butter, ⅓ cup sugar, egg and salt.
- Add the bubbly yeast mixture and stir to combine.
- Place the bowl in the stand mixer and put the dough hook on the machine. You can also knead by hand.
- Add the flour, one cup at a time, and mix until nearly combined before adding more. You can use all purpose or whole wheat or a combination. Start with 4-5 cups flour, mixing until each is incorporated.
- The closer you get to your dough being ready, the less flour you will add at once. We want a smooth, soft dough, never stiff, so we need to watch and stop adding flour at just the right moment.
- Add up to 6-7 cups flour total, very gradually at the end, until the dough comes together in a smooth, soft ball and does not stick to the sides of the stand mixer. When you touch it, it should be smooth and slightly tacky but not stick all over your hands.
- Place dough in a large lightly greased bowl and cover with plastic wrap or a clean kitchen towel.
- Set in a warm spot (I use the oven with the light on — turn the oven on to preheat for 2-3 minutes before turning off and adding the dough) and let rise until doubled, about 1.5 hours.
- Uncover dough, punch down, and roll out 20-24 rounds — smoothing the top and pinching the seam in the back to smooth (see video for additional details).
- Place in two lightly greased 9×13" baking dishes (12 in each) and let rise (cover with plastic wrap or a light towel that won't stick) in a warm spot for 30 to 90 minutes (instant yeast will be quicker) until doubled.
- Bake at 350 degrees for 15-20 minutes, until light golden brown.
- Brush with melted butter while warm if desired.
Video
Notes
- Water and milk: for either of the liquids required in this recipe you can use water or milk. Milk will give a softer, sweeter, richer roll. Water is a great option if you are dairy free.
- Butter: you can make this recipe with unsalted butter or even vegan hard margarine if you need them to be dairy free.
- Egg: the egg adds structure and richness, but you can leave it out if there are allergies to take into consideration
- Flour: you can use either all-purpose or whole wheat flour in this recipe, or a combination. I do not recommend 100% whole wheat flour as the rolls may be dry and tough.
- Store: Homemade rolls do not have the same preservatives as store-bought bread, so they should not be stored on the counter for more than a day, or you will find they are tough and not fluffy.
- Freeze: These rolls freeze perfectly; just cool them, place them in an airtight container or bag, and freeze them for up to 3 months. Thaw in the microwave on a piece of paper towel for 30-60 seconds before serving.
Nutrition
Nutrition information is automatically calculated, so should only be used as an approximation.
Want to save this recipe?
Create an account easily save your favorite content, so you never forget a recipe again.
Tried this recipe?
Tag @thereciperebel or hashtag #thereciperebel — I love to see what you’re making!
Tag @thereciperebel
Mikala Kinney says
Can these be made the night before and baked the next day?
Ashley Fehr says
I haven’t actually tried. My preferred method for making ahead would be to bake completely, then cover with foil and store at room temperature until the next day. Keep covered and reheat in a low temp oven, around 225-250 degrees F until warm.
Kris says
This recipe is awesome! I tried it and came out great!
The Recipe Rebel says
Thank you Kris!
Anita says
What can I use to replace the egg in the recipe?
Erin says
How long do you knead the dough in the mixer after you’ve gotten it to the right consistency?
The Recipe Rebel says
Hi Erin, in Step 6, once you get it to the point “comes together in a smooth, soft ball and does not stick to the sides of the stand mixer” you are done mixing.
Libby Reed says
I seem to be having some difficulty with stand mixer. What speed do you use? (Kitchenaid) My dough never gets to the point of not being sticky. Even when I add more flour. Seems like it’s just to “liquidity”. Maybe not kneeding enough? Help!
Ashley Fehr says
Hi Libby! That does seem strange. I use a pretty low speed because it makes less of a mess when adding flour. It’s okay if the dough is soft and tacky, we just don’t want it to come off on our hands when we touch it
Claudia says
This is my go to recipe. I stopped buying bread because I can use this recipe for everything. I make larger rolls and space them out so I end up with sandwich rolls and they’re delicious.
The Recipe Rebel says
Great to hear, Claudia!
Diane says
I haven’t tried yet but want too. Can you cut this recipe in half?
The Recipe Rebel says
You probably could, Diane, or just make them and freeze them. Enjoy!
Janet says
Can I use bread flour for this recipe? Is there any advantage or disadvantage either way?
The Recipe Rebel says
I haven’t tried it myself Janet, but you probably could. They are normally a 1:1 substitute.
Irma says
These look great! Can plant based milk be used?
The Recipe Rebel says
That should be fine!