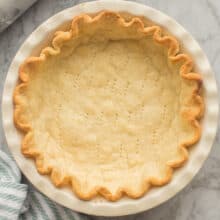
This easy Pie Crust recipe is perfect for any pie! Make it by hand or in the food processor, plus tips for storage and freezing.
See the step by step video down in the recipe card.

Table of Contents
Everyone needs a perfect, easy pie crust recipe, and it’s time to share this one!
I’ve been using this pie crust recipe for years now (in this Coconut Cream Pie, this Banana Cream Pie and this Chocolate Cream Pie to start!), and it’s never failed me.
With a simple combination of flour, butter, sugar, salt and water, it’s easy to throw together and really makes those homemade pies stand out!
It works in both sweet and savory dishes (like this homemade Chicken Pot Pie!), and is great for other uses like tarts, galettes, quiche and more!

This Pie Crust recipe is also my 6 Ingredient Staple this recipe, which means I’ll be sharing all kinds of pie and other recipes we can use it in!
How to make pie crust:
I use my food processor whenever I make pie crust, but it is almost as easy to make by hand! Here I’ll include tips for both, as the method is the same overall.
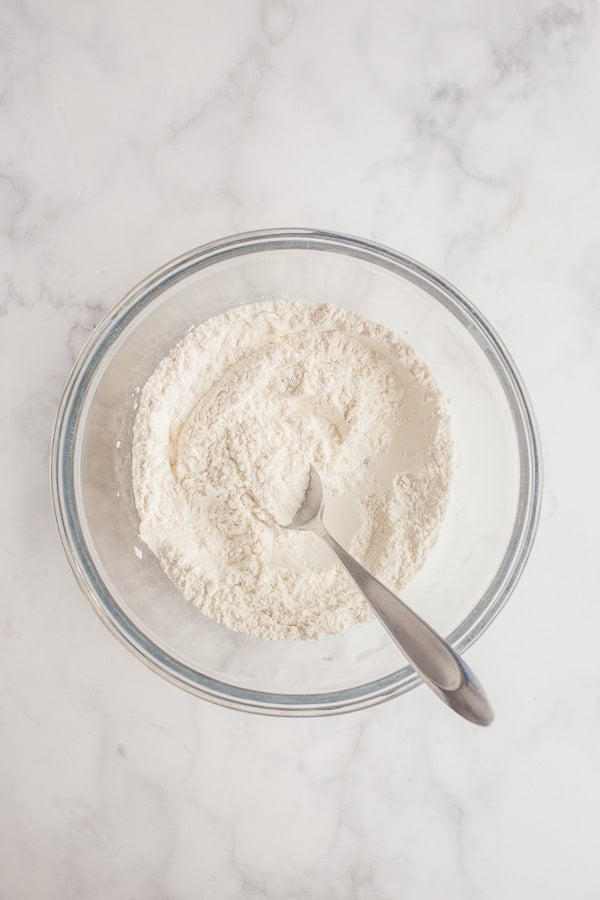
- Start with the dry ingredients: flour, sugar and salt. Mix them together!
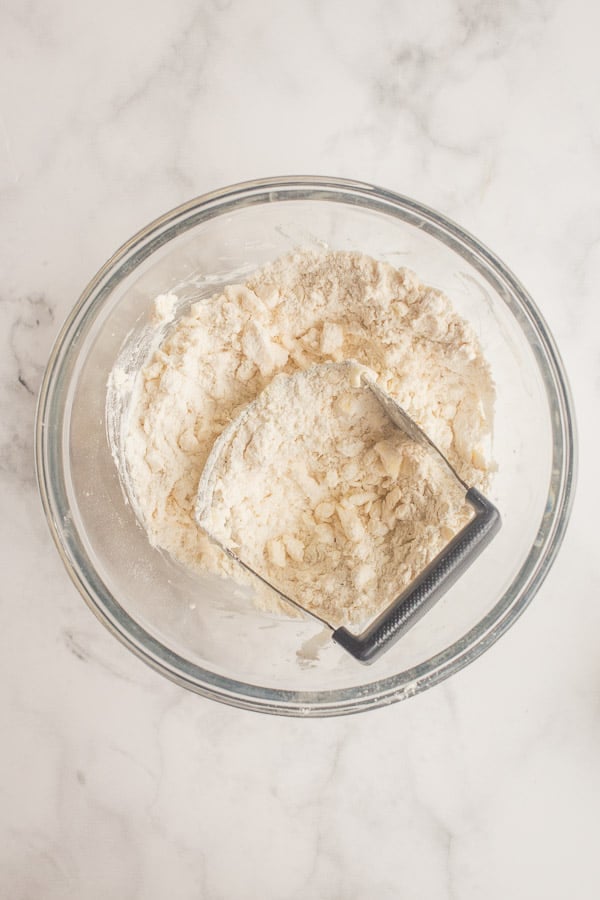
- Add cold butter: cut it into small cubes and break it up with a pastry cutter or in the food processor, by pulsing on and off for a couple seconds until the butter is broken into pea-sized chunks.
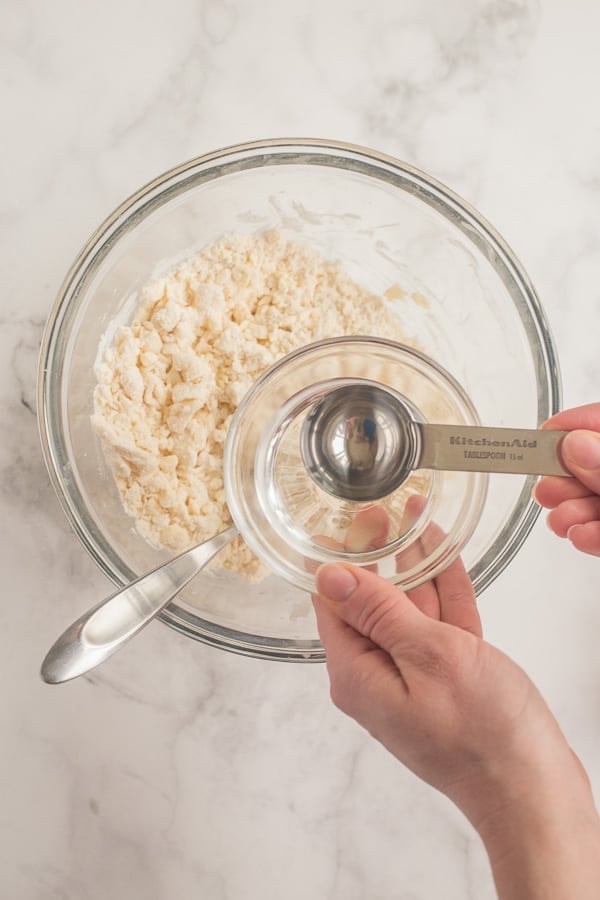
- Add cold water so that the butter does not become soft: and add just a little at a time until the pie dough comes together! Use your hands or the food processor (again, always use the “pulse” button and not “on”) to work it until a ball forms.
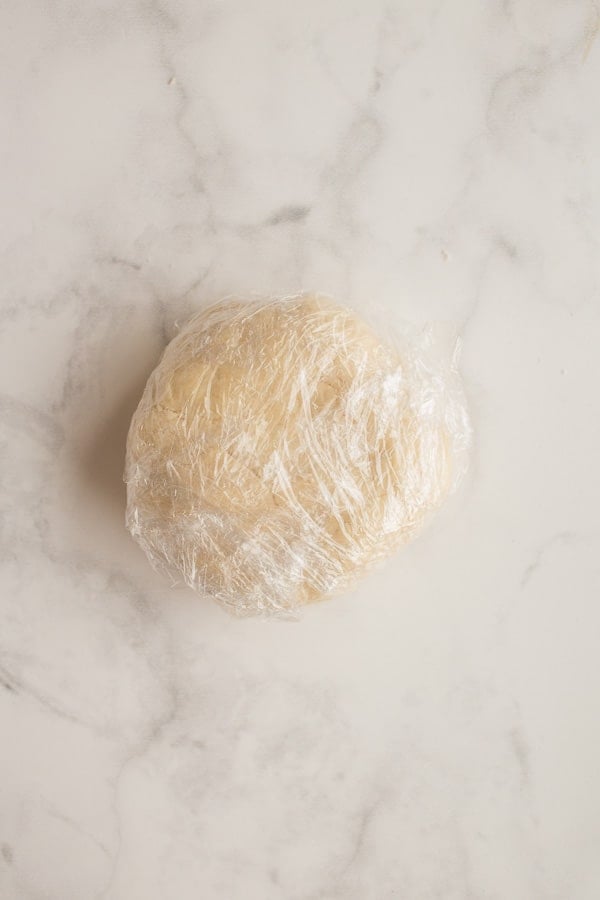
- Press the pie crust into a thick disc, wrap in plastic wrap and refrigerate or freeze until well chilled. I confess I have skipped this step a time or two in a pinch, but it really is going to give you the best results!
- Roll it out and fill your pie plate! See tips below for blind baking, or fill and bake until golden brown.
Can I use whole wheat flour?
Absolutely!
Keep in mind that whole wheat flour has a nuttier flavor and slightly different texture, which is why I prefer to use only half whole wheat flour instead of 100%.
Most often, I use all purpose flour for pie crust, because pie is a treat! All purpose flour will have the best texture and flavor overall.
Can I use shortening instead of butter?
Yes!
Butter is my go-to, but you can use all shortening or you can go half and half.
You can also use lard or a combination, as long as the ratio of flour to fat is the same.
I have found that all-butter pie crust is the easiest to roll — I’ve had a really hard time with shortening pastry crumbling and being difficult to work with.
This is just my experience, but I butter works perfectly for me every time!
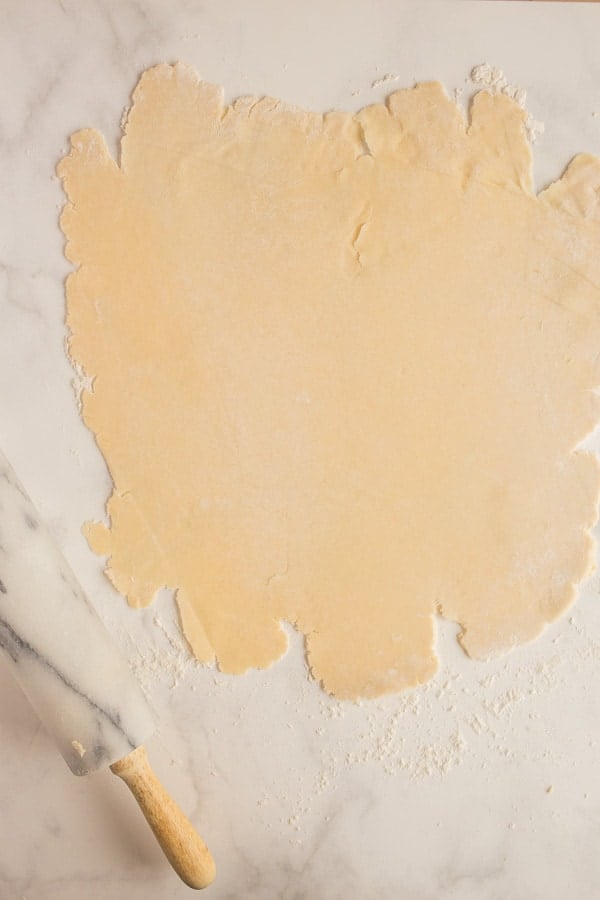
Tips for rolling out pie crust:
As I mentioned above, I’ve had some trouble rolling out shortening pie crust and getting it smooth and not crumbly and full of cracks.
For this reason, I wanted to share a few extra tips to help if you’re having trouble!
- We have quartz counters in our kitchen, and, like marble they are naturally cooler in temperature than vinyl or others. I have found that rolling out pie crust on my counters is a dream, but on the vinyl backdrop when we shot this video, it was a struggle. Obviously, you can’t just swap your counters, but if you make a lot of pie it might be worth investing in a small marble board for rolling pastry.
- Using just the right amount of flour is key, as we don’t want it to stick but we also don’t want it to be dry and have difficulty crimping. Start with a light amount, and reapply and reposition your crust as you roll it.
- If you’re worried about transferring the crust to the pie plate (or using too much/too little flour), you can roll out your pastry on a piece of wax paper or parchment. This way, you can just pick it up and place it right over your dish!

How to blind bake a pie crust:
Blind baking a pie crust is something every baker should know how to do!
Blind baking is baking the crust entirely without any filling, so that we end up with an empty but fulled cooked pastry.
We blind bake pie crust when making cream pies, or some fruit pies (this Strawberry Cream Cheese Pie is one!) — any pie where the filling is not cooked in the oven.
To blind bake a pie crust, you could just throw it in the oven at 425 degrees F and bake until cooked.
However, this isn’t the best method! Blind baking is trickier to master because it can shrink and shrivel when there’s nothing to help it hold its shape.
Here’s how we do it:
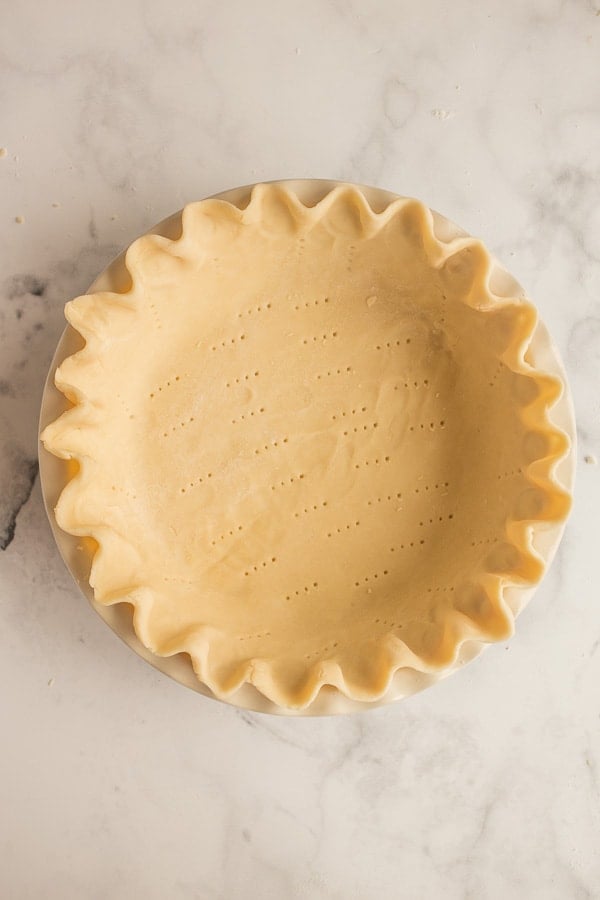
- Press your pie dough into the pan however you want it to look.
- Use a fork to poke holes in the bottom and sides of the pie crust (which allows steam to escape and can help prevent bubbles).
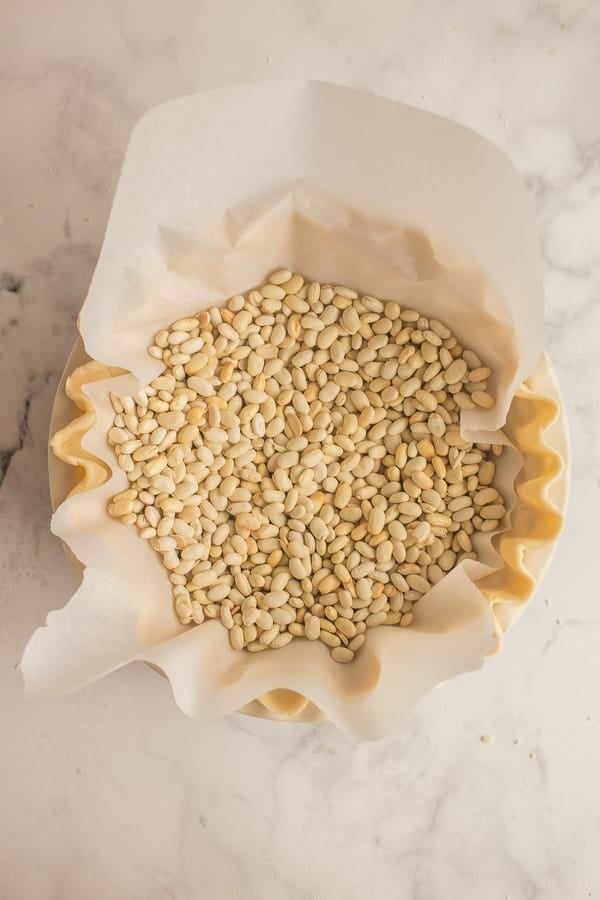
- Place a piece of parchment paper in the middle of the crust, and pour in some dried beans or pie weights.
- Bake at 425 degrees F for 10-12 minutes until the edges are light golden brown, then remove the pie weights and continue baking for 5-10 minutes until the bottom is cooked through.
- If desired, you can brush an egg wash (whisk an egg with a tablespoon of water) over the bottom of the crust before baking the bottom to keep the crust crispier and prevent it from getting soggy when filled later on.
How to store pie pastry:
Pie pastry is one of those things I love to have stashed away in the fridge or freezer! They are a big help when I need a quick dinner or dessert, and I don’t have to turn to store-bought if I have some on hand.
In the refrigerator:
Wrap your pie crust disc in plastic wrap and refrigerate for 3-4 days before using.
In the freezer:
Pie dough is easily frozen, as well! Simply place your wrapped disc of pie dough in the freezer for up to 3 months.
To use, let thaw overnight in the refrigerator before rolling out and using to make your favorite pies.

Pie Crust Recipe
written by Ashley Fehr
Ingredients
- 1 ¼ cup all-purpose flour (163 grams)
- 1 tsp sugar
- ½ tsp salt
- ½ cup cold unsalted butter, cubed (112 grams)
- 3-4 tablespoons cold water
Instructions
- NOTE: this recipe is for a single pie crust. If you need a bottom and a top, make a double batch.
- Stir together flour, salt and sugar in a large bowl. Cut in cold butter with a pastry cutter (or use your hands!) until crumbly — the butter should be in roughly pea-sized chunks. (FOOD PROCESSOR: combine flour, salt, sugar by pulsing a few times. Add in butter cubes and pulse until crumbly)
- Stir in 2-3 tbsp cold water and work dough with your hands until it comes together in a ball, adding in additional ice water if necessary. (FOOD PROCESSOR: Add water and pulse until dough starts to form a ball, then press dough together into a ball)
- Shape into a fat disc and wrap in plastic wrap. Refrigerate for at least 1 hour — see tips above for making ahead and storing for later.
- Preheat oven to 425 degrees F. Roll out dough so that it is a couple inches larger than the pie plate you're baking it in.
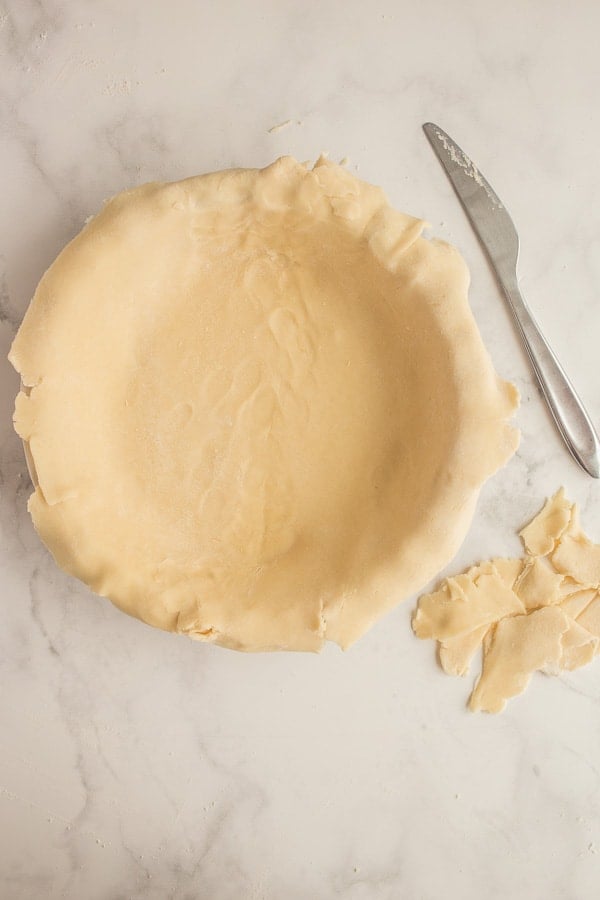
- Place the pie crust in pie plate, press down and up the edges. Trim only the edges that are very long. Fold the overhang under and pinch to form a very thick edge (see video for visual). Crimp as desired.
- Fill with fruit filling, or blind bake (empty). To blind bake, place a piece of parchment paper in the center of the unbaked pie crust. Fill with pie weights or dried beans.
- Bake for 12-15 minutes until edges are light golden brown. Remove pie weights and parchment and bake for another 10 minutes or until bottom of pie crust looks dry and is starting to brown. Cool and fill as desired.
Nutrition Information
Want to save this recipe?
Create an account easily save your favorite content, so you never forget a recipe again.
Tried this recipe?
Tag @thereciperebel or hashtag #thereciperebel — I love to see what you’re making!
Tag @thereciperebel
Faith Frees says
My crust is cracking?
Faith Frees says
Why is my crossed cracking when I roll it into a ball and flatten it out? Is it supposed to do that?
Janine says
Does this recipe work for an 11 inch quiche pan?
The Recipe Rebel says
Hi Janine! It might?? I just haven’t tried it myself so I can’t say for sure. If you decide to experiment, let me know how it goes!
Kathy says
How important is unsalted butter as opposed to salted butter?
The Recipe Rebel says
I like to use unsalted butter to control the amount of salt in recipes, but you could use salted.
Eleanor Anton says
Very good recipe!
The Recipe Rebel says
Hi Eleanor! So glad you enjoyed the recipe! Thank you for this kind review!
Winsome says
Hi, what size is this pie crust? I need a 9” pie crust.
Ashley Fehr says
This recipe will fit a 9″ pie plate well
Brenda says
I always have a problem when I make pie. The bottom crust never cooks completely. Should I prebake it? Do you have any suggestions?
Ashley Fehr says
Hi Brenda! It depends on the kind of pie. If it is a fruit pie where the fruit is baked in the pie crust, then I never prebake because it will most likely burn around the edges. With a cream pie or pie that doesn’t get baked after filling, it should definitely be pre baked.
Sara Welch says
These are some great tips! Looking forward to giving this a try; looks perfect!
Ashley Fehr says
Thanks Sara!
Caitlyn Erhardt says
This was the perfect base for my cherry pie. The texture and flavor was perfect!
Ashley Fehr says
Thanks Caitlyn!
Jessie says
This is an amazing pie crust and I love the freezing tip!
Ashley Fehr says
It’s so handy!
AISilva says
What an amazing pie crust recipe. I appreciate the background on blind baking as well. My kids have been asking for more pies lately so I can’t wait to use this recipe for them!
Ashley Fehr says
My pleasure!
Amanda Dixon says
This is a great pie crust recipe! The dough was surprisingly easy to work with, and it had the best flaky texture.
Ashley Fehr says
Thanks Amanda!