All food bloggers have those recipes that they think are going to nuts, and no one really seems to notice them.
All food bloggers also have those recipes that get such an incredible response, it’s kind of mind-blowing.
This Oven-Fried Chicken recipe is one those recipes for me.
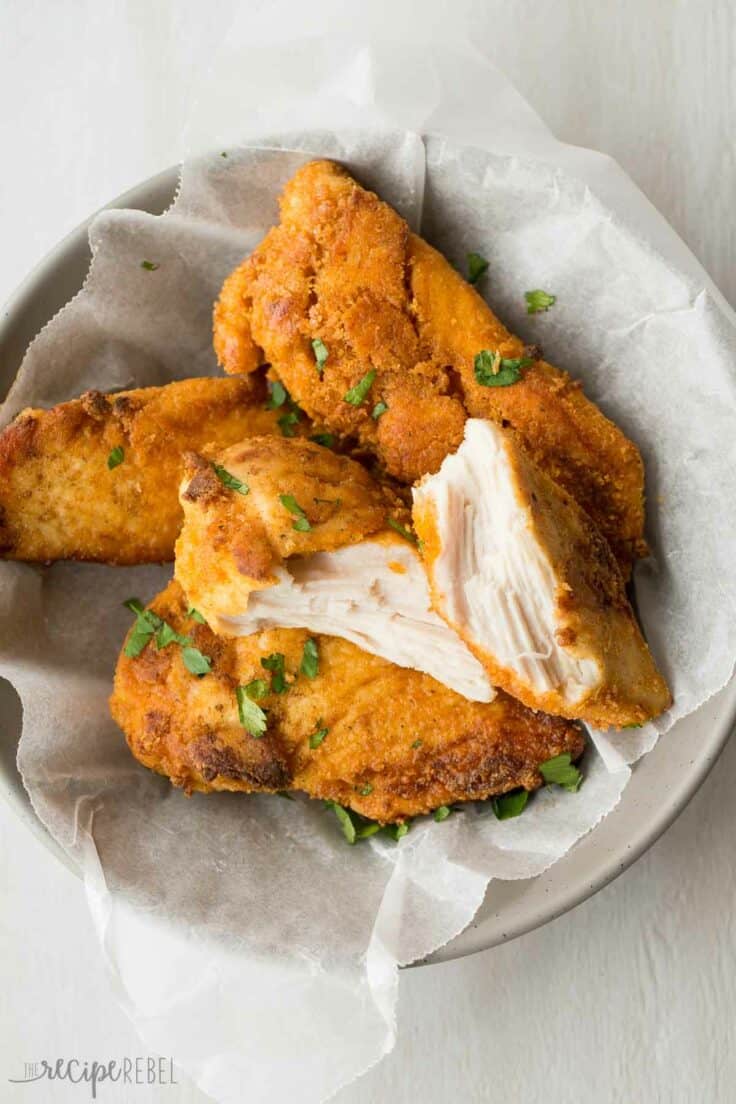
It’s a recipe we’d made several times before I even started a food blog, and one that I knew I wanted to share with you shortly after I began. We love this recipe. It has great KFC flavour, but it uses lean chicken breasts, has no fatty skin and is still moist and juicy without being greasy.
The response from readers has been outstanding. The recipe has over 52,000 pins, which is nothing for some bloggers out there, but for me? Nothing else has ever come close, keeping in mind that I only started my blog in March 2014.
But with so many people sharing it, and therefore more and more people making it, there are bound to be some that have mixed reviews. Some of you commented that you made it, and you loved it. Awesome! Others commented that they found it a little greasy, or the coating fell off, or had other issues with the recipe.
I had never had any of these issues with the recipe before, but after hearing from so many of you, I wanted to do a little experiment and test some different methods for making oven-fried chicken, to be sure that I was giving you reliable information.
I never want you to feel like the recipes here are completely unattainable, and I never want you to feel like I’m misleading you. I started this blog because I want to share with you the best food I’ve experienced, and I appreciate your feedback and comments so that I can help you figure out what’s going on when you try something that doesn’t work.
So, I’m done boring you with the mushy stuff.
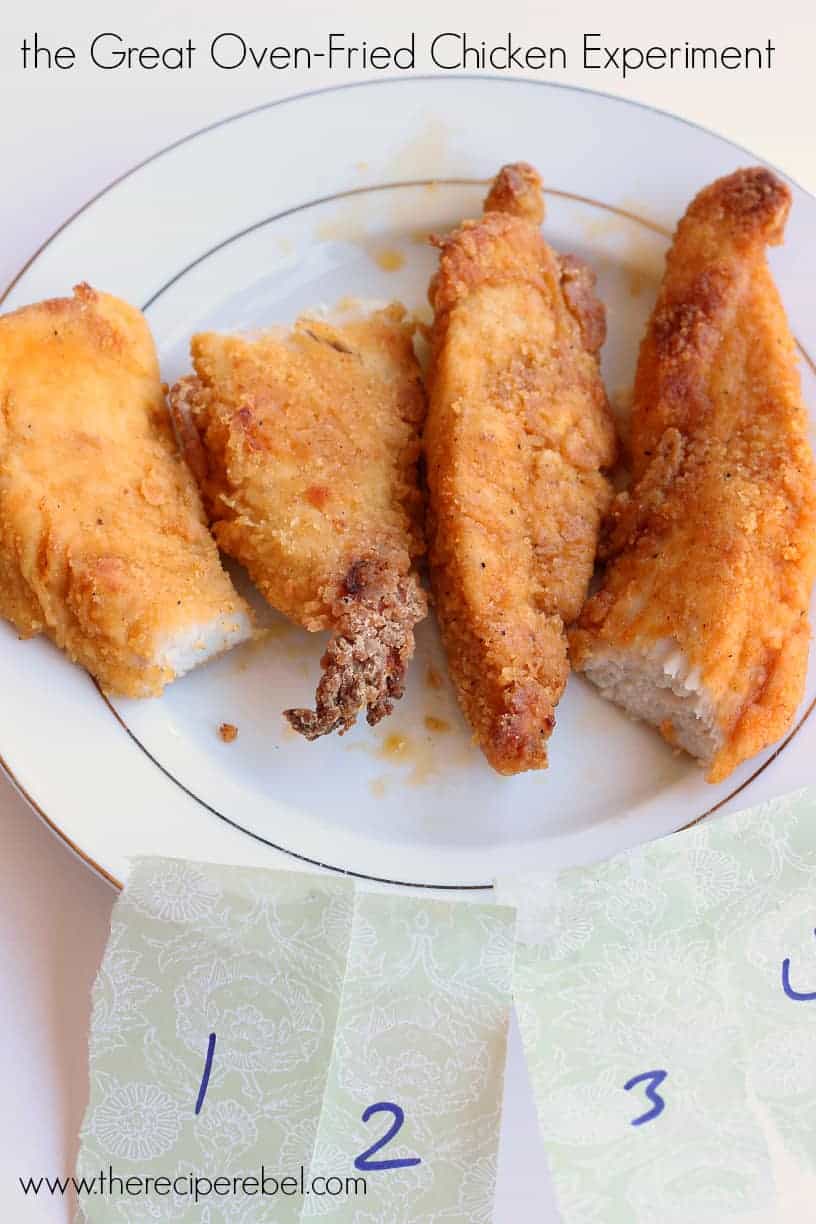
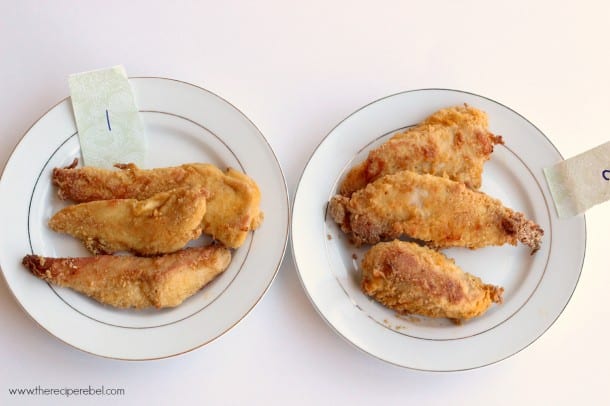
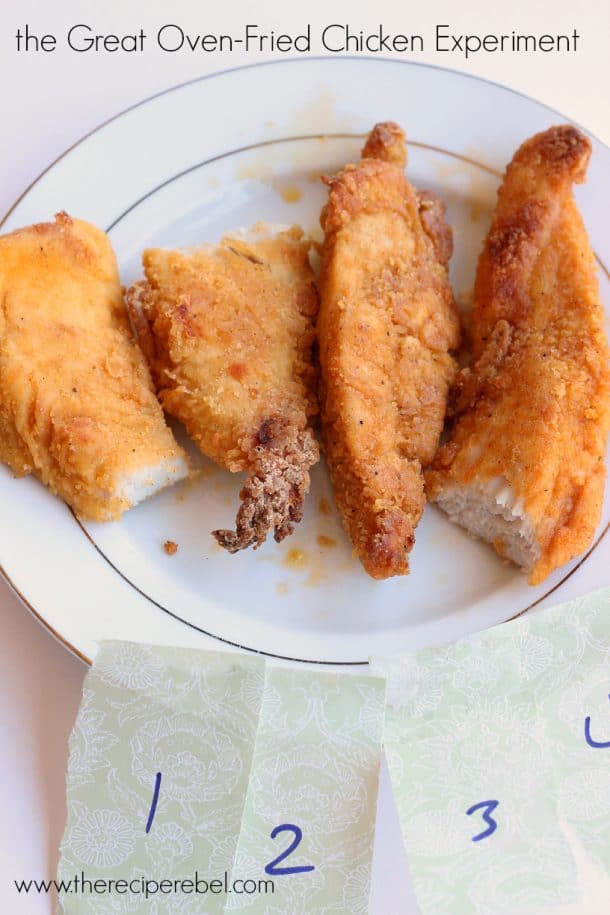
After reading your comments, I decided I would try 4 different methods.
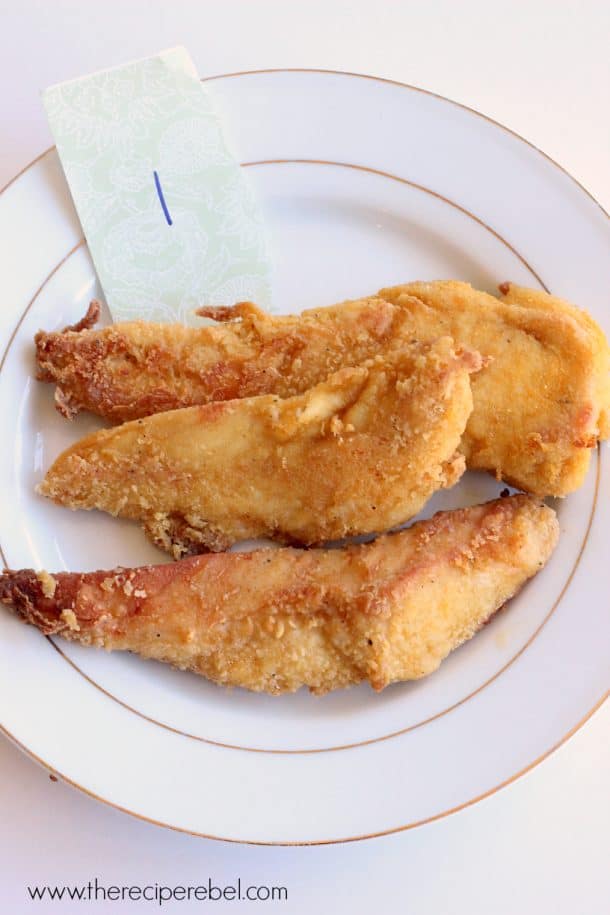
1. The original recipe as written. I reduced the butter to 3 tbsp because I was only cooking one chicken breast (cut into 3 strips) per baking sheet. If you’re cooking a large amount, you will probably still want 3-5 tbsp.
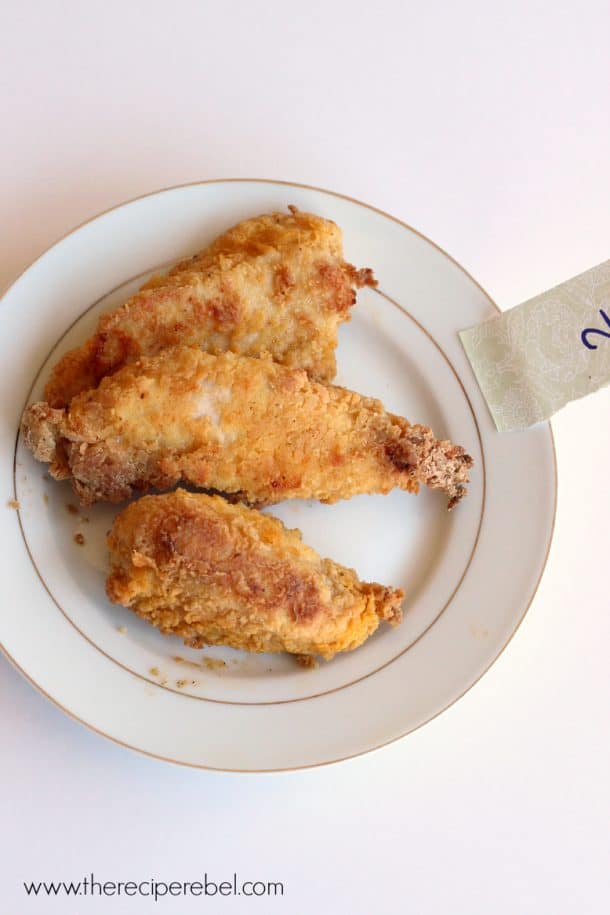
2. Flour, egg, flour. For this method, I coated my chicken strips in the flour mixture, then dipped in egg, then coated again in the flour mixture. I used 3 tbsp butter, for the same reasons as above.
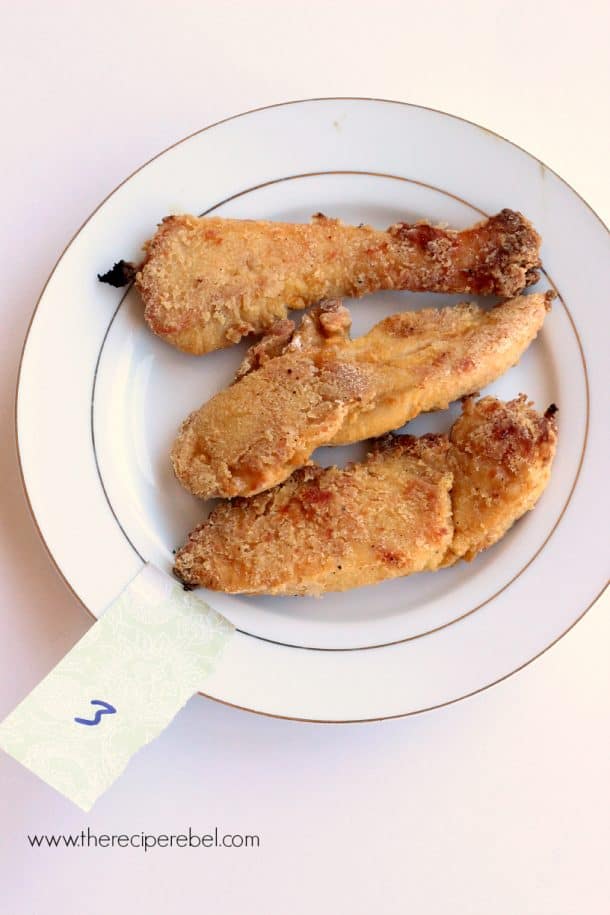
3. The original recipe, broiled after baking. Because some of you found the chicken soggy, the suggestion to broil it was brought up. I used 3 tbsp butter, for the same reasons as above.
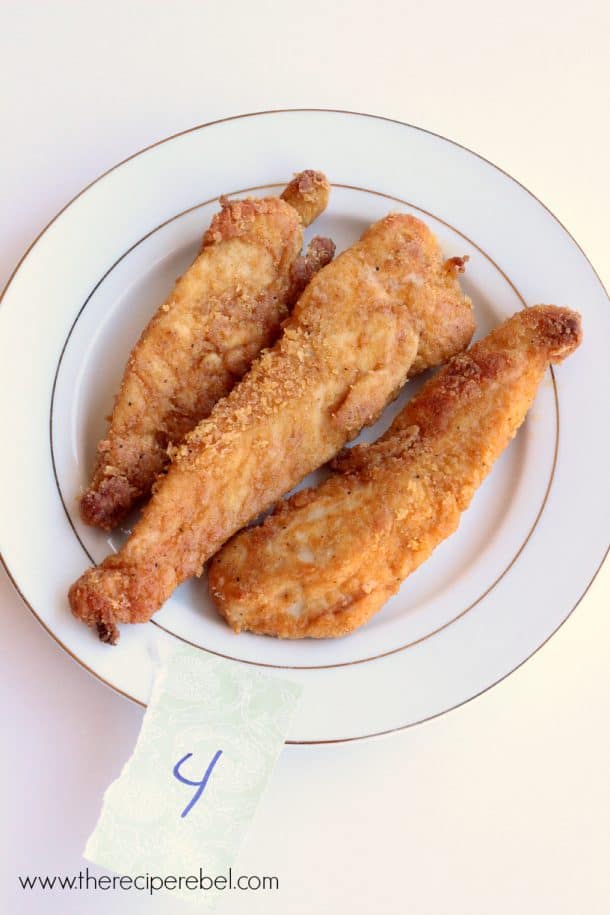
4. Half panko. One reader swapped panko for the flour, and enjoyed the recipe. I swapped half the flour for panko, as I still wanted it to be as close to real fried chicken as possible.
The results:
1. The original recipe as written. Guys, I still love this recipe. The chicken wasn’t soggy and the coating didn’t fall off. I baked exactly 11-12 minutes, flip, bake another 11-12 minutes. I didn’t dry my chicken before coating it in the flour, I just sliced up a thawed chicken breast, dumped it in my ziploc bag and shook it up. Remove the chicken from the pan once it’s done so that it’s not sitting in any excess grease. If you find it a touch greasy, place on a plate on some paper towel to soak up the grease.
2. Flour, egg, flour. This way was also good. I dipped first in the flour mixture, then a beaten egg, and then again in the flour mixture. I did everything else according to the original recipe. I could tell right away that it had a thicker crumb, if that makes sense. After it was baked, I found it had larger chunks of coating, which gave it a nice texture. To be completely honest, the coating stuck really well, but not quite as good as the original because the coating was thicker and slightly heavier. You can see in the pictures though, that both were really well coated.
3. The original recipe, broiled after baking. Still good. I broiled 2 minutes per side after the cooking time, and I found it not as juicy as the other pieces. I checked after 1 minute and found that not much had changed, so I did 2. I think if you’re going to broil it, you’ve got to be careful and reduce the original cooking time. The coating was maybe slightly crispier, but there wasn’t a really noticeable difference in my opinion.
4. Half panko. This was really good. I found it was somewhere in between #1 and #2. The panko gave it a nice texture without becoming crumbly and falling off, but mixing the panko with flour kept that original fried chicken texture.
Overall thoughts:
There are so many different things that will affect your results, it’s hard to know what is going to work best for every person. The weight and colour of your baking sheet, the type of oil or butter you use, the thickness of your chicken, the temperature of your oven, the positioning of your rack, and the list goes on.
That said, I hope that this experiment has helped you to see the different methods available and pick one that you think will work best for you and get you the results you want.
If you are looking for a great oven-fried chicken recipe with a thin and not overwhelming breading, the original recipe is the way to go. If you’re looking for a little more texture, try adding some panko. If you’re looking for maximum breading, try the egg and the double dip.
Overall, they were all good, and not that different. I ate an embarrassing amount of “fried” chicken this morning, because they were all so good. And even after sitting out on the counter for 20 minutes, the texture didn’t really change. They didn’t get soggy and they were still totally irresistible. The seasoning is just out of this world good.
If you have any other questions or thoughts, I would love to hear about them!


mike says
I really don’t care for the taste, texture and dryness of white meat (breast meat), I only eat dark meat (thighs) any suggestions on making this with thighs?
Ashley Fehr says
If you use boneless, skinless chicken thighs I don’t think the method or cook time would change much. Just be sure it’s cooked through — thighs are smaller so they might cook more quickly.
Natasha says
I never comment on blogs but I have to tell you that my husband and I LOVE this recipe! I try to watch my carbs though so I swapped the flour for ground almonds and it was amazing! I also tried coconut flour but it was a lot drier. Thanks for an awesome recipe!
Ashley says
Thanks Natasha! I’m so glad you liked it! It’s good to know that the almond were a good substitution but the coconut flour was not 🙂
Kurt H. says
I thought I had done something wrong but I had the same results. Not crispy. I decided to blame it on the fact the breasts were frozen previously and were just too filled with moisture. But I could be wrong. Believe it or not I have been wrong in the past a couple of times.
Ashley says
It could be that there was still a lot of moisture in the chicken from it being frozen, but I use thawed frozen chicken breasts all the time. I would make sure they are completely thawed and that your oven temperature is high enough. You might even want to bump it up a bit if you aren’t using a dark pan.
Vivian cotton says
I tried this chicken recipe tonight. Was disappointed in my results. Mind did not look at all like picture and never got crispy. I used Regular pan no Teflon coating. Sprayed with pam and used 5 tbls of butter. Had five boneless skinless chicken breast cut into strips. Coating was soggy and never got crisp. Had more liquid when it was done than when I started.cooked about 15 minutes on each side. Where did I go wrong.
Diane says
I just wanted to say thanks for putting the extra effort into this. I’ve been making this chicken after finding it on Our Life Uncommon, and while I don’t have any problems with the recipe, I wouldn’t mind a little thicker of a breading. (We like the extra crispy chicken from KFC…) However, I also hate hate hate dipping in flour, then egg, then flour – it takes me years to make chicken that way. I’m SO happy to know I can just sub a little panko in there and get a similar result, so thank you ever so much for doing all the hard work for me. 🙂
Ashley says
Thanks Diane! We love it both ways — such a great recipe!
Caitlin says
Yum! I had huge chicken breasts, so I made them into cutlets then cut each cutlet in 3 pieces. I let the chicken soak in buttermilk for 3 hours, then used your recipe with the flour/Panko mixture. It was tender, crunchy, and delicious! Plus none of the weird cartilage pieces you get in a lot of fast food tenders! Thanks for an easy and delicious recipe!!
Ashley says
I’m glad you liked it! We love making it with the panko, too!
Nadia says
Ça me semble délicieux!
On va essayer ce soir.
Je pense que ça pourrait être bon aussi de cette façon :
1) flour
2) egg
3) Panko
Thank you!
Rose says
What is the brand of seasoned salt you used. What season is in the salt?
Ashley says
I use Lawry’s seasoning salt. The ingredients doesn’t really say obviously, some garlic, onion, red pepper and not sure what else. Hope that helps!
Shelley says
Hi Ashley! Just wanted to tell you how much I enjoyed your experiment part of this recipe! It was very cool and certainly interesting! Thank you!
BTW, I made this today and #1 was PERFECT 🙂
Ashley says
Thanks Shelley! I try my best to help everyone get the same results I’ve had with recipes 🙂 I’m glad you liked it!
Kurt H. says
I live in a foreign country where seasoned salt is not available. Can you tell me how to make my own from basic ingredients?
Ashley says
I don’t have a recipe for seasoning salt that I’ve used before, but there will be many, many online if you do a quick search.
reg says
seasoning salt is called MRS DASH in the food market
Lorayne says
Seasoned salt is similar to all purpose seasoning.
Debbie says
https://low-cholesterol.food.com/recipe/copycat-lawrys-seasoned-salt-17051?oc=linkback
PhishinPhool says
Thank you for the seasoned salt recipe. I appreciate your time sending it to me. I hope y’all have a great Christmas holiday.
Jess @ On Sugar Mountain says
I can see why everyone loves this recipe though! It looks awesome and I love that I can have crispy fried chicken without all the work of actually frying. 😀
Ashley says
Thanks Jess! We’re kind of obsessed with it!
Annie @Maebells says
I made this the original way and totally loved it! Bless your heart for all your extra work! Your very kind to accommodate your readers like that! 🙂
Ashley says
Thanks Annie! It was kind of fun to do, and I got to eat more than my share of “fried” chicken! Lol
Kelly - Life Made Sweeter says
Oh Ashley, this looks perfect! Thanks so much for all the experimenting – it looks so crispy and delicious! Love that it’s made in the oven too – it looks so crispy and amazing! Awesome awesome recipe and I can’t wait tot make this!
Ashley says
Thanks Kelly! I have to admit, the taste testing job wasn’t too difficult 😉
Amy | Club Narwhal says
However you make this oven friend chicken, it looks like a winner to me! KFC is maybe my guiltiest of all guilty pleasures so the idea of having similar flavors while baking it is blowing my mind with awesome 🙂
Ashley says
Thanks Amy! You definitely need to try it!
Shashi @ runninsrilankan says
Thanks for all the experimenting – And congrats on over 50,000 pins after only starting in March of this year! Wow !
Ashley says
Thanks Shashi! It was definitely one of the tastiest experiments I’ve had to do 😉
Melanie @ Garnish & Glaze says
This chicken looks awesome! I totally thought it was fried because it looks so crispy. And what a good idea to experiment with different methods. They all look so good!
Ashley says
Thanks Melanie! It’s one of our favorites 🙂
Dannii @ Hungry Healthy Happy says
I love oven baked chicken. Yours looks really crispy too.
Ashley says
Thanks Dannii!
Gayle @ Pumpkin 'N Spice says
This oven fried chicken sounds incredible! I’ve never made it before, so I think I found the perfect recipe! I love that you made this in the oven, too. Pinned!
Ashley says
Thanks Gayle! To be honest, I think I like it better than real fried chicken!
Brian says
I had a Australian food restaurant in America, and the favorite item on the menu was my fish and chips. The batter was the secret as I used 1/2 flour and 1/2 corn starch (flour) It made it SO crispy.
Ashley says
Great idea!