These Baked Honey Garlic Chicken Breasts are sweet and savory with a bit of kick! They come together with a few minutes prep and one pan!
See the step by step recipe video down in the recipe card.

Table of Contents
Honey garlic is one of our favorite sauces for pouring over chicken!
That sweet, savory, tangy combination is just so good, and I love how easy it is to make from scratch. (We use the same sauce in this Instant Pot Honey Garlic Chicken, this Instant Pot Pork Tenderloin and Potatoes, and these Sheet Pan Honey Garlic Chicken Thighs!)
With April being all about these perfect Baked Chicken Breasts, I wanted to come up with a few ways to take our 6 Ingredient Staple to the next level.
First up were these Tuscan Chicken Breasts — rich and creamy and perfect over pasta!
Naturally, a honey garlic version had to happen next 😉
This Honey Garlic Chicken is made with just a few ingredients and takes only a few minutes to prep! Plus, since it’s baked instead of pan-fried, there’s no babysitting, which is maybe my favorite part.
Even though this recipe is simple, I wanted to share a few tips and tricks to make sure your chicken is perfectly cooked and flavorful!
How to make Baked Honey Garlic Chicken:
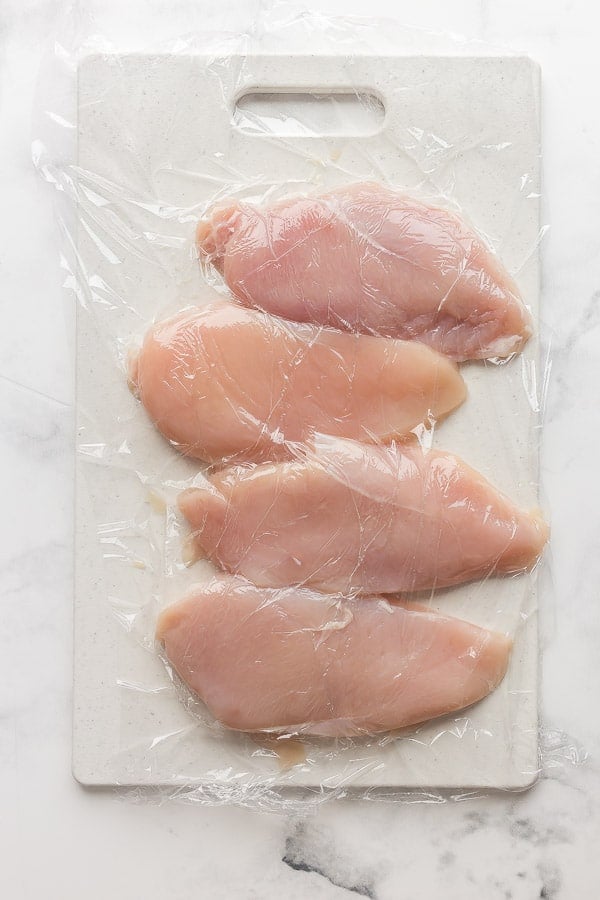
- Flatten your chicken breasts slightly so they are roughly the same size: this will ensure they cook evenly and that one side doesn’t end up completely dried out! Simply cover in plastic wrap and use a rolling pin or a small frying pan to flatten the thick end slightly. If you skip this step, you may require a longer cook time.
- Dry your chicken with paper towels. Drying them will make sure there isn’t excess moisture in the pan, which prevents browning.
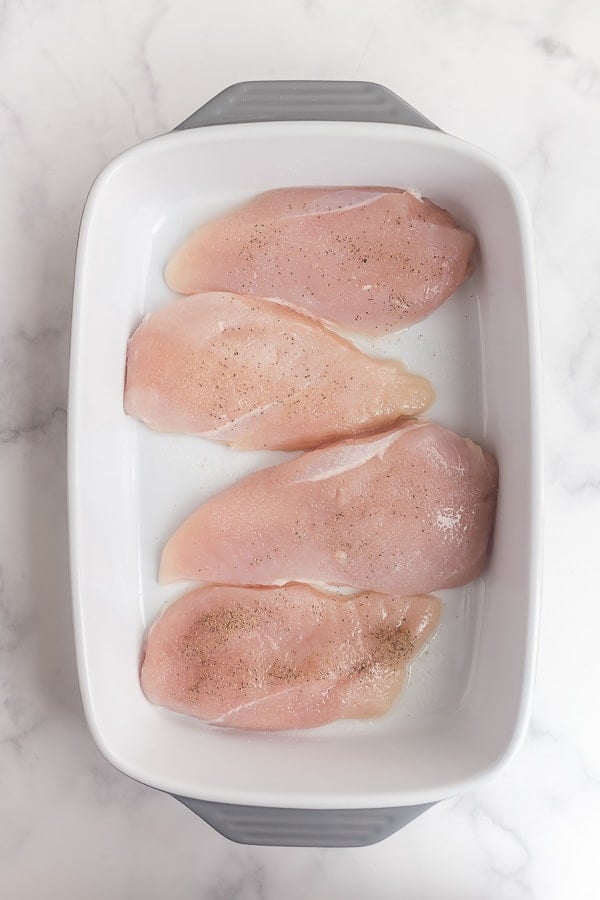
- Drizzle and rub: rub your chicken all over with canola oil and then sprinkle on the seasoning. I like to give it a chance to cook and brown slightly on the outside before adding my sauce.
- While your chicken is cooking, stir together the sauce. Because there’s a good amount of sugar in the sauce, I like to add it to the chicken just for the last half of the cook time so that it doesn’t burn.
- Finish cooking: your chicken breasts are done when the thickest part of the chicken reaches an internal temperature of 165 degrees F. Do not cut them open to check for doneness — if you don’t have a meat thermometer, get on over to Amazon and buy one. It’s the only way to really know when it’s cooked and protect against overcooking!
- Rest: Cover and let your chicken rest for at least 10 minutes or up to 20. This ensures the juices stay inside the chicken and don’t leak out when you slice them.
Ingredients and Substitutions:
- Chicken breasts: you could swap these for boneless, skinless chicken thighs, and the cook time will remain the same. You can double the amount of thighs or use the same total weight.
- Seasoning: I kept the seasoning simple so that it wouldn’t overpower the sauce. You can always adjust slightly if desired, just don’t go too crazy here!
- Honey: you want plain, clear, liquid honey here and not flavored or creamed. For sweetness! Since this is honey garlic chicken, you probably shouldn’t swap for another sweetener 😉
- Garlic: I usually have a big jar of minced garlic stashed in my fridge, but finely chopped or even sliced works great! If you like the flavor but not the chunks, then opt for sliced garlic and you can pull it out later.
- Soy sauce: I always, always use low sodium soy sauce. If you’re using regular soy sauce, you may want to adjust the amount of salt in the seasoning or swap some of the soy sauce with water to reduce the saltiness.
- Apple cider vinegar: for a punch of flavor! You can use regular white vinegar if you must, but I really like using apple cider vinegar in this recipe.
Want to make this recipe your own? Add some heat! A pinch or two of red pepper flakes goes a long way in the sauce if you like things spicy.

How to prep this recipe ahead:
- You can flatten your chicken breasts and store them in your baking dish until you’re ready to bake.
- Stir together your seasoning (and you can always make a jumbo batch and store it in your spice cupboard!) and store for a day or for several months
- Whisk together your sauce and refrigerate it up to 1 week before using — just be sure to give it a good whisk before you pour it on the chicken
How to store leftover honey garlic chicken breasts:
Got leftover Honey Garlic Chicken? Lucky you!
It doesn’t happen often around here, but I love how versatile this recipe is and we love the leftovers.
You can store any leftover chicken in an air tight container in the refrigerator for up to 4 days.
You can also place in a freezer safe container or zip-top freezer bag and freeze for up to 3 months.

What to serve with this Honey Garlic Chicken:
We absolutely love serving this chicken over rice to soak up all of that delicious sauce!
This Instant Pot Brown Rice is our go-to (it could not be easier!), but any rice will do.
Baked Honey Garlic Chicken
written by Ashley Fehr
Ingredients
- 4 boneless skinless chicken breasts, (breast halves)
- 1 teaspoon oil
- ½ teaspoon salt
- ¼ teaspoon black pepper
Honey Garlic Sauce
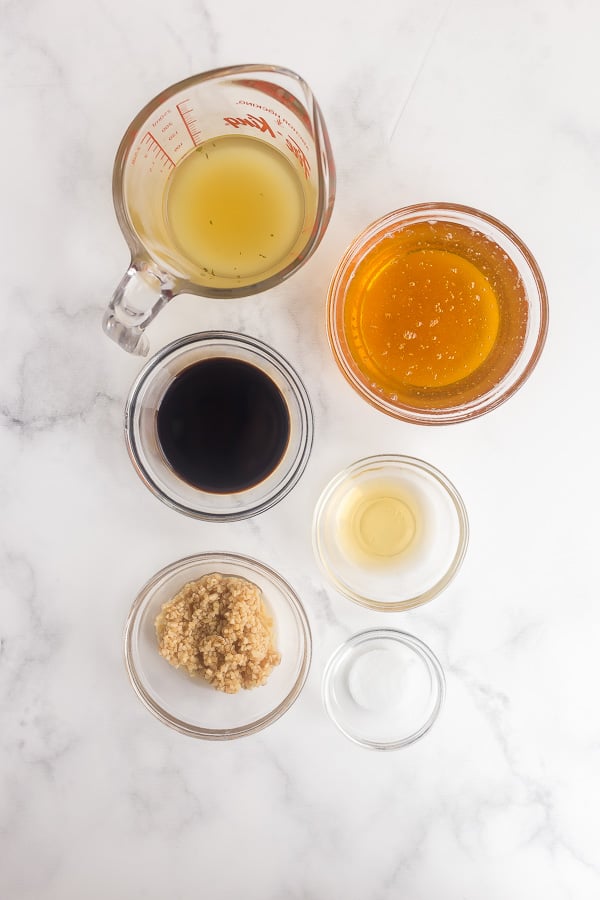
- ⅔ cup clear honey
- ¼ cup low sodium chicken broth, (or sub water)
- 2 tablespoons low sodium soy sauce
- 2 tablespoons minced garlic
- 1 tablespoon apple cider vinegar
- 1/4 teaspoon salt
- 1 tablespoon corn starch
- red pepper flakes, (optional – for a bit of heat!)

Instructions
- Preheat oven to 425 degrees F.
- Place chicken breasts on a cutting board and cover with a piece of plastic wrap. Use a smooth meat mallet, rolling pin or small frying pan to flatten the thick ends of the breasts so that they are roughly the same thickness.
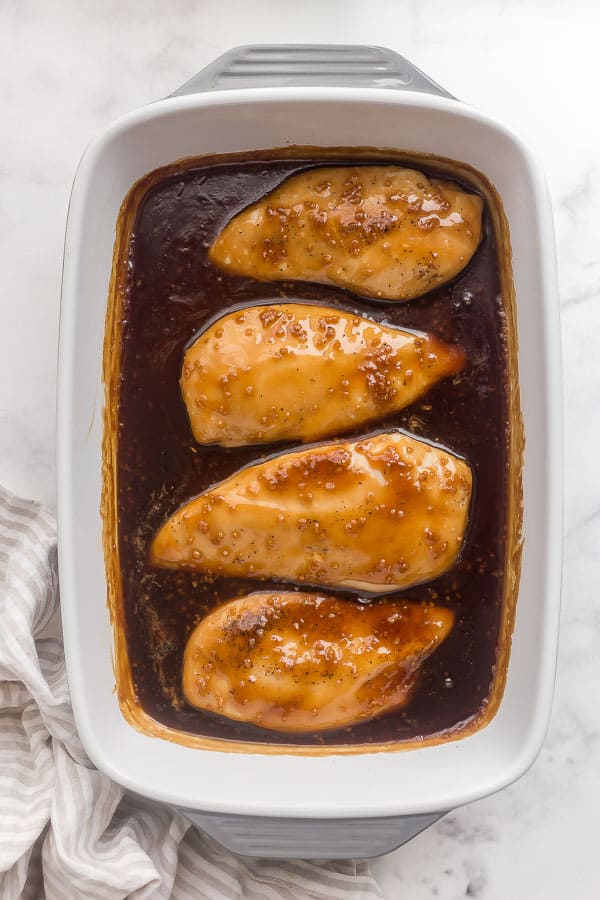
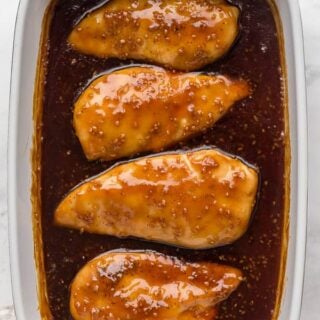
- Place chicken breasts in a 9×13" baking dish (or larger — you don't want them to be squished together or they will take longer to bake), brush lightly with oil and season with salt and pepper.
- Bake for 10 minutes.
- Meanwhile, whisk together the sauce ingredients: honey, broth, soy sauce, garlic, vinegar, salt, corn starch, and pepper flakes if using.
- After the chicken has cooked for 10 minutes, remove the pan from the oven and pour the sauce over top. (*Note: I tested adding the sauce from the beginning, and it does work, but with the high amount of sugar you do risk the sauce burning around the edges if you add it for the full 20 minutes).
- Bake for another 10-12 minutes, until the thickest part of the chicken registers a temperature of 165 degrees F. If your sauce has not thickened yet (it should have!), you can place it back in the oven for a couple of minutes.
- Cover the chicken and allow to rest for 10 minutes before serving.
Video
Notes
Nutrition
Nutrition information is automatically calculated, so should only be used as an approximation.
Want to save this recipe?
Create an account easily save your favorite content, so you never forget a recipe again.
Tried this recipe?
Tag @thereciperebel or hashtag #thereciperebel — I love to see what you’re making!
Tag @thereciperebel

Barbara says
Very good recipe! Didn’t change anything
Ashley Fehr says
Thanks Barbara!
Nicole says
This recipe is delicious! The sauce is easy to use and ingredients are typically in our household which was a bonus! The sauce was to die for! Even the kids ate the whole dish!
Ashley Fehr says
Thanks Nicole!
Whitefeather says
Do you need to use clear honey?
Ashley Fehr says
Anything but creamed should work fine
Charlene Hanson says
This recipe is easy and the end result is delicious. I should have doubled the sauce as we used it over top of our rice as well.
We are going to use the sauce recipe for our stir fry recipes as well as wing glaze.
YUM.
Ashley Fehr says
Thanks Charlene!
Miriam says
The recipe does not mention rubbing the chicken in oil, as the initial notes say
Ashley Fehr says
You’re right! I apologize, it has been fixed.
Margie says
We always bake our chicken breasts to 165, but average they take max 17 minutes. This seems way too long?
Ashley Fehr says
3 minutes longer does not seem like that much longer considering all chicken breasts are different weights? Adding a sauce does change things as well since there is more in the pan to heat through. You’re welcome to cook for 17 minutes if you find they are done.
Adrienne says
This recipe is delicious, especially the sauce! Works perfectly with chicken tenders and a shorter bake as well. Loved it!
Ashley Fehr says
Thanks Adrienne!
Nicole says
My family loved it…especially my husband.
Ashley Fehr says
Thanks Nicole!