Sorry! The page you were looking for is gone.
I’ve been doing some updates here at The Recipe Rebel and have removed some recipes that didn’t meet the standards I now have for what is posted here.
It’s important to me that all the content here is of a high quality, so you have the best results!
Type in what you’re looking for here to find a recipe, or see some of our favorites below.
Favourite dinner recipes:

Crockpot Tuscan Chicken recipe
This Crockpot Tuscan Chicken is made up juicy chicken breasts slow cooked in a rich and cheesy cream sauce. This recipe takes just 10 minutes to prep and makes the perfect dinner served over your favorite pasta!
View Recipe

One Pan Chicken Meatballs with Orzo
This One Pan Chicken Meatballs with Orzo recipe is so delicious, and only takes 45 minutes to make! With homemade chicken meatballs in a creamy Parmesan sauce, it's cooked with yummy Orzo pasta to make a filling dish the whole family will love!
View Recipe

Potato Soup
This Potato Soup is thick and creamy! Bacon, onions, and cheese give it incredible flavor and a simple roux makes it thick and creamy.
View Recipe
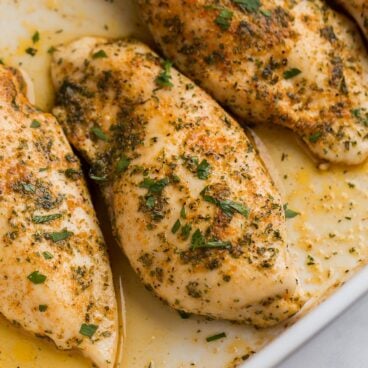
Juicy Baked Chicken Breast
This Baked Chicken Breast comes out juicy and flavorful every time! With a simple spice rub and quick cook time, it's perfect for any night of the week!
View Recipe
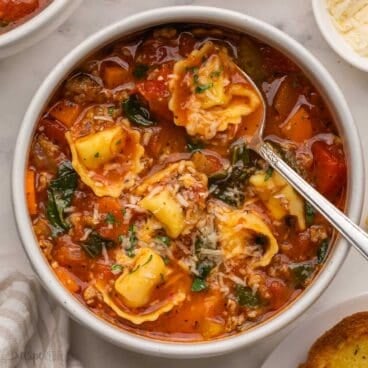
The BEST Sausage Tortellini Soup
This Sausage Tortellini Soup is a tomato-based soup loaded with vegetables, Italian sausage and cheese tortellini. It’s the perfect cold weather soup and freezer friendly!
View Recipe
Our Favorite Desserts and Baked Goods
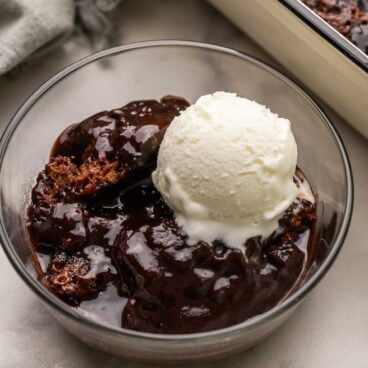
Grandma’s Hot Fudge Sundae Cake
Delicious chocolate cake that makes its own hot fudge sauce while it bakes, right in the pan! This is amazing served with any flavour of ice cream: mint, vanilla, chocolate, strawberry — you name it!
View Recipe
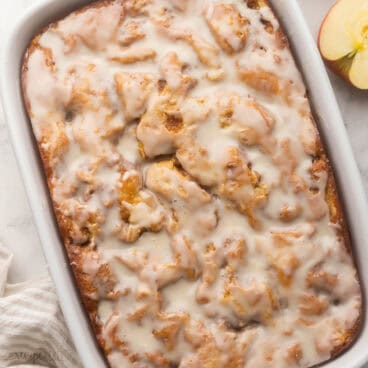
Droolworthy Apple Fritter Cake
This Apple Fritter Cake recipe has all the flavors of an apple fritter but in cake form! A moist cake made with Greek yogurt, oil, tender apples, and warm spices, swirled with cinnamon sugar and topped with a sweet glaze for the ultimate fall treat.
View Recipe
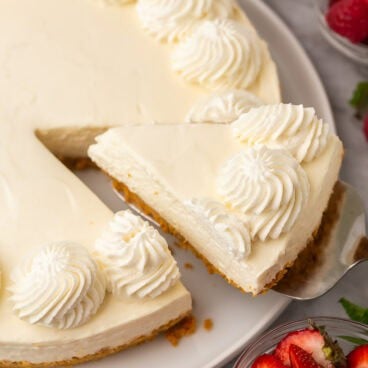
BEST Easy Cheesecake Recipe
This easy Cheesecake Recipe is totally no bake and made with just SIX ingredients! Make ahead friendly no bake cheesecake for summer.
View Recipe
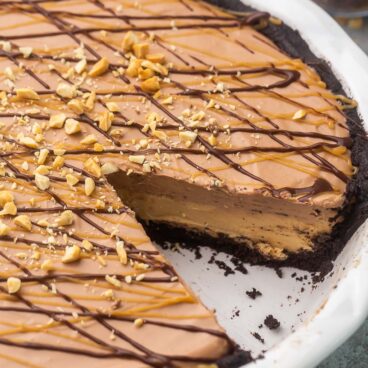
No Bake Chocolate Peanut Butter Pie
No Bake Chocolate Peanut Butter Pie is the perfect dessert for peanut butter lovers! Made with a chocolatey Oreo crust, it's filled with a chocolate and creamy peanut butter filling, topped with rich chocolate ganache!
View Recipe
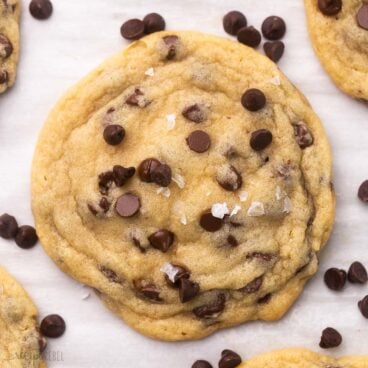
Mom’s Chocolate Chip Cookies
This is the original recipe for my own Mom’s Chocolate Chip Cookies that she’s been making since I was a kid. These cookies are soft, chewy, perfectly golden, and ready in under 25 minutes!
View Recipe